How-To: Change the Climate Control Bulbs in a del Sol
Application: 93-97 del Sol's
Difficulty: 3 Out of 5
Estimated Time: 2 hours
Required Parts
-#74 bulbs
Required Tools
-Phillips Screwdriver
-Flat head scredriver
-Box Wrench (Or whatever is needed to remove shift knob)
So after dealing with no Climate Control lights for over a year, I decided it's time to fix them. This DIY will show you how to access your eBrake adjustment, cigarette lighter, radio, and climate control unit. Let's get started. Excuse the pictures, as I took them on my cell phone. They came out good, for the most part.
Let's Get Started!
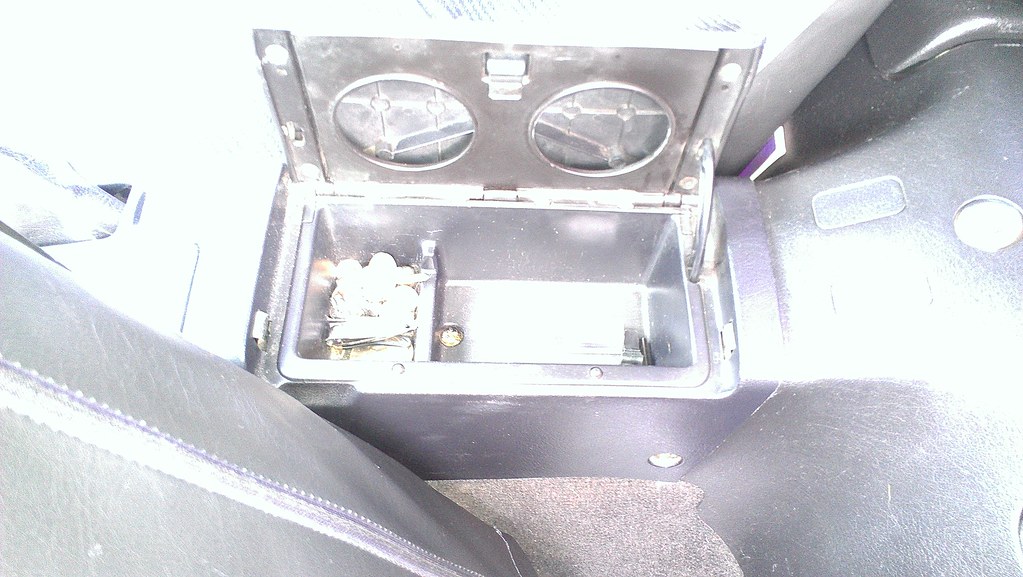
First, remove your center arm-rest/console. There are 3 screws on each side, and one in the cup-holder area totaling 7 screws.


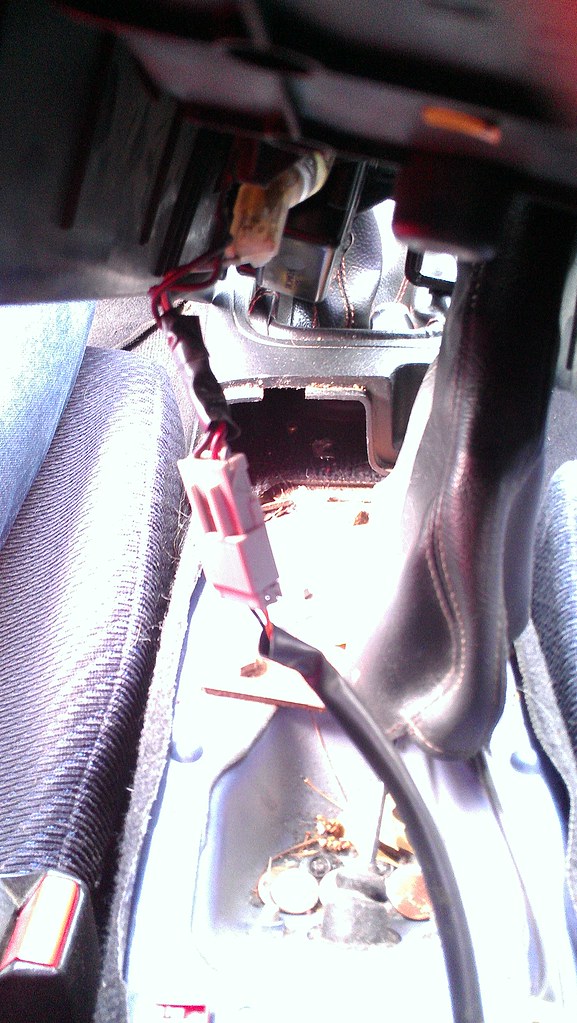
Remove your shift knob (mine is a 14mm lock nut, then the shifter screws off. If you're using the stocker, it just screws off). Now, lift up on the back of the center arm rest. Don't just start yanking, because the cigarette lighter is plugged in. Lift it up carefully, and look for the plug. It'll look like this...

Simply squeeze the clip on the plug, and pull apart. Once that's done, go ahead and full remove the arm rest part. Set it off to the side. Next is the shifter portion. This is a little bit tricky.
Make sure your ebrake is up all the way, and pull the piece up and over the shifter. If you can wiggle it out ebrake end up first, go that route. I couldnt, so I had to lift up from the dashboard/radio end first. Gently pull the piece apart from where the screws on the side were, and lift up and over/around the dash. With a little patience, it WILL come out. Just be careful to not brake anything. Del Sol dash parts are becoming more rare, so you dont want to brake anything.
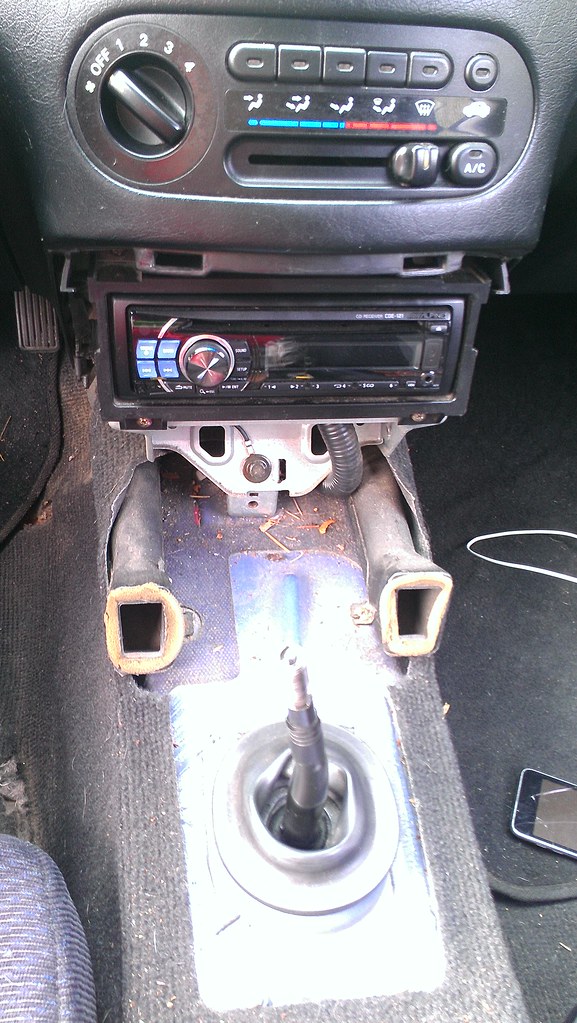
Once the plastic piece is out, you'll be looking at this... This is where you can adjust your ebrake, or fix your cigarette lighter if need-be. This is also a GREAT time to bust the shop vac out and clean everything out. I know I have change that falls down under the arm rest, trash, etc. I once found an earring under the arm rest. Good thing the girlfriend wasn't around to ask who's it was...because I didn't even know!

Next, we're going to remove the radio. Looking at the radio, there is a screw in each of the 4 corners. The bottom 2 are easy to spot, where the top 2 are a bit recessed in behind the dash. They're a little harder to notice at first. Remove those screws, and pull the radio out slowly, being sure to unplug anything connected to the back of it. Set it off to the side.
Now, there will be a metal tray piece that the radio was sitting on. It's held in by 2 screws, one on each side. You dont HAVE to remove this piece, but it's highly recommended, due to the cramped space. Be sure to un-hook the wire harness that's connected to the tray.
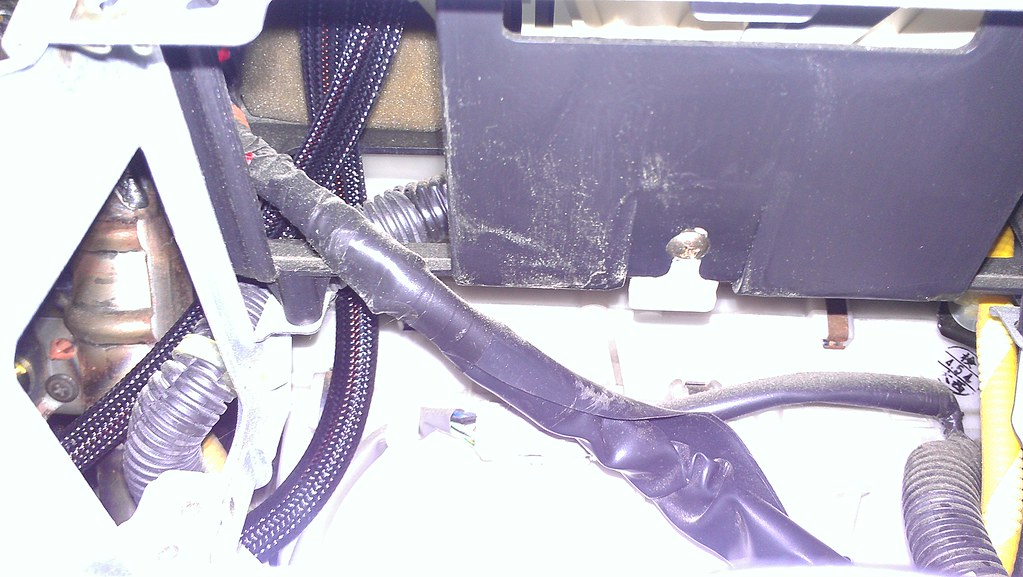
Now, if you'll look up in that area where the radio was, you'll see a single screw....

This is what's holding the climate control unit to the dash. Grab your stubby Phillips, and remove the screw. Mine was in there quite hard, so just keep at it.
Once that screw is removed, the climate control unit will be free, sort of. If you'll notice, it only comes out a few inches. Not nearly enough to get to the bulbs.
Head over to the passenger side of the cabin, and get up under the dash. You'll want to locate a black cable, that connects to the heater core. It'll look like this...

Pry the cable out of the retainer clip it's sitting in, then slide the loop off the shaft it's attached to.
Back up to the climate control unit, you can now pull it out a few more inches. As you carefully pull it out, on drivers side of the unit, there is a brown plug. Unplug it. It'll come off hard, so use some force. Just don't brake it. I'm not responsible if you do. This controls your blower/fan speed.
If you wiggle the unit out a little more, you'll see a green plug on the passenger side of the unit. This has to be unplugged as well. If you have fat/big hands, good luck. It took me literally 5 minutes to get it unplugged.
Once unplugged, the unit will now completely slide out. If it gets stuck, double check to make sure everything is unplugged. If it's still stuck, the cable is getting caught on something inside the dash. Wiggle and tug, and it will eventually come out.
You should have this in your hands, now...

If you flip it over, you'll see two sets of red wires, running to two black pieces. These are your lights.

Carefully pull the black unit out, and you'll see your light.

Pull your light out, put your new one in. The new light will go in hard, so put some force behind it. Just don't brake the light.
Now, if you can get the light socket back into the unit without issue, great. Unfortunately, for me, I couldnt. So, I had to remove the front cover. There are a couple small phillips screws on the backside of the unit. Remove those, and grab a flat head screw driver, and carefully pry/pop the face plate off. This gives you more room to get the light sockets back into place. If you have to do this, make sure you pull the slider lever/knob off, and the round fan speed knob. They both just pop right off.
Installation is reverse of removal. Slide your C/C unit back into place, guide the black cable down the dash to the heater core/unit, make sure the plug the green harness in first, then the brown. Flip your lights on to make sure the new lights you installed turn on. If they dont light up, either the bulbs are dead, you didnt seat the bulb in the socket fully, or you have a wiring issue (in which case you'll need a new C/C unit). Put your screw back in on the underside of the unit, re-connect the cable on the heater unit (once done, slide the temp adjuster lever back and forth to make sure it's working properly), put the metal plate back in (the one that the radio sits on), re-install your radio (making sure to plug everything back in), and put all your center console plastics back in place.
After it's all said and done, you'll have lights!

Review:
Overall, this isnt all that bad of a job to do. A lot of people do this to change the color of the lights. The same process applies, just with different color bulbs, or even LEDs. Questions are welcome, as I know there isnt a whole lot about random del Sol jobs (especially like this).
Application: 93-97 del Sol's
Difficulty: 3 Out of 5
Estimated Time: 2 hours
Required Parts
-#74 bulbs
Required Tools
-Phillips Screwdriver
-Flat head scredriver
-Box Wrench (Or whatever is needed to remove shift knob)
So after dealing with no Climate Control lights for over a year, I decided it's time to fix them. This DIY will show you how to access your eBrake adjustment, cigarette lighter, radio, and climate control unit. Let's get started. Excuse the pictures, as I took them on my cell phone. They came out good, for the most part.
Let's Get Started!
First, remove your center arm-rest/console. There are 3 screws on each side, and one in the cup-holder area totaling 7 screws.

Remove your shift knob (mine is a 14mm lock nut, then the shifter screws off. If you're using the stocker, it just screws off). Now, lift up on the back of the center arm rest. Don't just start yanking, because the cigarette lighter is plugged in. Lift it up carefully, and look for the plug. It'll look like this...
Simply squeeze the clip on the plug, and pull apart. Once that's done, go ahead and full remove the arm rest part. Set it off to the side. Next is the shifter portion. This is a little bit tricky.
Make sure your ebrake is up all the way, and pull the piece up and over the shifter. If you can wiggle it out ebrake end up first, go that route. I couldnt, so I had to lift up from the dashboard/radio end first. Gently pull the piece apart from where the screws on the side were, and lift up and over/around the dash. With a little patience, it WILL come out. Just be careful to not brake anything. Del Sol dash parts are becoming more rare, so you dont want to brake anything.
Once the plastic piece is out, you'll be looking at this... This is where you can adjust your ebrake, or fix your cigarette lighter if need-be. This is also a GREAT time to bust the shop vac out and clean everything out. I know I have change that falls down under the arm rest, trash, etc. I once found an earring under the arm rest. Good thing the girlfriend wasn't around to ask who's it was...because I didn't even know!
Next, we're going to remove the radio. Looking at the radio, there is a screw in each of the 4 corners. The bottom 2 are easy to spot, where the top 2 are a bit recessed in behind the dash. They're a little harder to notice at first. Remove those screws, and pull the radio out slowly, being sure to unplug anything connected to the back of it. Set it off to the side.
Now, there will be a metal tray piece that the radio was sitting on. It's held in by 2 screws, one on each side. You dont HAVE to remove this piece, but it's highly recommended, due to the cramped space. Be sure to un-hook the wire harness that's connected to the tray.
Now, if you'll look up in that area where the radio was, you'll see a single screw....
This is what's holding the climate control unit to the dash. Grab your stubby Phillips, and remove the screw. Mine was in there quite hard, so just keep at it.
Once that screw is removed, the climate control unit will be free, sort of. If you'll notice, it only comes out a few inches. Not nearly enough to get to the bulbs.
Head over to the passenger side of the cabin, and get up under the dash. You'll want to locate a black cable, that connects to the heater core. It'll look like this...
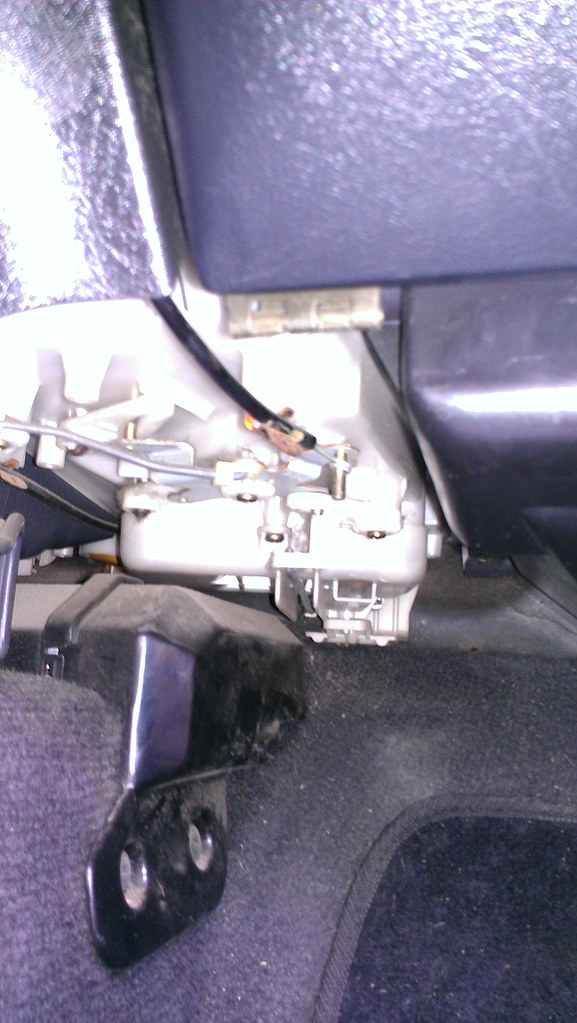
Pry the cable out of the retainer clip it's sitting in, then slide the loop off the shaft it's attached to.
Back up to the climate control unit, you can now pull it out a few more inches. As you carefully pull it out, on drivers side of the unit, there is a brown plug. Unplug it. It'll come off hard, so use some force. Just don't brake it. I'm not responsible if you do. This controls your blower/fan speed.
If you wiggle the unit out a little more, you'll see a green plug on the passenger side of the unit. This has to be unplugged as well. If you have fat/big hands, good luck. It took me literally 5 minutes to get it unplugged.
Once unplugged, the unit will now completely slide out. If it gets stuck, double check to make sure everything is unplugged. If it's still stuck, the cable is getting caught on something inside the dash. Wiggle and tug, and it will eventually come out.
You should have this in your hands, now...
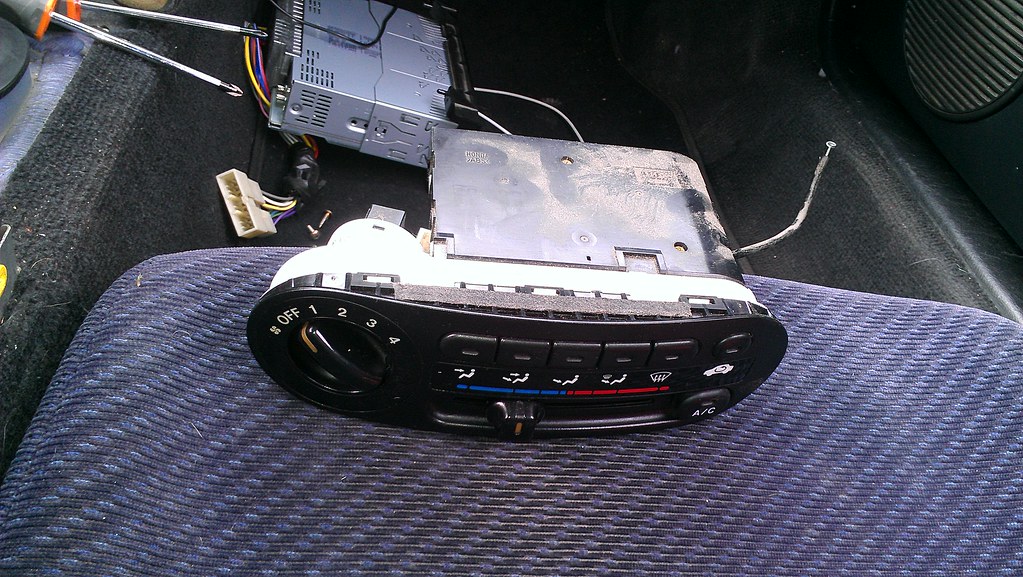
If you flip it over, you'll see two sets of red wires, running to two black pieces. These are your lights.

Carefully pull the black unit out, and you'll see your light.

Pull your light out, put your new one in. The new light will go in hard, so put some force behind it. Just don't brake the light.
Now, if you can get the light socket back into the unit without issue, great. Unfortunately, for me, I couldnt. So, I had to remove the front cover. There are a couple small phillips screws on the backside of the unit. Remove those, and grab a flat head screw driver, and carefully pry/pop the face plate off. This gives you more room to get the light sockets back into place. If you have to do this, make sure you pull the slider lever/knob off, and the round fan speed knob. They both just pop right off.
Installation is reverse of removal. Slide your C/C unit back into place, guide the black cable down the dash to the heater core/unit, make sure the plug the green harness in first, then the brown. Flip your lights on to make sure the new lights you installed turn on. If they dont light up, either the bulbs are dead, you didnt seat the bulb in the socket fully, or you have a wiring issue (in which case you'll need a new C/C unit). Put your screw back in on the underside of the unit, re-connect the cable on the heater unit (once done, slide the temp adjuster lever back and forth to make sure it's working properly), put the metal plate back in (the one that the radio sits on), re-install your radio (making sure to plug everything back in), and put all your center console plastics back in place.
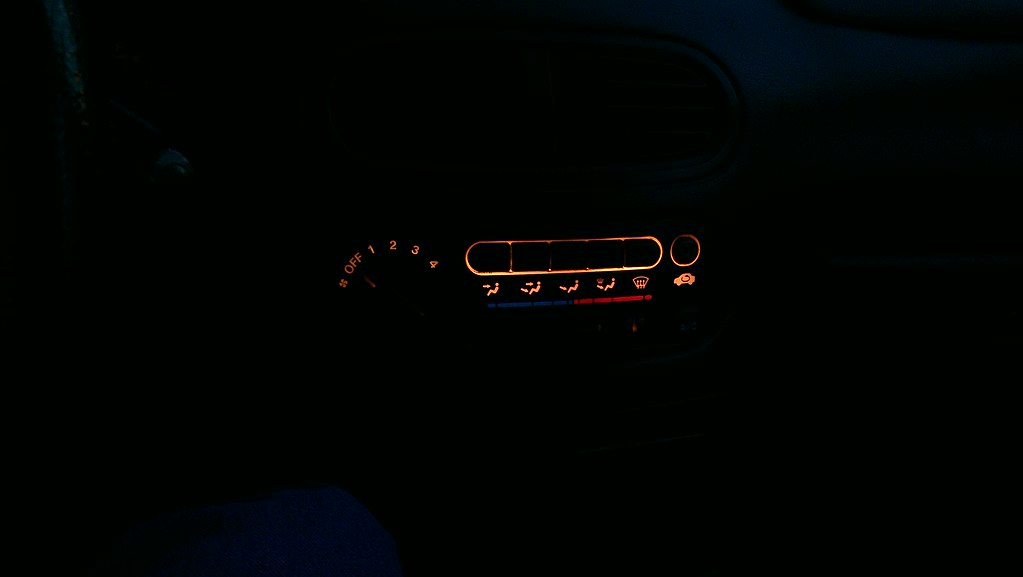
After it's all said and done, you'll have lights!
Review:
Overall, this isnt all that bad of a job to do. A lot of people do this to change the color of the lights. The same process applies, just with different color bulbs, or even LEDs. Questions are welcome, as I know there isnt a whole lot about random del Sol jobs (especially like this).

