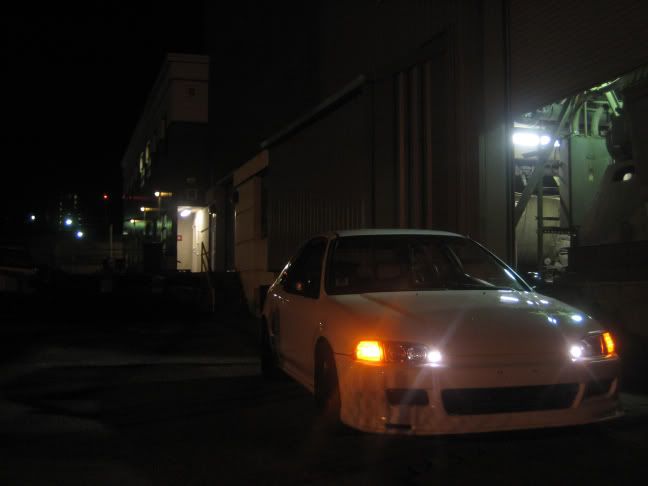
DYI: City Lights into 5th Gen
*Someone please sticky this and move it to it's appropriate place thanks.
After multiple questions and requests I decided to write a walkthrough on how to install City Lights into your 5th gen Civic. Enjoy!
**Disclaimer: I am not responsible for any damage caused to your vehicle by installing the following mod. By reading the following you agree that it is indeed you who are responsible for your actions. This worked for me, and worked great. This may or may not work for you, I’ve only done this to my car. I can not and will not be held accountable for anything you damage to your vehicle. **
What you need:
Wire taps
Female wire connectors (your wire taps may already come with some)
16 gauge wire (your choice of color, I went with Red (power) and Black (ground).
Wire crimpers
Gauged wire stripper
(optional) tube of dielectric tune up grease
*Most of this can be found at your local auto parts store (wire crimpers and gauged wire stripper can be found at RadioShack).
Step 1: Prep wires
Strip the ends of your city lights so that you may be able to crimp them onto the female wire connectors.
With the 16 gauge wire you bought, lengthen (I’m assuming you know how to do this) the city light wires by about 4 to 8 inches.
Strip the end of the 16 gauge wire.
Step 2: Crimp
Crimp female wire connectors onto the ends of the city light wires.
**(optional) cover ends with some dielectric tune up grease before crimping (this will weatherproof your connection and prevent arcing).

Step 3: Power Tap
Here’s where you need to pay close attention. Look at the wires that go into your turn signal bulb. They should be Red, Black, and Green.

Red=Switch
Black=Ground
Green=Turn Signal
Tap into the Red wire (switch). This is where your city lights will draw their power from. That way whenever you turn on your parking lights, they will power up.

Step 4: Ground Tap
Here’s where it gets tricky. In order to wire up your city lights so that they turn off with your headlights, you need to ground them to your headlight power. This will act as a false ground (double positive) and break the circuit when you turn on your headlights (and act as a ground when your headlights are off).
Finding it was tricky. This is how my car works (yours may be different (I don’t know). Your headlights should have a female plug with 3 holes that plug into your headlights. Trace the wires back until you can distinguish three different colors.
*If you can’t find the colors, I believe the top one is the headlight power.*

Red with a White or Yellow line (low beam power)
Red with a Blue line (high beam power)
Black (ground)
*If you can’t find the colors, I believe the top one is the headlight power.*
Tap into your low beam power so that you draw power from them when you turn your headlights on.

Step 5: Plug and enjoy
Insert the female wire connector into the wire tap.
(Optional: squirt some dielectric tune up grease into the female wire conectors. This will not only weatherproof your connection, it will also make it easier to remove in the event that you need to remove your city lights.)
Step 6: Enjoy your City Lights
You should now be finished. Pat yourself on the back for a job well done. Turn on your parking brakes and check them out. Your City Lights should light up along with your corners (parking lights).

Now turn on your headlights, your city lights should power off.

There you have it. I hope I didn’t miss anything (I did this a couple of months ago and regurgitated this mostly from memory). If you have any questions please feel free to ask (it's why I joined this forum).
-Adrian
*Someone please sticky this and move it to it's appropriate place thanks.
After multiple questions and requests I decided to write a walkthrough on how to install City Lights into your 5th gen Civic. Enjoy!
**Disclaimer: I am not responsible for any damage caused to your vehicle by installing the following mod. By reading the following you agree that it is indeed you who are responsible for your actions. This worked for me, and worked great. This may or may not work for you, I’ve only done this to my car. I can not and will not be held accountable for anything you damage to your vehicle. **
What you need:
Wire taps
Female wire connectors (your wire taps may already come with some)
16 gauge wire (your choice of color, I went with Red (power) and Black (ground).
Wire crimpers
Gauged wire stripper
(optional) tube of dielectric tune up grease
*Most of this can be found at your local auto parts store (wire crimpers and gauged wire stripper can be found at RadioShack).
Step 1: Prep wires
Strip the ends of your city lights so that you may be able to crimp them onto the female wire connectors.
With the 16 gauge wire you bought, lengthen (I’m assuming you know how to do this) the city light wires by about 4 to 8 inches.
Strip the end of the 16 gauge wire.
Step 2: Crimp
Crimp female wire connectors onto the ends of the city light wires.
**(optional) cover ends with some dielectric tune up grease before crimping (this will weatherproof your connection and prevent arcing).
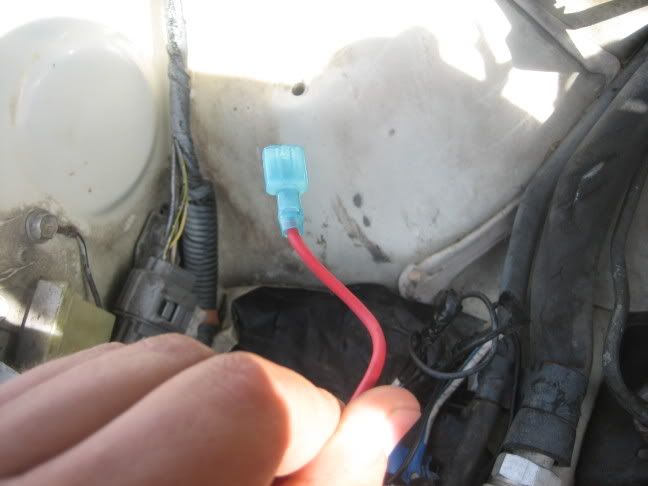
Step 3: Power Tap
Here’s where you need to pay close attention. Look at the wires that go into your turn signal bulb. They should be Red, Black, and Green.
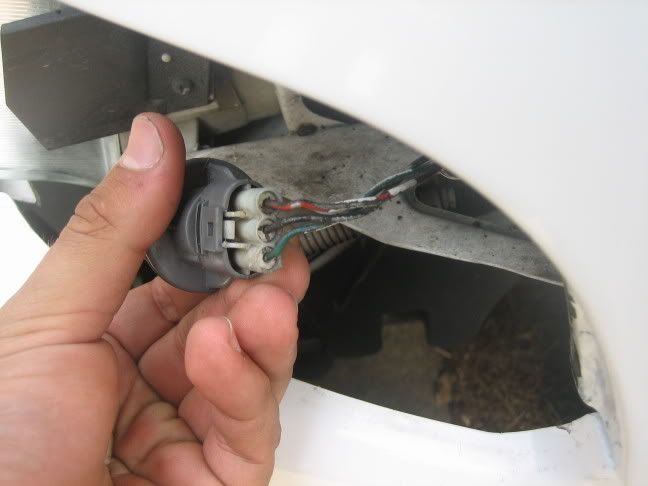
Red=Switch
Black=Ground
Green=Turn Signal
Tap into the Red wire (switch). This is where your city lights will draw their power from. That way whenever you turn on your parking lights, they will power up.
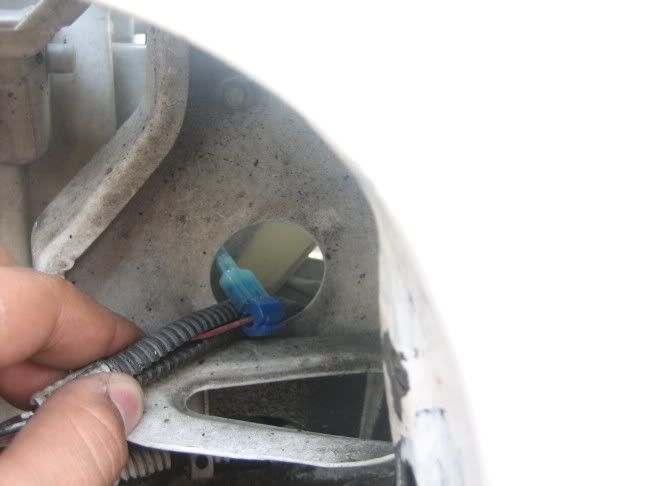
Step 4: Ground Tap
Here’s where it gets tricky. In order to wire up your city lights so that they turn off with your headlights, you need to ground them to your headlight power. This will act as a false ground (double positive) and break the circuit when you turn on your headlights (and act as a ground when your headlights are off).
Finding it was tricky. This is how my car works (yours may be different (I don’t know). Your headlights should have a female plug with 3 holes that plug into your headlights. Trace the wires back until you can distinguish three different colors.
*If you can’t find the colors, I believe the top one is the headlight power.*
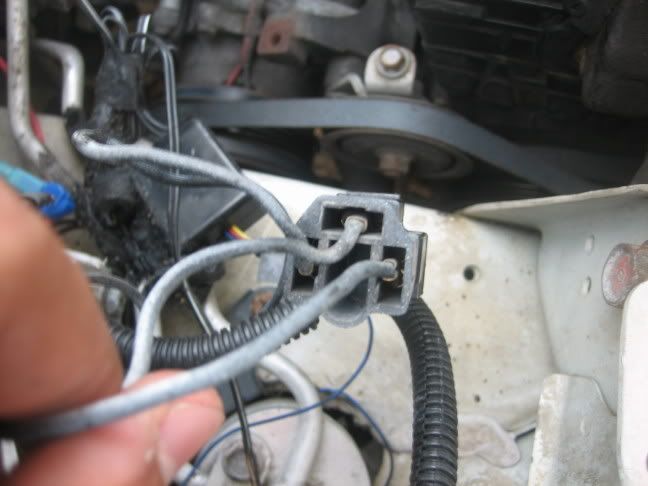
Red with a White or Yellow line (low beam power)
Red with a Blue line (high beam power)
Black (ground)
*If you can’t find the colors, I believe the top one is the headlight power.*
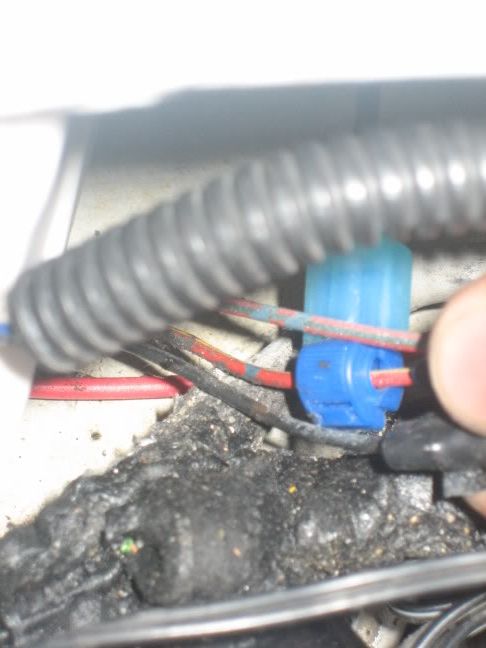
Tap into your low beam power so that you draw power from them when you turn your headlights on.
Step 5: Plug and enjoy
Insert the female wire connector into the wire tap.
(Optional: squirt some dielectric tune up grease into the female wire conectors. This will not only weatherproof your connection, it will also make it easier to remove in the event that you need to remove your city lights.)
Step 6: Enjoy your City Lights
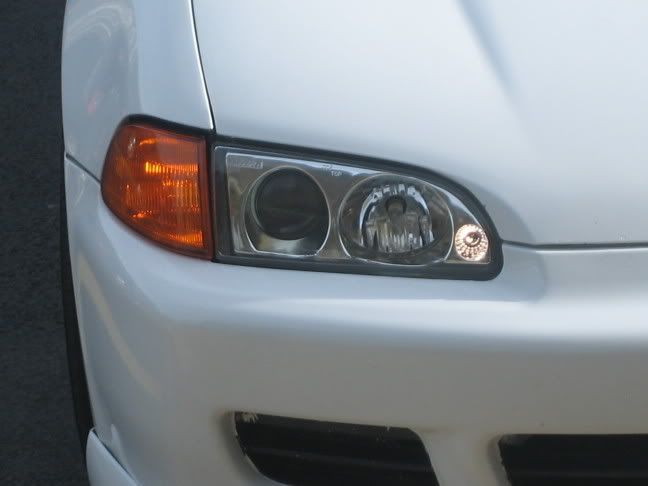
You should now be finished. Pat yourself on the back for a job well done. Turn on your parking brakes and check them out. Your City Lights should light up along with your corners (parking lights).
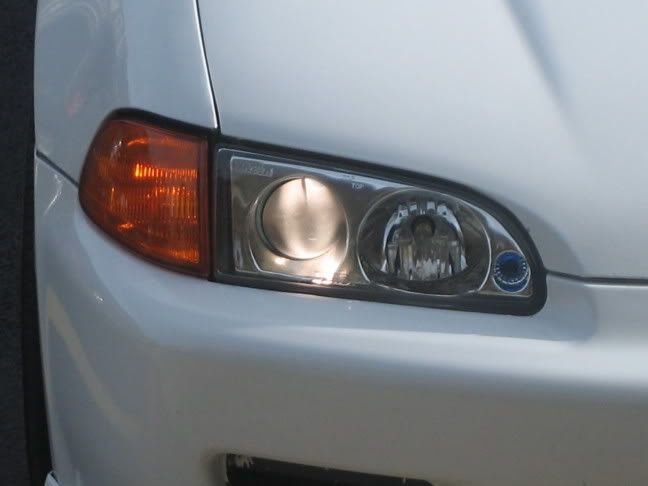
Now turn on your headlights, your city lights should power off.
There you have it. I hope I didn’t miss anything (I did this a couple of months ago and regurgitated this mostly from memory). If you have any questions please feel free to ask (it's why I joined this forum).
-Adrian


