Prooph
New Member
What up guys! I am happy to make this DIY for others that are interested in swapping out their OEM seats for these Type S seats and hopefully it helps out with any confusion and/or additional problems you might run into like I did which were not very clear in the other DIYs I read.
Full credit goes to Wes Miley on the rear seat attachment. This was his idea which he coached me throughout the process which I believe is the best way for support.
I tried to take as many pictures as I can to explain what I was doing step by step, however, there was a couple times where either it was self-explanatory or I forgot. Here goes...
So, first thing you have to do is remove the seats. Fold the Upper seats down and on the passenger side, you'll see this small bracket with two 10mm bolts.

Remove the bolts and the seat will come free - remove rear, upper passenger seat. Now remove the rear, upper driver side seat by sliding the seat left (If I remember correctly, if not, try sliding it right) until one of the "poles" slide out of the swivel bracket. The swivel bracket looks like this:

Once you have both rear, upper seats out you have to remove the rear bench seat. There is a 10mm bolt that holds in it. You should be able to see it very clearly now, but here is where it is located (Photo was taken from the internet from a RSX).

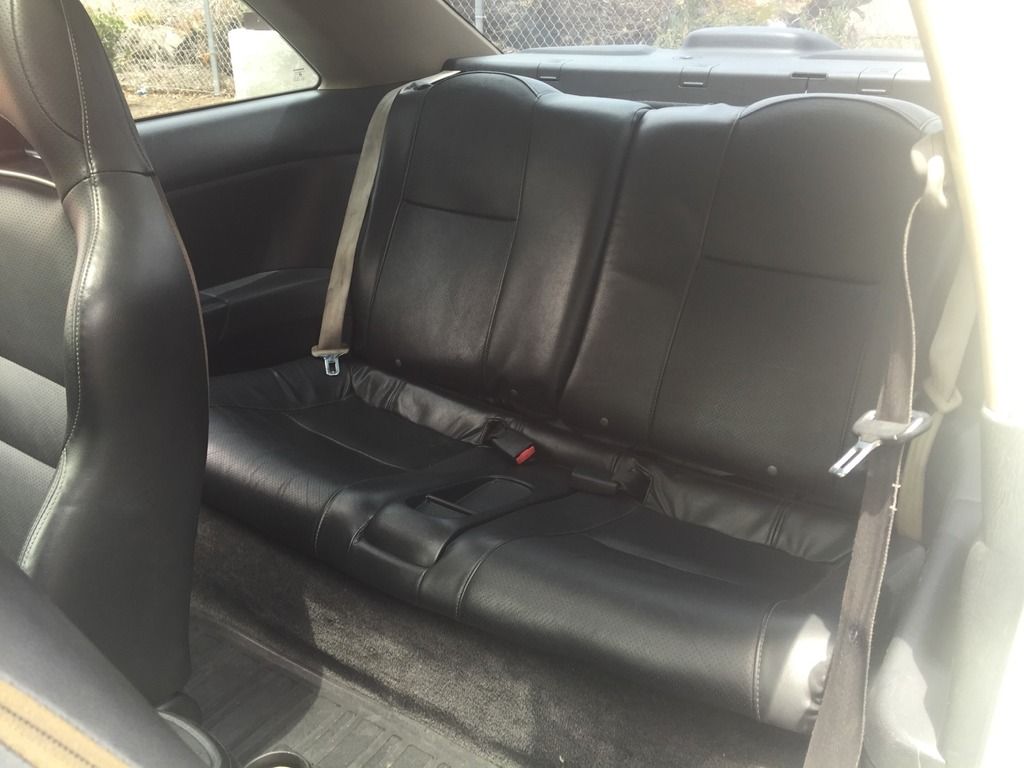
Now, simply lift up the rear bench seat from the front until you hear to clicks and the seat will come free. Grab your DC5 rear bench seat and install it (still step can be done before or after you modify the rear upper seats, just make sure you install it before you start installed the post modified rear, upper seats - your knees will thank you.
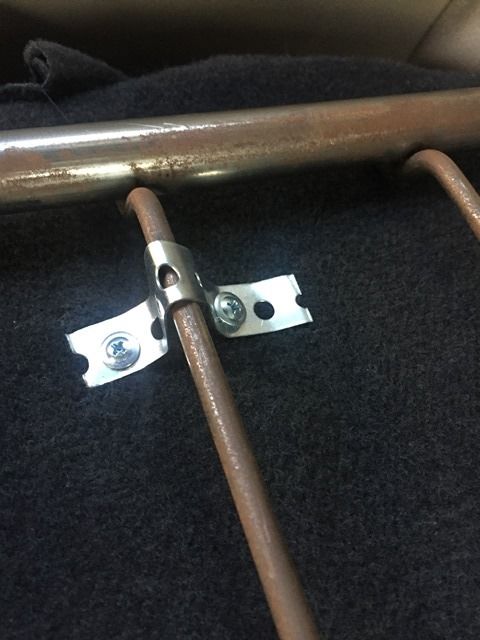
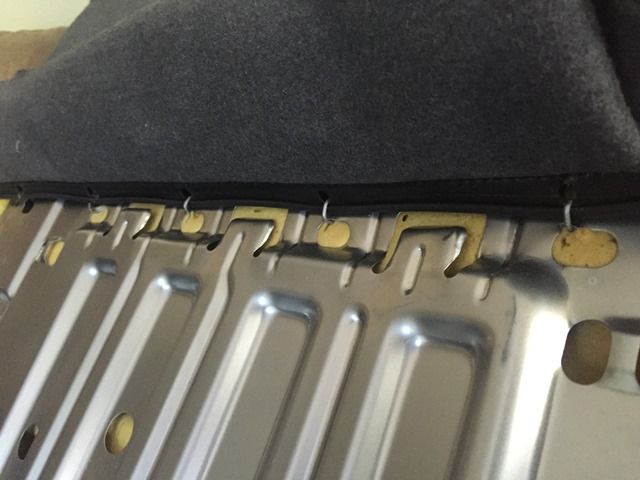
Now, take your rear upper seats apart to where you have the leather cover off and skeleton out of the foam. As you start to remove the leaver cover, you'll notice two areas where there is a set of "hog rings" that hold on the leather cover to the seat skeleton. If I remember correctly, there is a set in the middle of the seat and a set near the bottom of the seat. They look like this (middle area pictured):

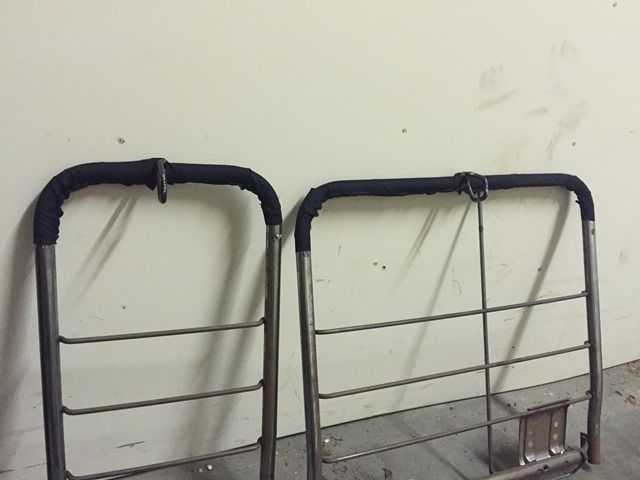
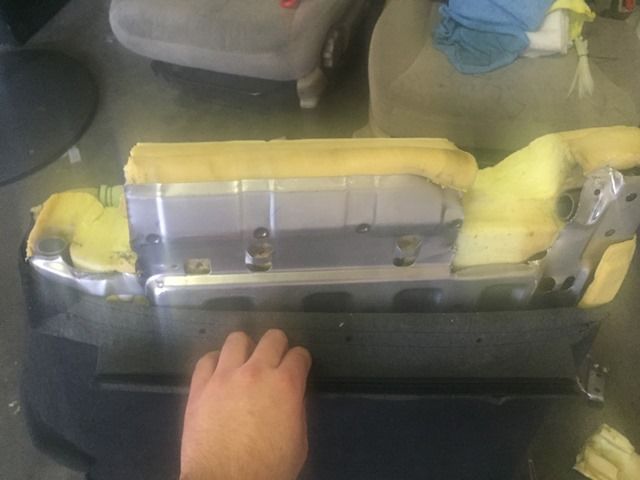
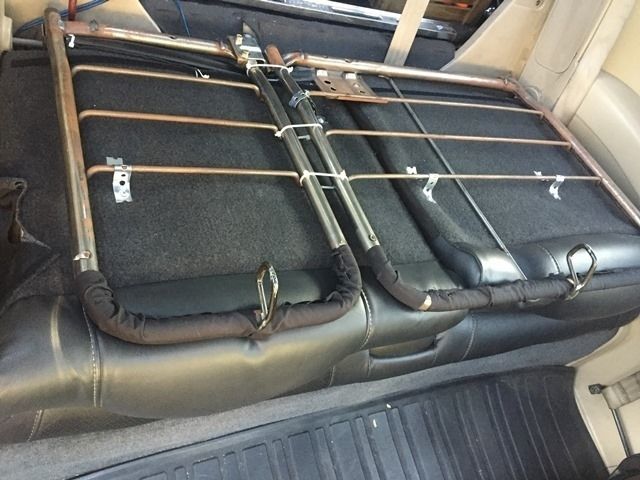
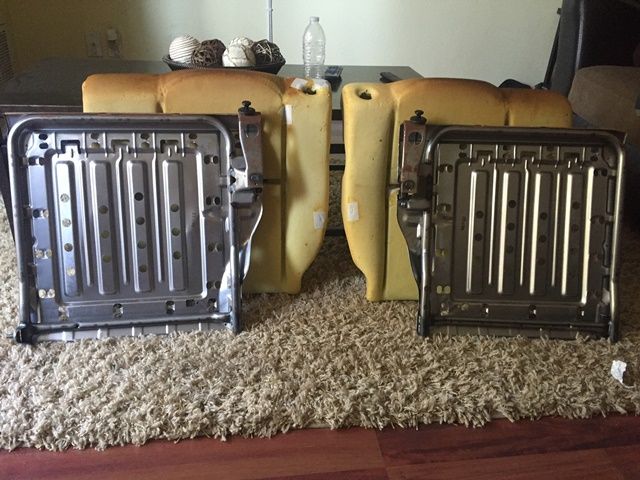
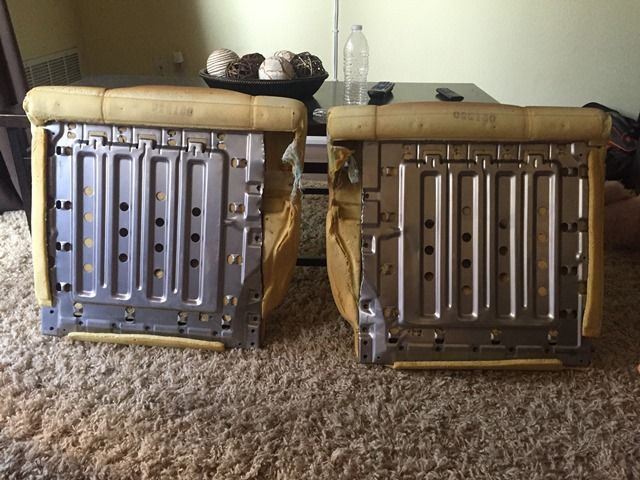
Once you have the leather cover off and the skeleton out of the foam, they should look like this:

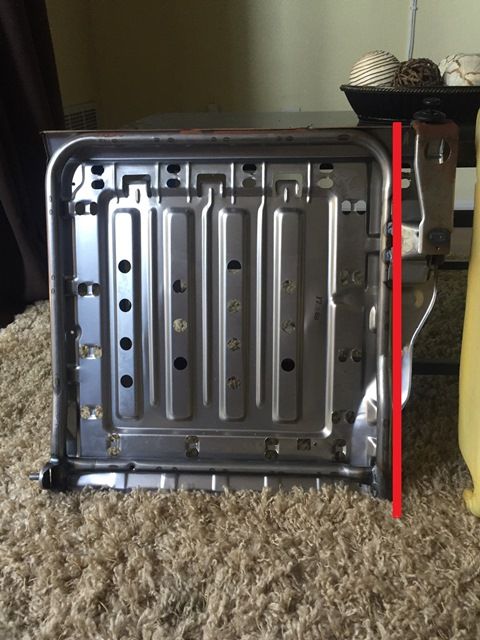
Now, what you're going to have to do is cut off the "wing" (that's what I call it) part of the skeleton which has the pull release lever on it. Basically, you'll cut just slightly next to the rounded "pipe" on the skeleton. Here is the designated cutting area:

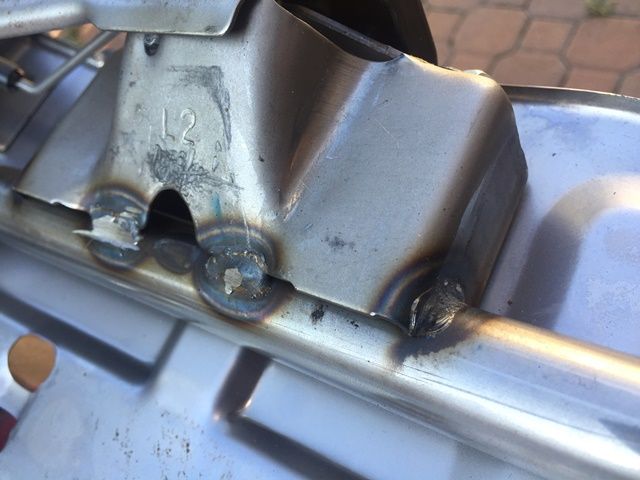
Here is a close up of the welds that you'll have to cut to break the "wing" loose. Once you have cut the welds, there is a piece of sheet metal that will need to be cut along the "pipe" to finish the cutting. Here is a picture of the welds that you'll need to cut (even though they are very obvious, lol):

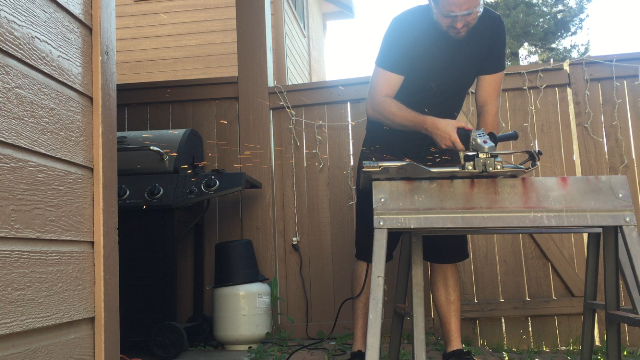
Now, let the sparks fly!

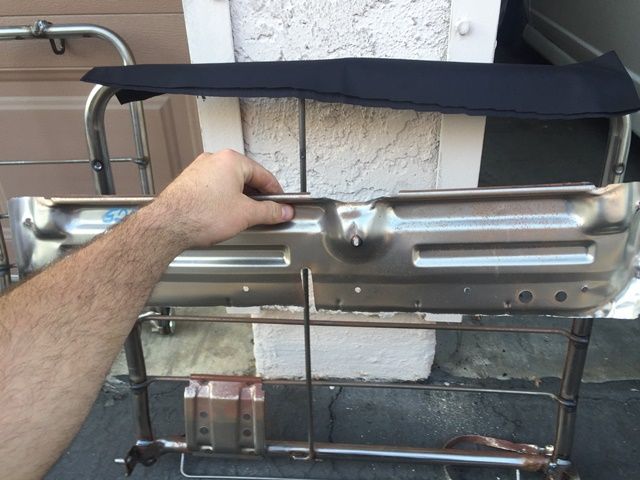
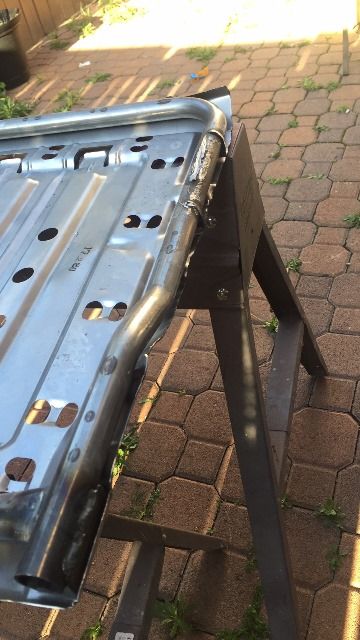
Here is what the skeleton should look like once you're done cutting:

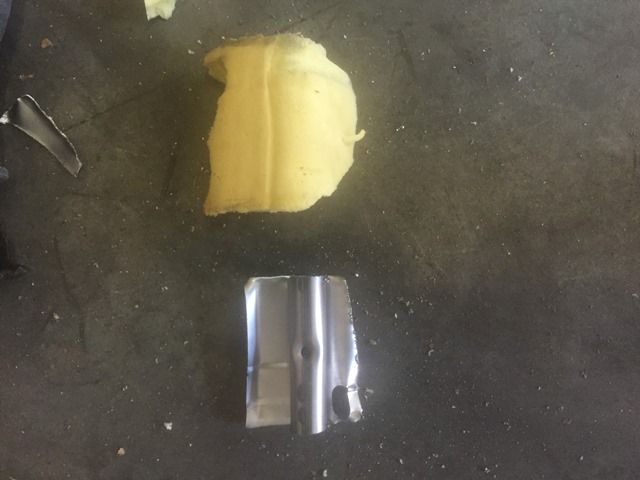
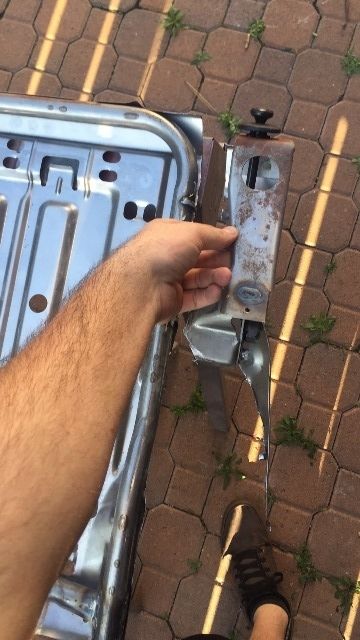
Here is a picture of the part removed next to the cut skeleton:

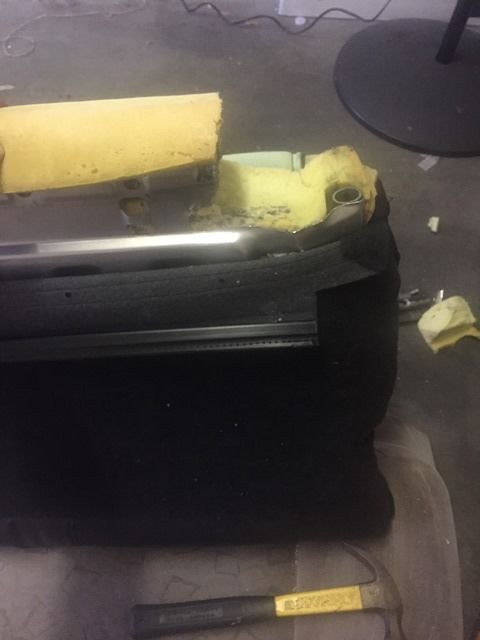
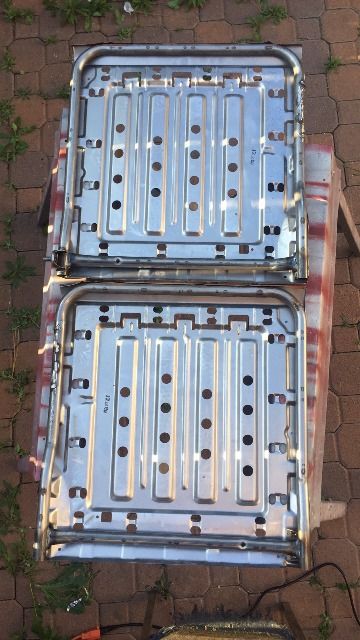
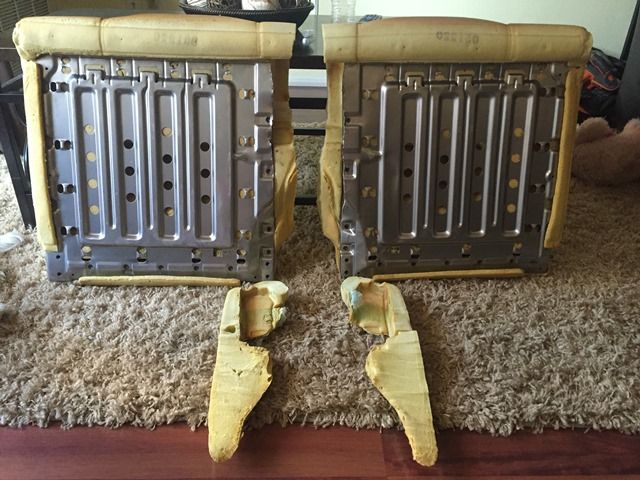
Here is what both skeletons should look like once all cutting of the "wing" is completed:

I used a grinder to cut down the welds because they were pretty significant. Then I used a sawzall to cut the remaining bit of weld and sheet metal.
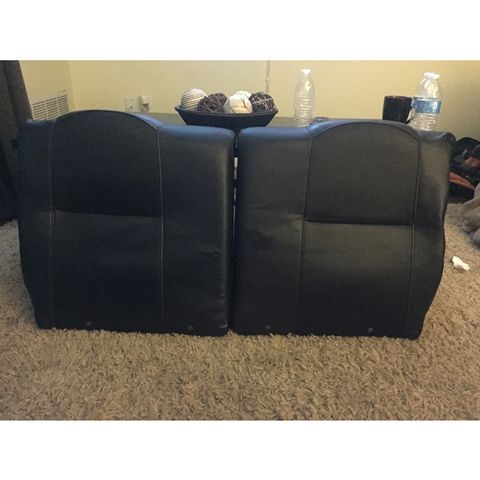
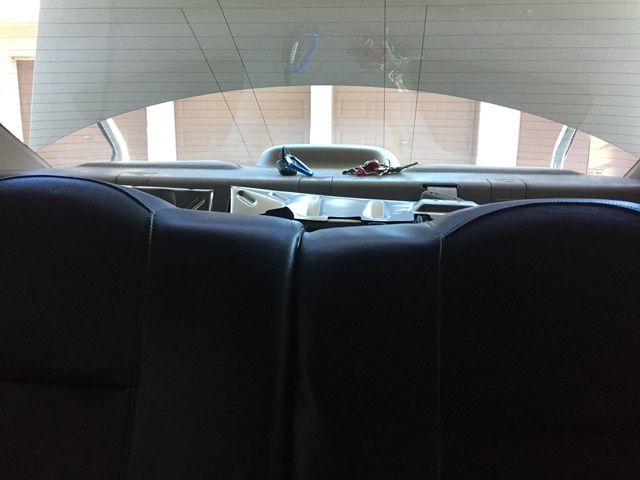
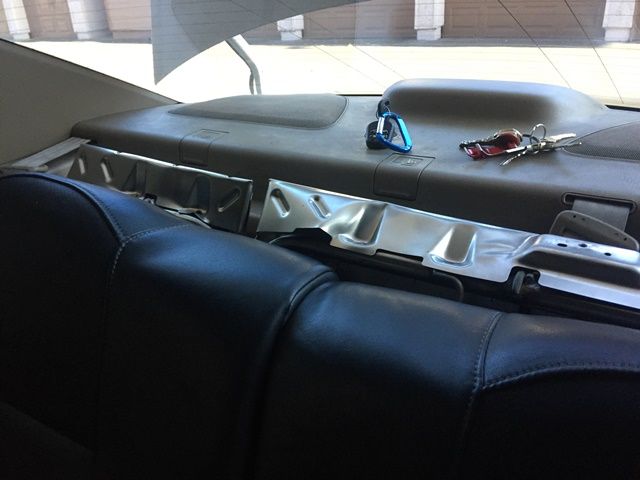
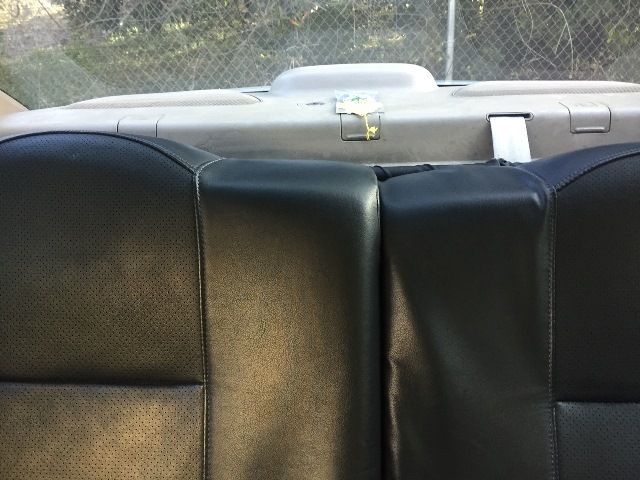
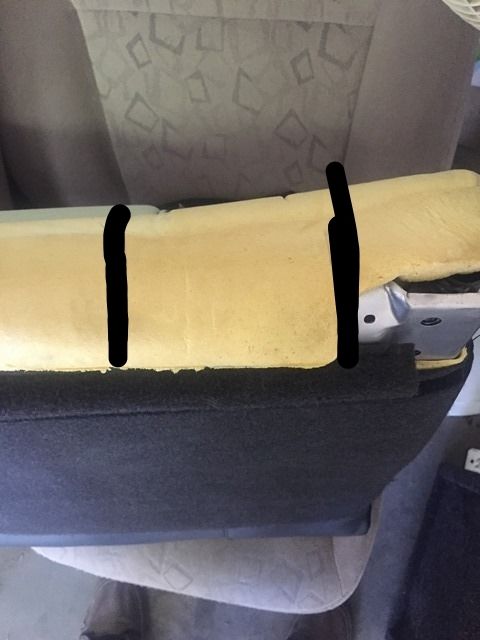
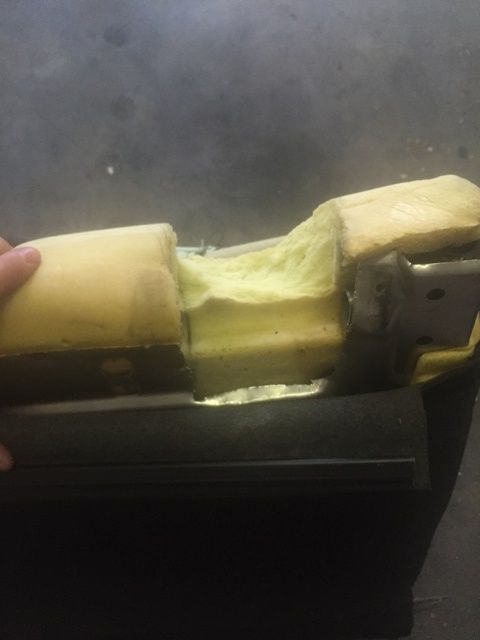
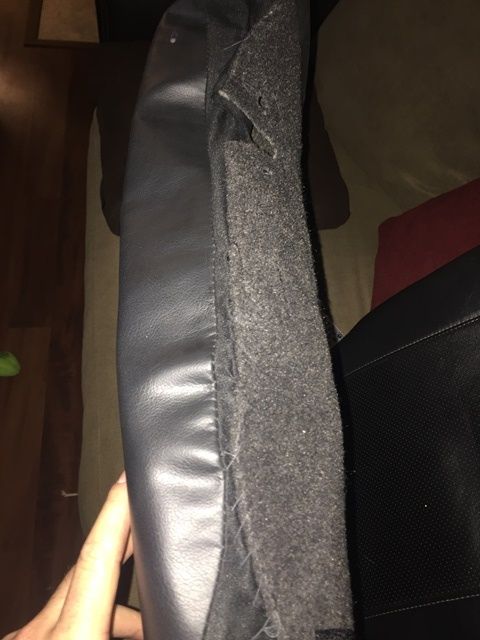
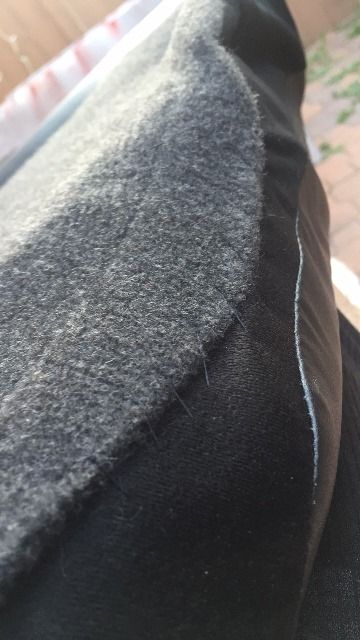
Now that everything is cut, put your DC5 skeleton back into the foam. You'll have a lot of access foam from where the "wing" was there. Trim enough foam till where you have about 1.5" of foam sticking past the cut skeleton. Now re wrap the seat with the leather cover. Once that is done, you'll notice some extra leather that is loose. You'll need to stretch the leather around toward the back of the seat and sew it shut. This will make the leather stay tight. *Make sure you fold it back towards the back of the seat[/U][/B]* I made the mistake by folding it forward. There was no big issue, but I noticed when I wedged the seats for a test fit, the leather wasn't very tight and I had to "hand tuck" it in. Here are some pictures below:


Full credit goes to Wes Miley on the rear seat attachment. This was his idea which he coached me throughout the process which I believe is the best way for support.
I tried to take as many pictures as I can to explain what I was doing step by step, however, there was a couple times where either it was self-explanatory or I forgot. Here goes...
So, first thing you have to do is remove the seats. Fold the Upper seats down and on the passenger side, you'll see this small bracket with two 10mm bolts.
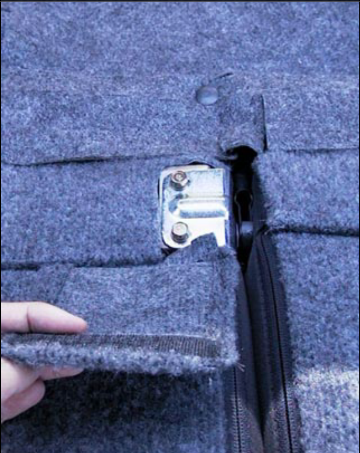
Remove the bolts and the seat will come free - remove rear, upper passenger seat. Now remove the rear, upper driver side seat by sliding the seat left (If I remember correctly, if not, try sliding it right) until one of the "poles" slide out of the swivel bracket. The swivel bracket looks like this:
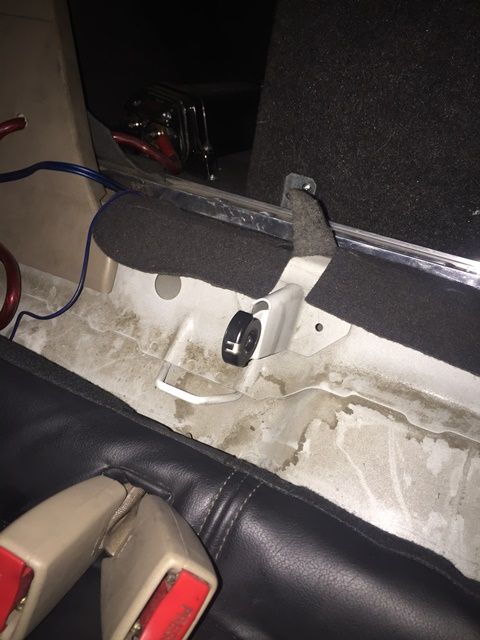
Once you have both rear, upper seats out you have to remove the rear bench seat. There is a 10mm bolt that holds in it. You should be able to see it very clearly now, but here is where it is located (Photo was taken from the internet from a RSX).
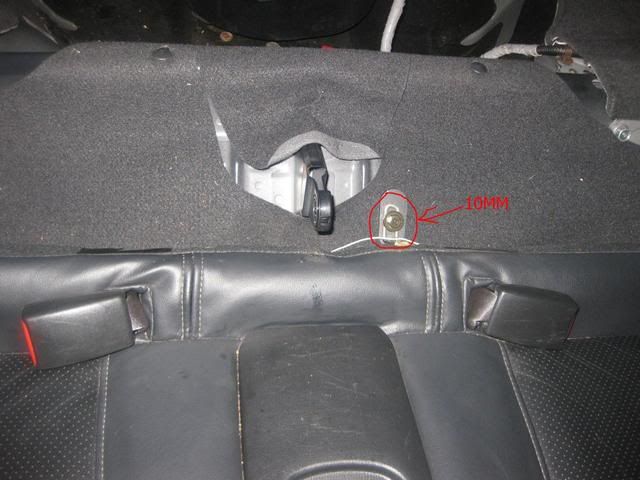
Now, simply lift up the rear bench seat from the front until you hear to clicks and the seat will come free. Grab your DC5 rear bench seat and install it (still step can be done before or after you modify the rear upper seats, just make sure you install it before you start installed the post modified rear, upper seats - your knees will thank you.
Now, take your rear upper seats apart to where you have the leather cover off and skeleton out of the foam. As you start to remove the leaver cover, you'll notice two areas where there is a set of "hog rings" that hold on the leather cover to the seat skeleton. If I remember correctly, there is a set in the middle of the seat and a set near the bottom of the seat. They look like this (middle area pictured):
Once you have the leather cover off and the skeleton out of the foam, they should look like this:
Now, what you're going to have to do is cut off the "wing" (that's what I call it) part of the skeleton which has the pull release lever on it. Basically, you'll cut just slightly next to the rounded "pipe" on the skeleton. Here is the designated cutting area:
Here is a close up of the welds that you'll have to cut to break the "wing" loose. Once you have cut the welds, there is a piece of sheet metal that will need to be cut along the "pipe" to finish the cutting. Here is a picture of the welds that you'll need to cut (even though they are very obvious, lol):
Now, let the sparks fly!
Here is what the skeleton should look like once you're done cutting:
Here is a picture of the part removed next to the cut skeleton:
Here is what both skeletons should look like once all cutting of the "wing" is completed:
I used a grinder to cut down the welds because they were pretty significant. Then I used a sawzall to cut the remaining bit of weld and sheet metal.
Now that everything is cut, put your DC5 skeleton back into the foam. You'll have a lot of access foam from where the "wing" was there. Trim enough foam till where you have about 1.5" of foam sticking past the cut skeleton. Now re wrap the seat with the leather cover. Once that is done, you'll notice some extra leather that is loose. You'll need to stretch the leather around toward the back of the seat and sew it shut. This will make the leather stay tight. *Make sure you fold it back towards the back of the seat[/U][/B]* I made the mistake by folding it forward. There was no big issue, but I noticed when I wedged the seats for a test fit, the leather wasn't very tight and I had to "hand tuck" it in. Here are some pictures below:
Last edited by a moderator:

