DIY wire tuck the passenger side headlight harness
Applicable Years: 96-00 all
Difficulty: 2 out of 5
EstimatedTime: 1-2 hrs
Tools Required:
-metric sockets and wrenches
-screwdrivers
-wire(12-14 gauge for pulling the harness through the cabin, 16-18 gauge for extending wires)
-wire stripper/cutter
-soldering iron
-flux
-heat shrink
-electrical tape
-cable ties
Important Notes:
-Make sure to disconnect the battery before doing any wiring(negative terminal first). Have the code to your
factory stereo ready, if required.
-Make sure to use secure jack stands when raising the car. Set the emergency brake and be on a level surface. NEVER get under the car when it is only supported by a jack.
-I am not responsible for any damages to your car, should you choose to do this mod.
Steps
Remove the bumper, fender liner, and fender. It is not necessary to jack up the car, I had mine jacked up for different reasons. It will also be helpful to remove the battery, battery tray, and unbolt the fuse box and headlight.

Remove the factory plastic clips that hold the headlight harness in place in the engine bay and undo the connector. Pull the front half of the harness out through the small hole that is behind the side of the headlight.

Use cable ties to hold the harness along the top of the wheel well. It advisable to cut a hole and run the harness through the hollow part. I ran mine on the outside for now due to time constraints. The fender liner will protect it from damage.

Locate the hole in the firewall where the fusebox harness and the headlight harness enter the cabin. Make one, straight slice in the grommet in order to remove it.


Pull the door grommet out of its groove.

Get a piece of 12-14 gauge copper wire that is approximately 14-16 inches long. Bend a half inch on each end to make hooks. Run the wire through the door grommet hole and out the firewall grommet hole(this may take some time as it is a cramped path, but trust me, it is easier that pulling the harness through by hand). Once the wire is through the firewall, hook the remaining connector to it with a cable tie.


Carefully, so as not to lose the connector inside the dash, pull the wire through and out the door grommet.

The engine bay side should look like this at this point. Proceed to push the headlight harness the entire way into the dash.

This is what it will look like with the harness pulled through all the way.


Put the grommets back into place. The firewall one should be taped to keep it from coming off. The door grommet needs a corner to be cut off.


Use cable ties to secure the second half of the headlight harness. So close, yet so far.

Cut the harness, behind the connector, with enough room to mess with the wires on each side. Make sure to label the wires as two of them are the same color.

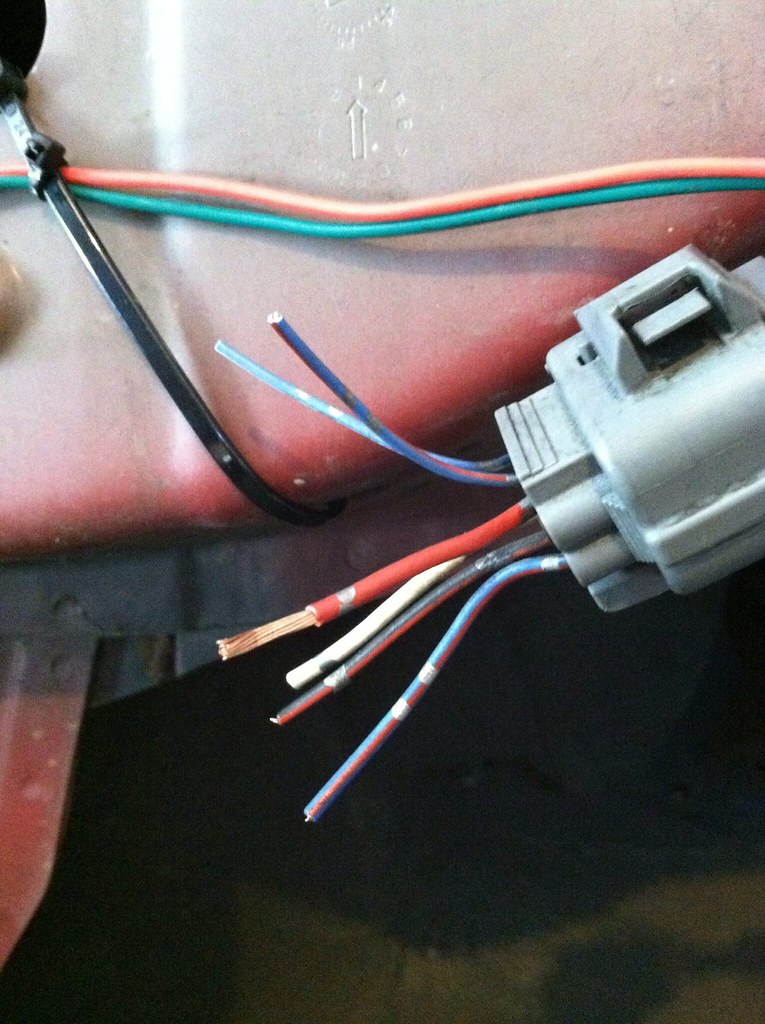
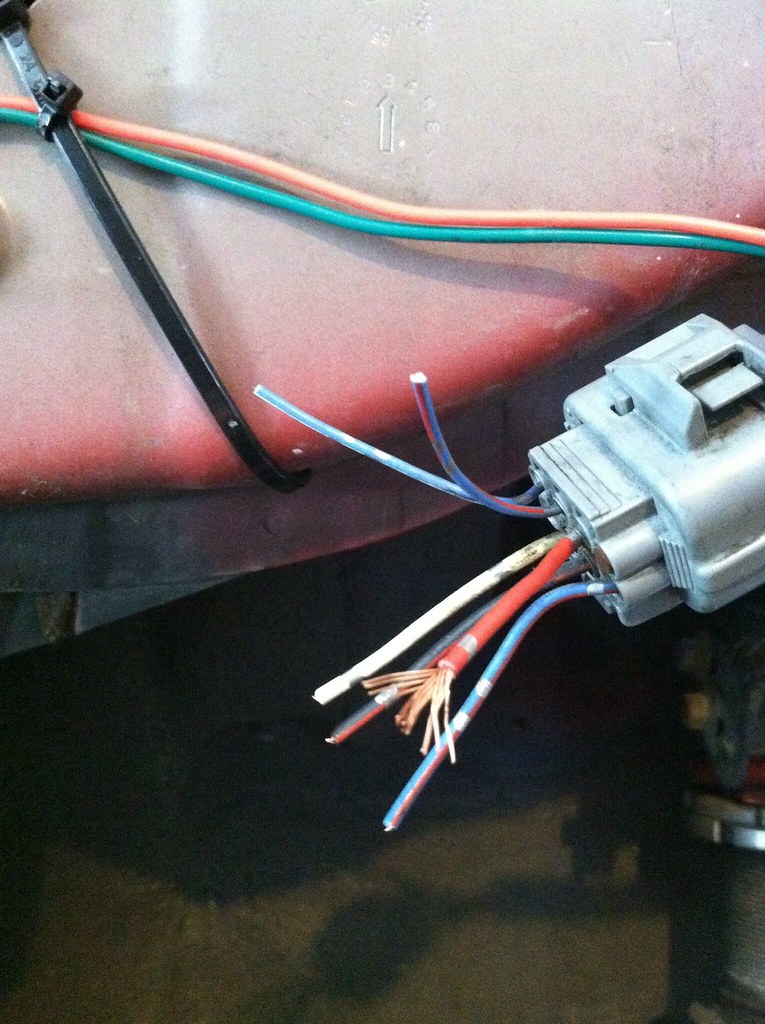
Extend the wires. First, strip a half inch off the ends to be soldered. "Fan" the copper strands. Mesh the "fans" together and twist to make a secure connection. Solder. Make sure to slide heat shrink on before you complete the extension. You will forget heat shrink, it's just going to happen.


The completed connector, only six more solders to go!
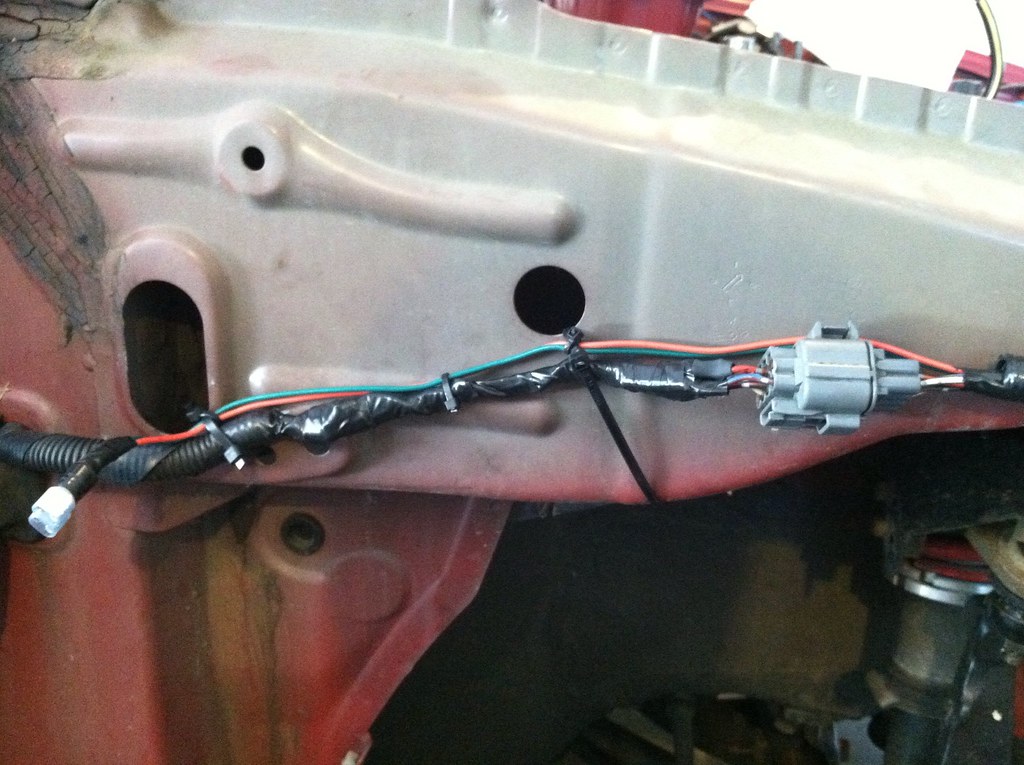
Once everything is soldered and individually heat shrunk, loom the whole harness with electrical tape.

Reinstall everything you removed and enjoy your clean bay.

Review:
I put off doing this mod for a while because I was unsure how to do it. I just decided to go for it the other day and it was surprised with the relative ease of completion and happy with the result. Definitely recommended for all you 6th genners out there. The driver's side is almost the same process. Feel free to contact me with any questions you may have.
Applicable Years: 96-00 all
Difficulty: 2 out of 5
EstimatedTime: 1-2 hrs
Tools Required:
-metric sockets and wrenches
-screwdrivers
-wire(12-14 gauge for pulling the harness through the cabin, 16-18 gauge for extending wires)
-wire stripper/cutter
-soldering iron
-flux
-heat shrink
-electrical tape
-cable ties
Important Notes:
-Make sure to disconnect the battery before doing any wiring(negative terminal first). Have the code to your
factory stereo ready, if required.
-Make sure to use secure jack stands when raising the car. Set the emergency brake and be on a level surface. NEVER get under the car when it is only supported by a jack.
-I am not responsible for any damages to your car, should you choose to do this mod.
Steps
Remove the bumper, fender liner, and fender. It is not necessary to jack up the car, I had mine jacked up for different reasons. It will also be helpful to remove the battery, battery tray, and unbolt the fuse box and headlight.
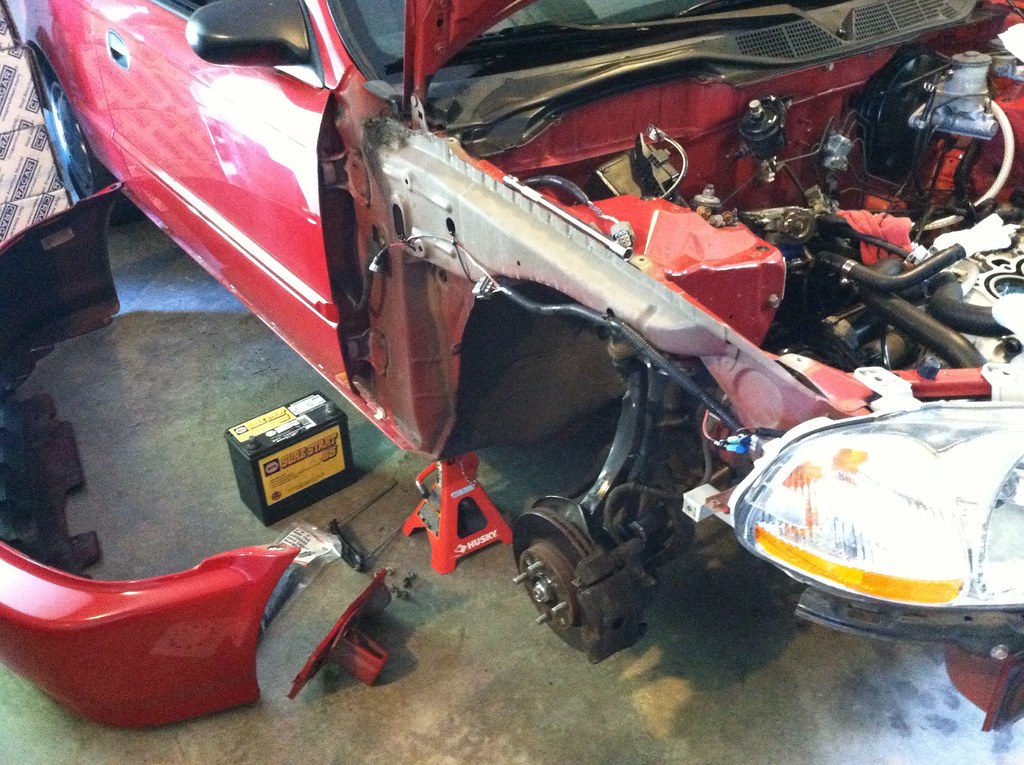
Remove the factory plastic clips that hold the headlight harness in place in the engine bay and undo the connector. Pull the front half of the harness out through the small hole that is behind the side of the headlight.
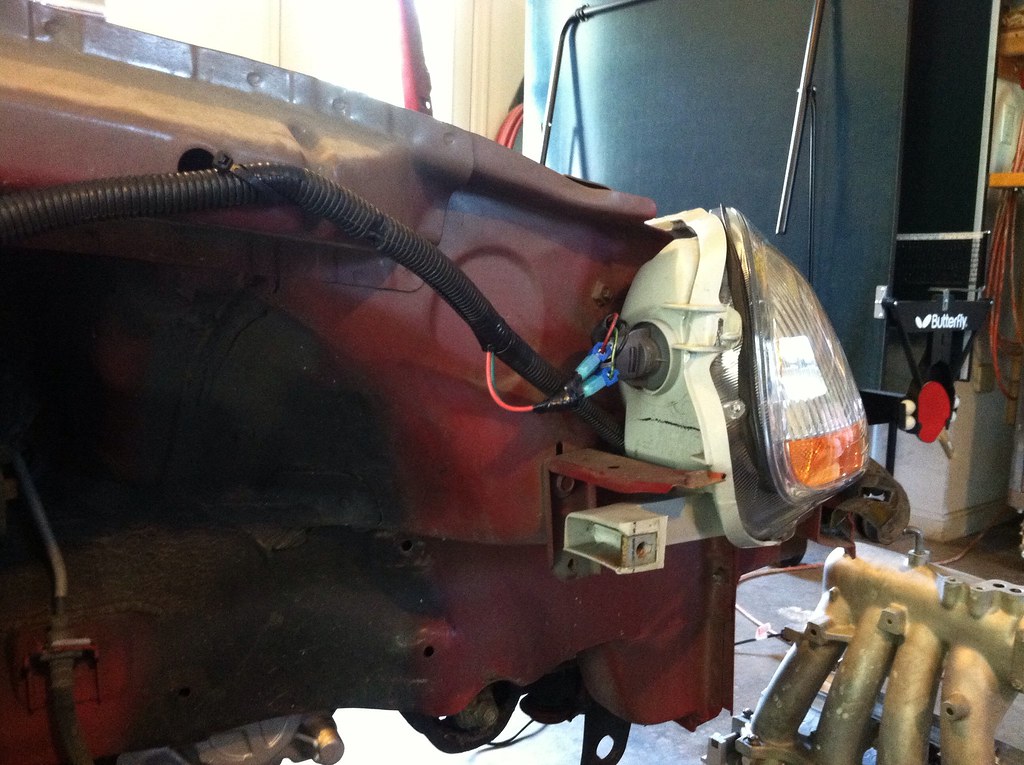
Use cable ties to hold the harness along the top of the wheel well. It advisable to cut a hole and run the harness through the hollow part. I ran mine on the outside for now due to time constraints. The fender liner will protect it from damage.
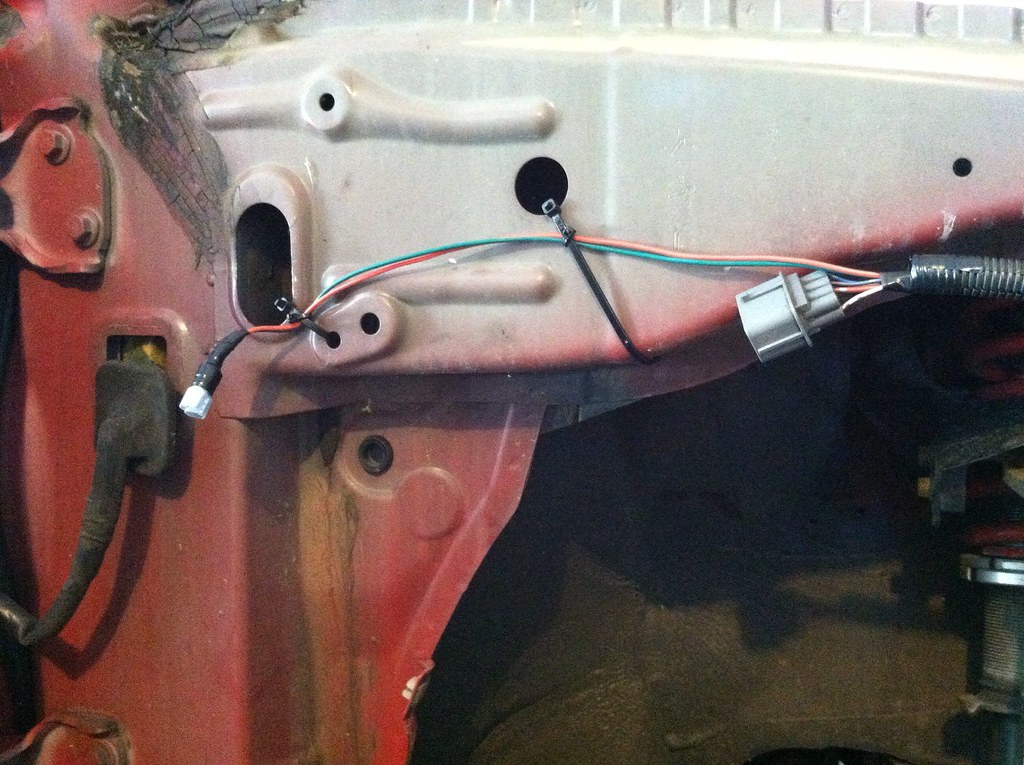
Locate the hole in the firewall where the fusebox harness and the headlight harness enter the cabin. Make one, straight slice in the grommet in order to remove it.
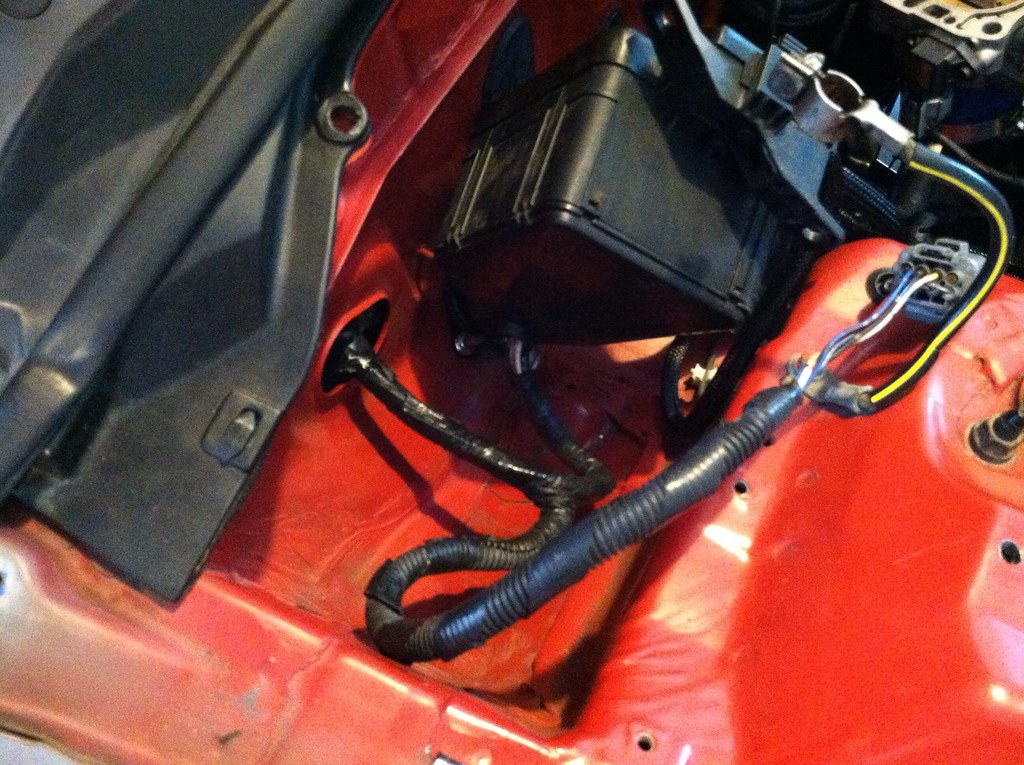

Pull the door grommet out of its groove.
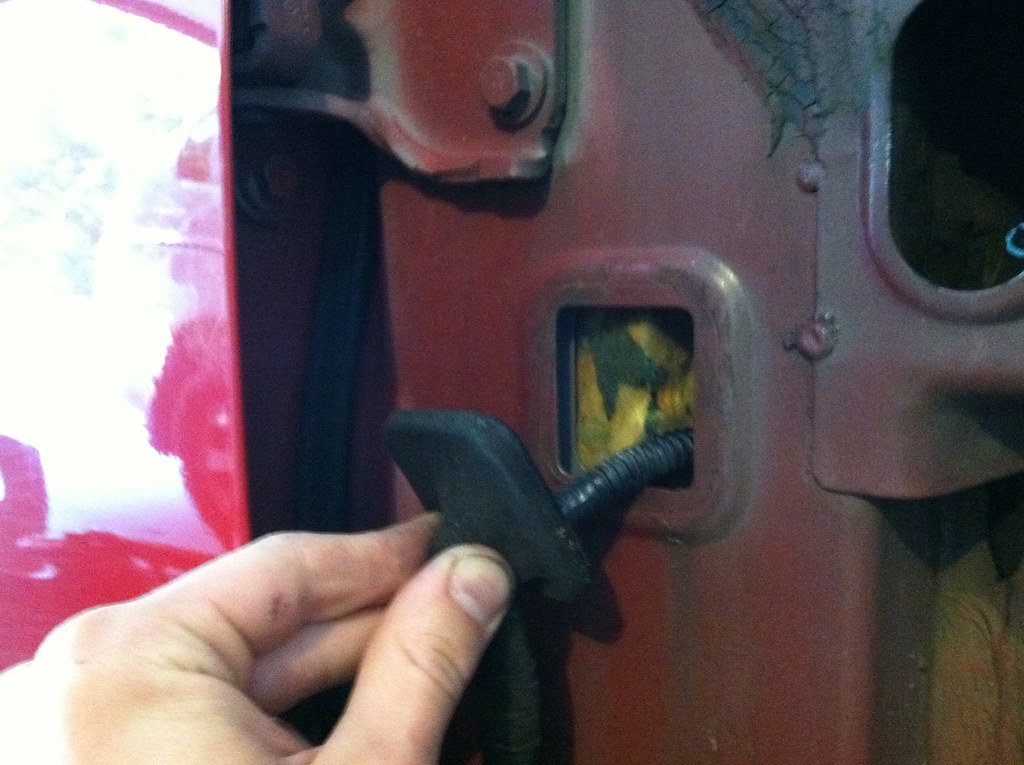
Get a piece of 12-14 gauge copper wire that is approximately 14-16 inches long. Bend a half inch on each end to make hooks. Run the wire through the door grommet hole and out the firewall grommet hole(this may take some time as it is a cramped path, but trust me, it is easier that pulling the harness through by hand). Once the wire is through the firewall, hook the remaining connector to it with a cable tie.
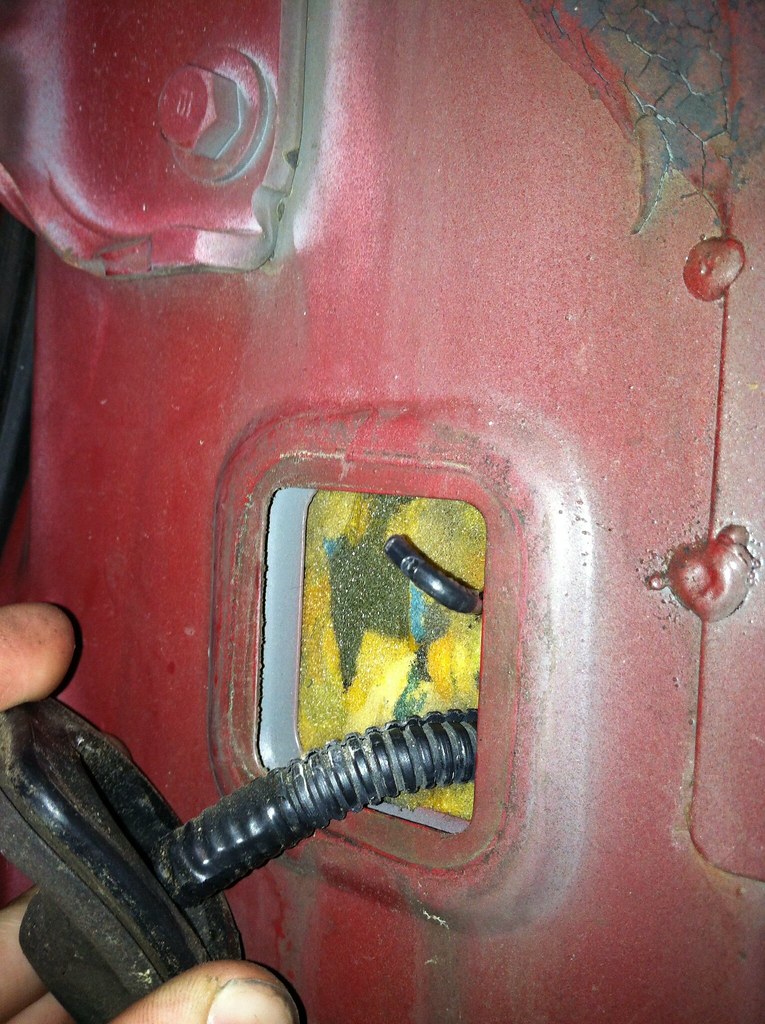
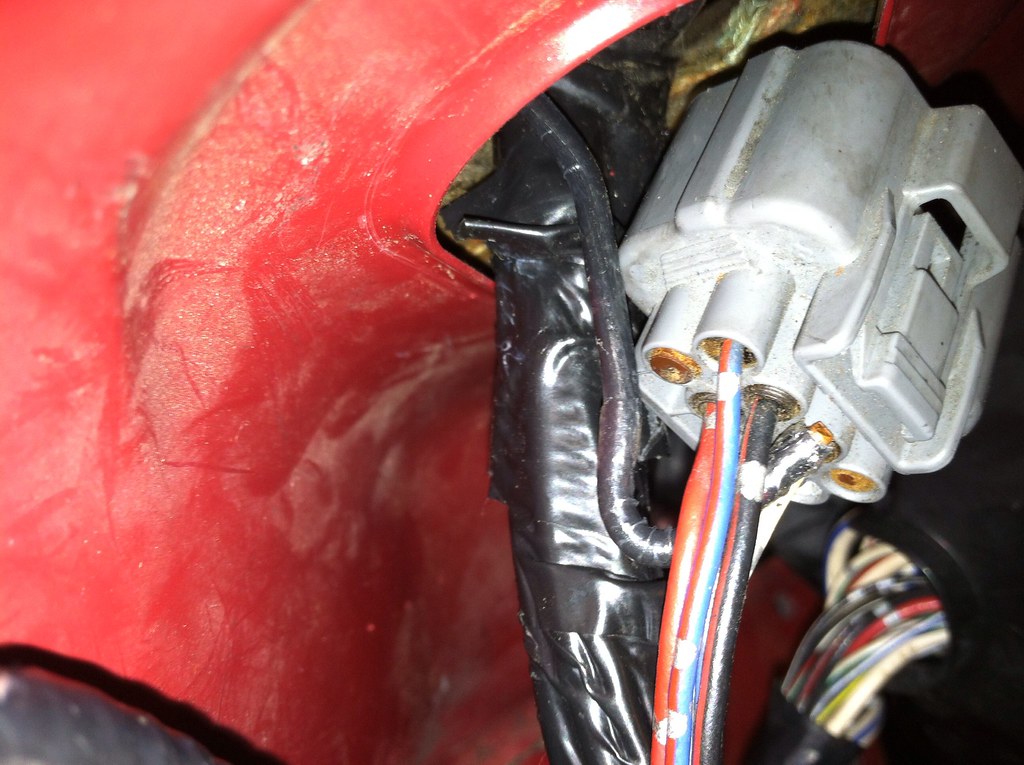
Carefully, so as not to lose the connector inside the dash, pull the wire through and out the door grommet.
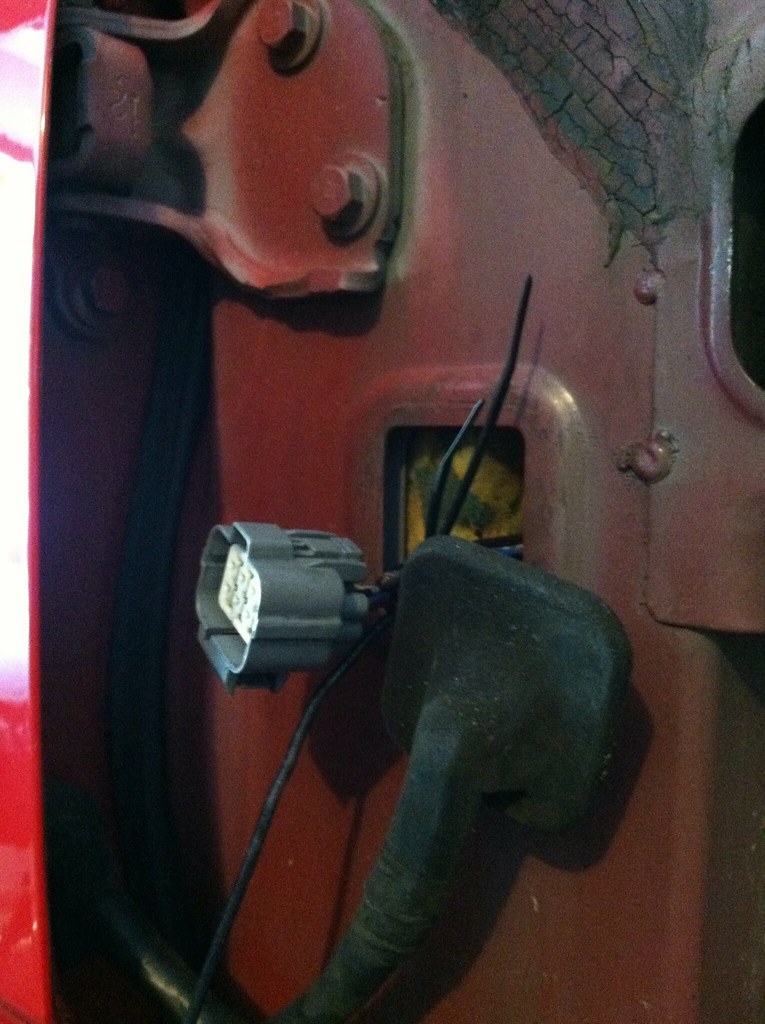
The engine bay side should look like this at this point. Proceed to push the headlight harness the entire way into the dash.
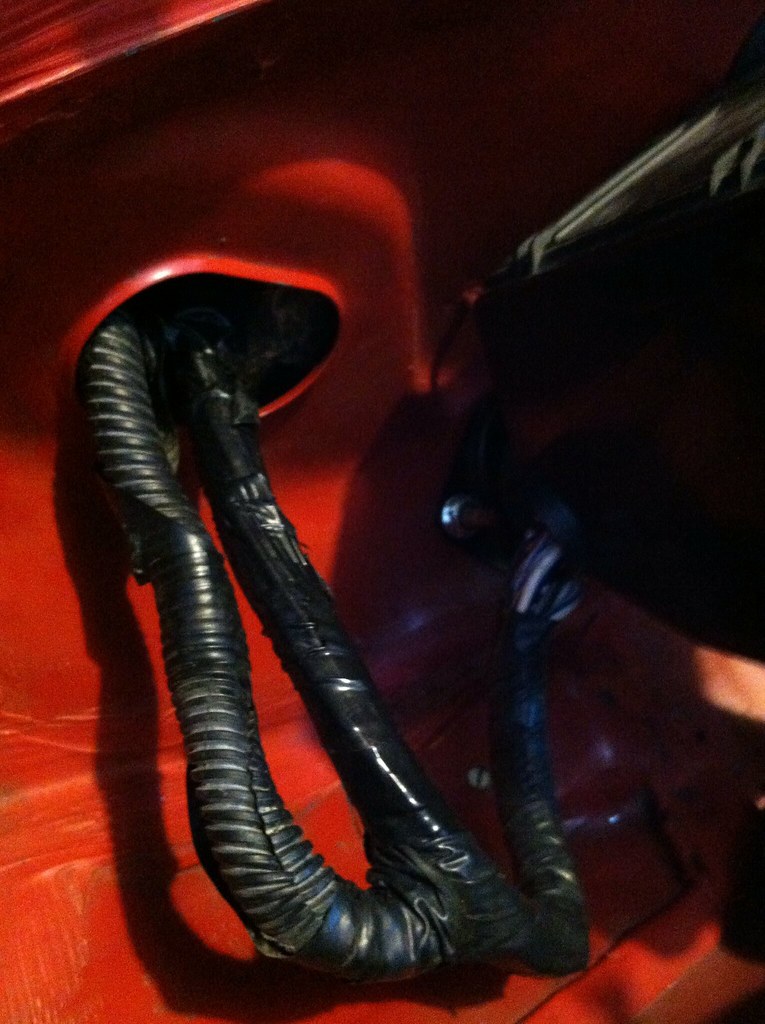
This is what it will look like with the harness pulled through all the way.


Put the grommets back into place. The firewall one should be taped to keep it from coming off. The door grommet needs a corner to be cut off.

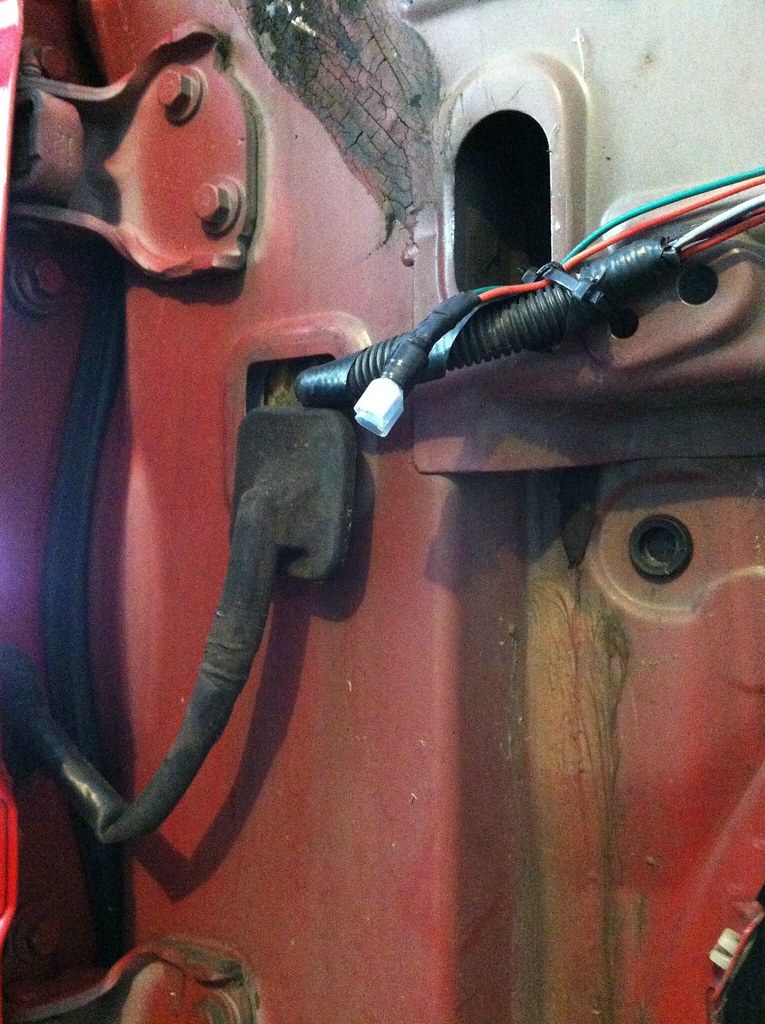
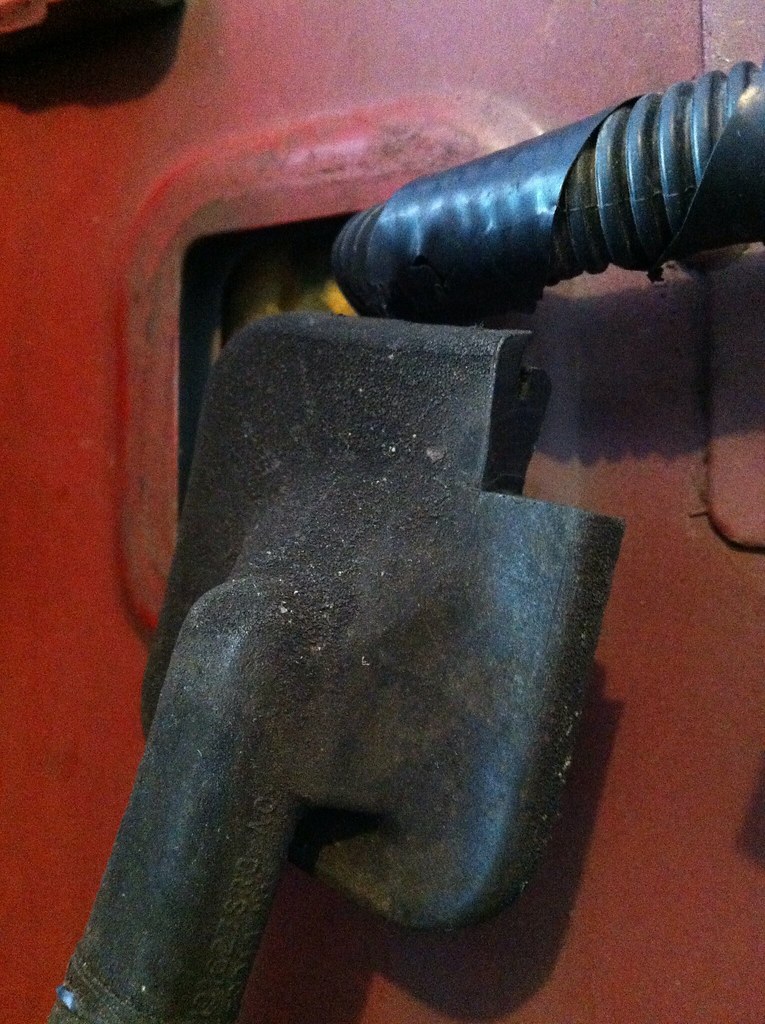

Use cable ties to secure the second half of the headlight harness. So close, yet so far.

Cut the harness, behind the connector, with enough room to mess with the wires on each side. Make sure to label the wires as two of them are the same color.
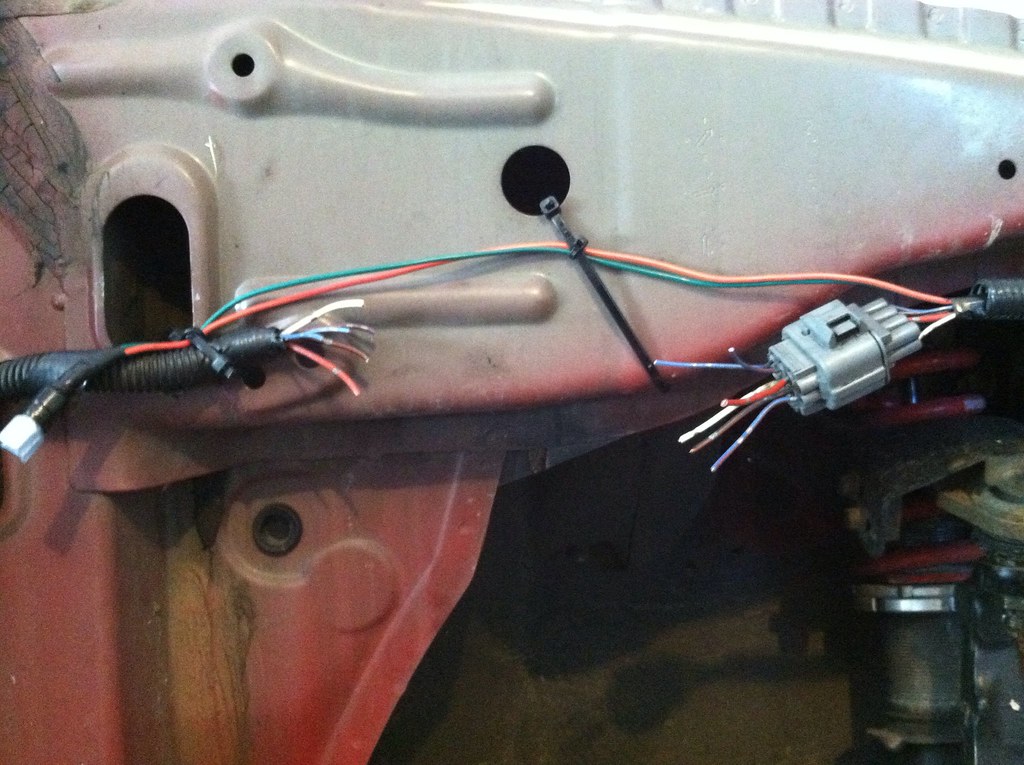
Extend the wires. First, strip a half inch off the ends to be soldered. "Fan" the copper strands. Mesh the "fans" together and twist to make a secure connection. Solder. Make sure to slide heat shrink on before you complete the extension. You will forget heat shrink, it's just going to happen.

The completed connector, only six more solders to go!
Once everything is soldered and individually heat shrunk, loom the whole harness with electrical tape.
Reinstall everything you removed and enjoy your clean bay.

Review:
I put off doing this mod for a while because I was unsure how to do it. I just decided to go for it the other day and it was surprised with the relative ease of completion and happy with the result. Definitely recommended for all you 6th genners out there. The driver's side is almost the same process. Feel free to contact me with any questions you may have.


