So, after doing the DIY amber guage lighting, I decided I didnt like the ugly (still light blue) needles. So, after some thinking, I found a way to make the needle's red, without spending tons of money on either a EM1 cluster, or a JDM cluster. **Sorry for the blurry pics**
Materials Needed:

Stained Glass Paint (used for kids crafts, and can be found at either WalMart or a crafts store. I used "Kelly's Glass Stain", and costs about $2.)
Scotch Tape
Some kind of cutter (I used a razor blade, but an exacto knife would be alot easier)
First, you need to take your gaage cluster out of the car. Theres a couple of "How To's" here on ClubCivic, so search for one.
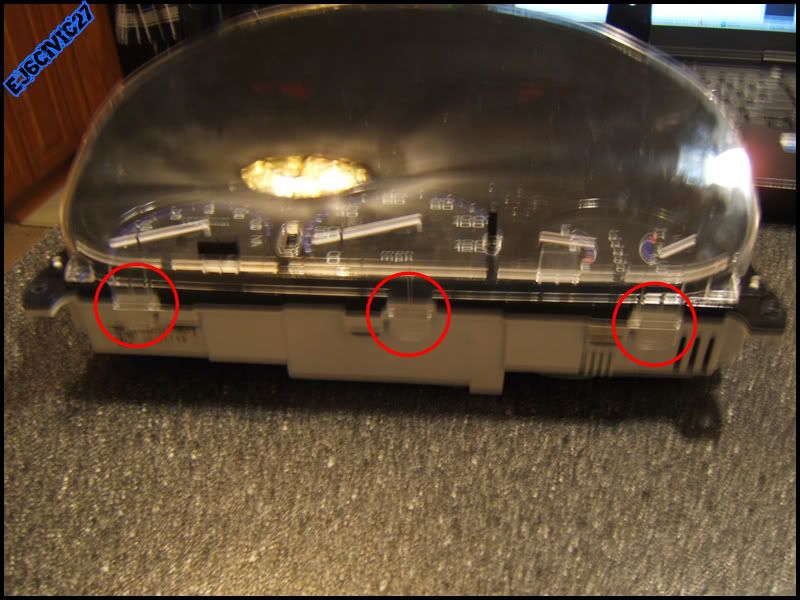
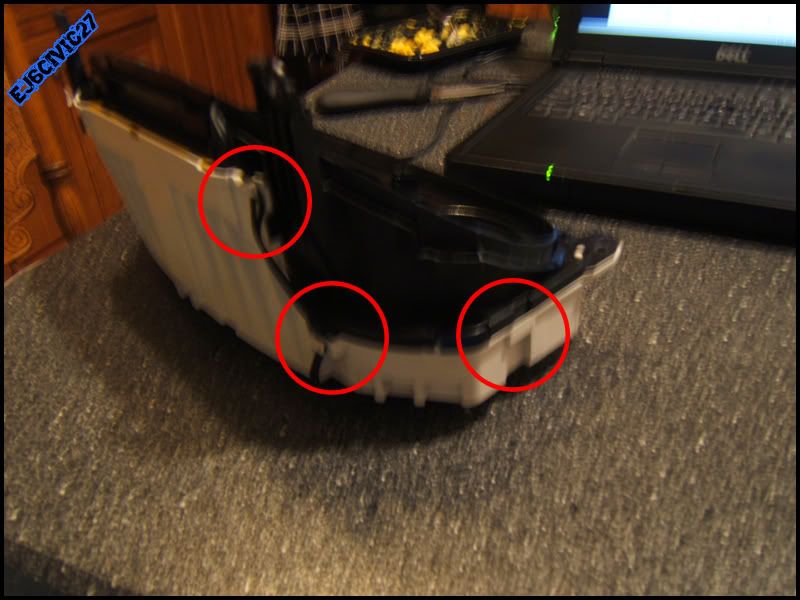
Next, you need to take apart your cluster. Start off by unclipping the clear cover. Theres a total of seven. (Note all clips are pictured. Its not hard to figure out where the others are.)


Next, comes the bezel type piece. This also has seven clips. (Not all clips are pictured. Its not hard to figure out where the others are.)


Now, on the top side of the bezel type piece, is a black plastic peice with little blue triangle/squares in it. Carefully pull it off. Its just pressed into place. It should look something like this:

NOTE: Stupid me didnt plan on doing a Write-up on this, so I didnt take pictures before hand. Mine is already painted red, but a stock piece will be black, with blue peices on the outter area side.)
Next, take your cutter and carefully (use a peice of wood or something hard as a backing) cut out the blue triange/square shapes. Get all the blue out that you can.
(Sorry, I didnt take a picture of this process. Like I said before, I didnt plan on doing a write-up on this, so some processes are missing.)
Next, take your scotch tape, and cover up the 4 holes you just cut out. Be sure to fold the tape over BOTH sides of the plastic piece, so there's no sticky side of the tape. Also be sure to use two seperate pieces of tape (one piece for each side of the plastic piece). Cut off any excess tape you have.
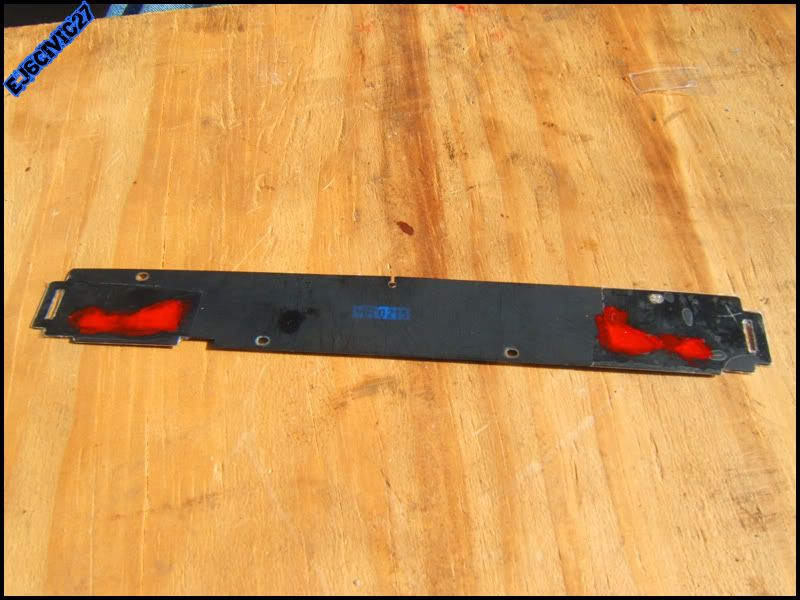
Next, get your red glass staining paint, and paint over the tape that you just put on. Be sure to let it dry. I put two coats on one side, and one coat on the other side. Heres what it should look like...

Once the paint has fully dried, put the plastic peice back into the housing/bezel, and re-install the housing and clear peice onto the gauge cluster. Put your cluster back into the car, and your done. Heres the final product!!

Note: This will only work at night with the lights on!
So, overall I spend $2 and about 30 minutes or so doing this. I think it came out great. Any questions, comments, ect. please feel free ask or PM me.
Materials Needed:
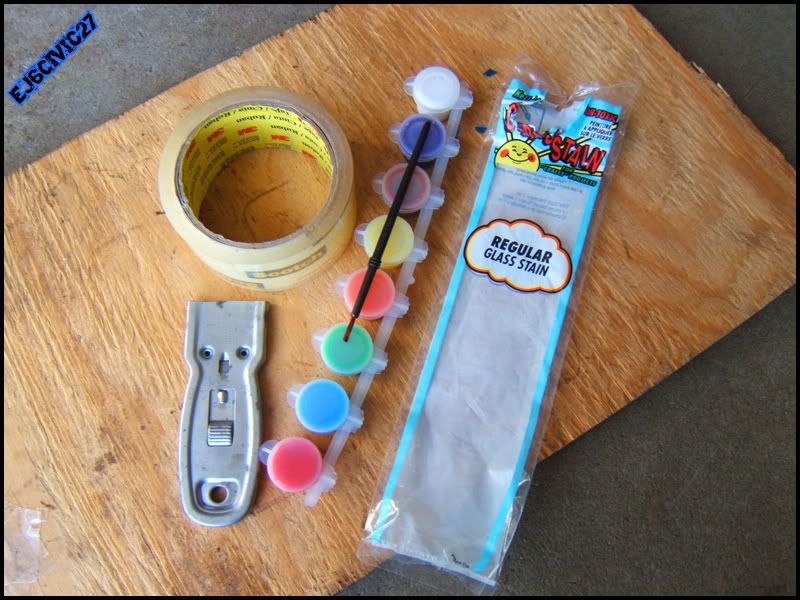
Stained Glass Paint (used for kids crafts, and can be found at either WalMart or a crafts store. I used "Kelly's Glass Stain", and costs about $2.)
Scotch Tape
Some kind of cutter (I used a razor blade, but an exacto knife would be alot easier)
First, you need to take your gaage cluster out of the car. Theres a couple of "How To's" here on ClubCivic, so search for one.
Next, you need to take apart your cluster. Start off by unclipping the clear cover. Theres a total of seven. (Note all clips are pictured. Its not hard to figure out where the others are.)
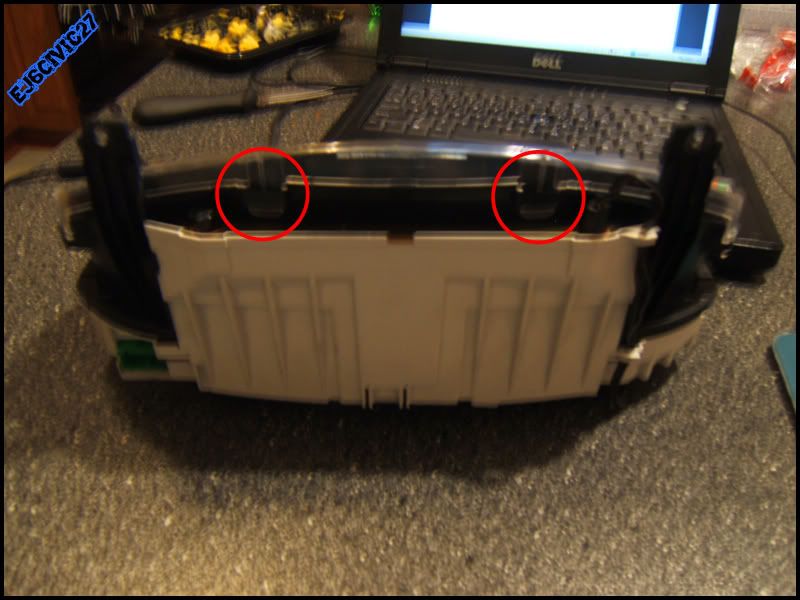
Next, comes the bezel type piece. This also has seven clips. (Not all clips are pictured. Its not hard to figure out where the others are.)
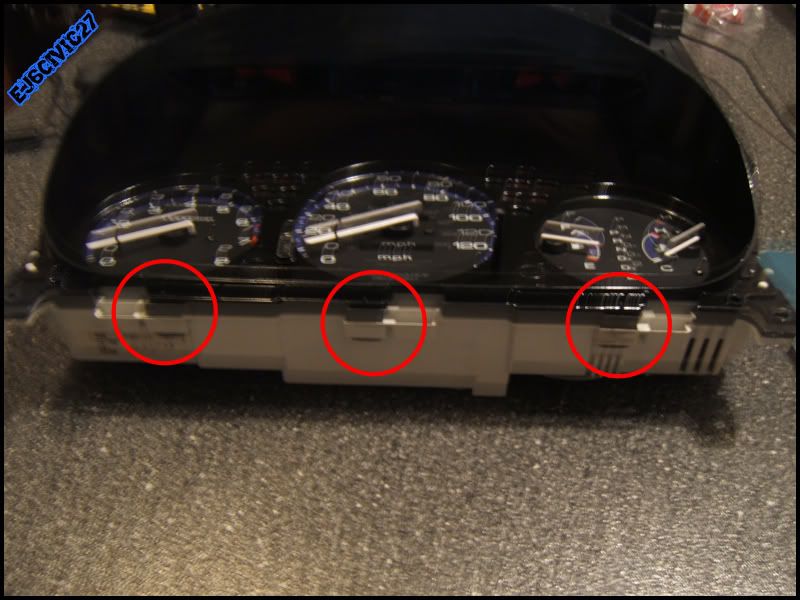
Now, on the top side of the bezel type piece, is a black plastic peice with little blue triangle/squares in it. Carefully pull it off. Its just pressed into place. It should look something like this:
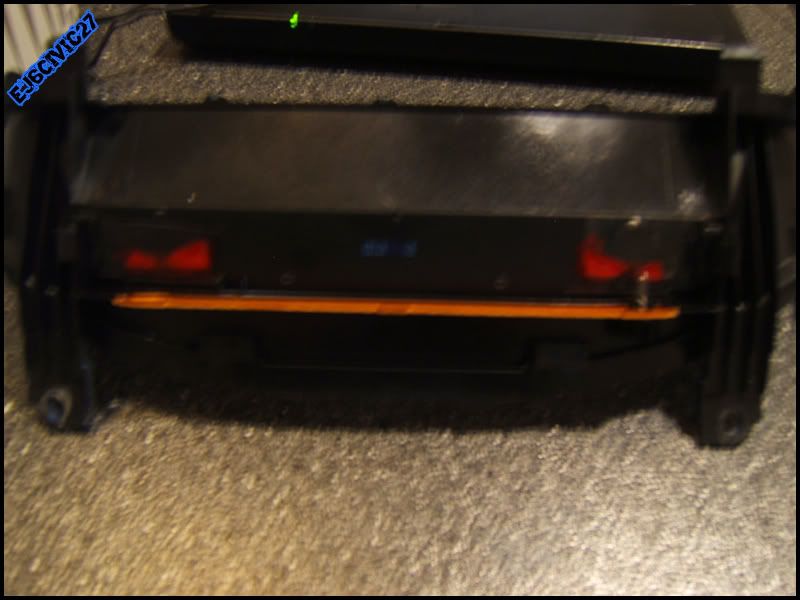
NOTE: Stupid me didnt plan on doing a Write-up on this, so I didnt take pictures before hand. Mine is already painted red, but a stock piece will be black, with blue peices on the outter area side.)
Next, take your cutter and carefully (use a peice of wood or something hard as a backing) cut out the blue triange/square shapes. Get all the blue out that you can.
(Sorry, I didnt take a picture of this process. Like I said before, I didnt plan on doing a write-up on this, so some processes are missing.)
Next, take your scotch tape, and cover up the 4 holes you just cut out. Be sure to fold the tape over BOTH sides of the plastic piece, so there's no sticky side of the tape. Also be sure to use two seperate pieces of tape (one piece for each side of the plastic piece). Cut off any excess tape you have.
Next, get your red glass staining paint, and paint over the tape that you just put on. Be sure to let it dry. I put two coats on one side, and one coat on the other side. Heres what it should look like...
Once the paint has fully dried, put the plastic peice back into the housing/bezel, and re-install the housing and clear peice onto the gauge cluster. Put your cluster back into the car, and your done. Heres the final product!!
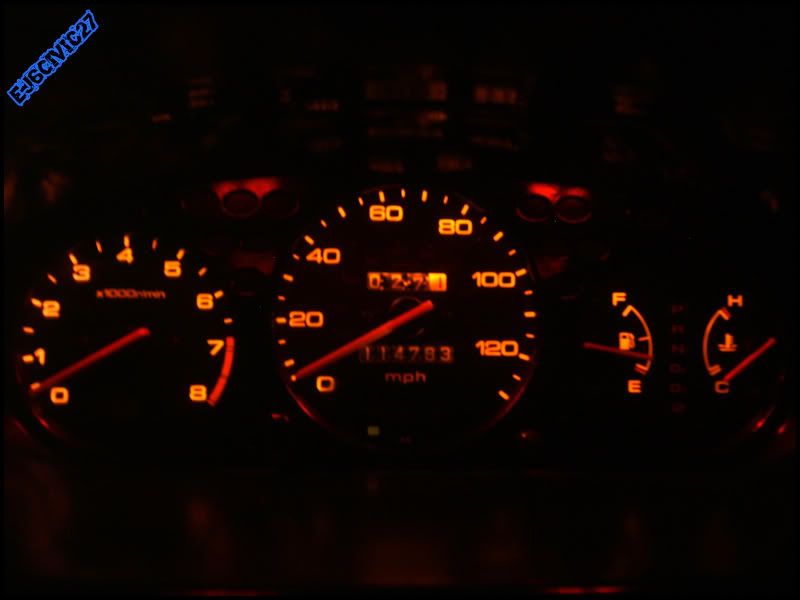
Note: This will only work at night with the lights on!
So, overall I spend $2 and about 30 minutes or so doing this. I think it came out great. Any questions, comments, ect. please feel free ask or PM me.

