OK, I just finished the full wink mirror install on my EG hatch and I took a few pics to help out the install. This is done on a 94 hatch. but I can imagine it's pretty universal across all Civics or cars in general with a few minor modifications.
First things first.
Get yourself a Rallye Wink Mirror. There are the 4 & 5 panel variants. I went with with 5 panel. I have read that the 4 panel is shorter.
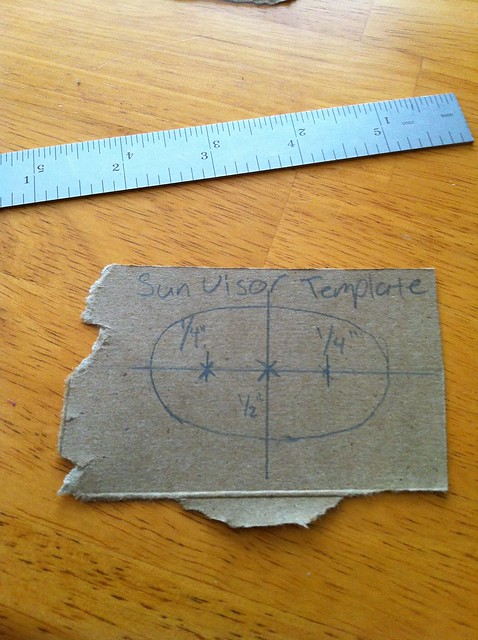
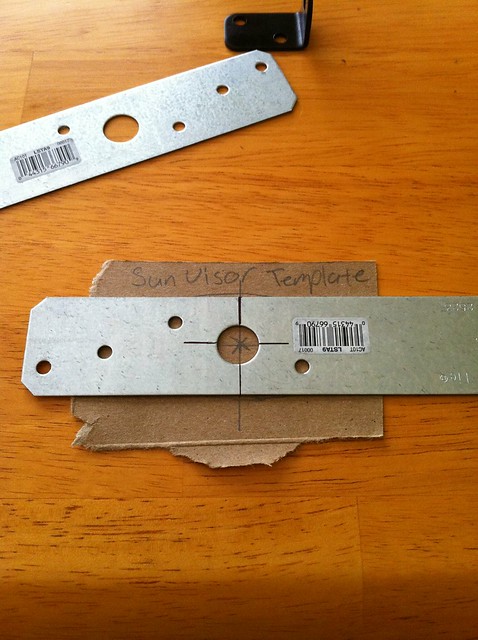
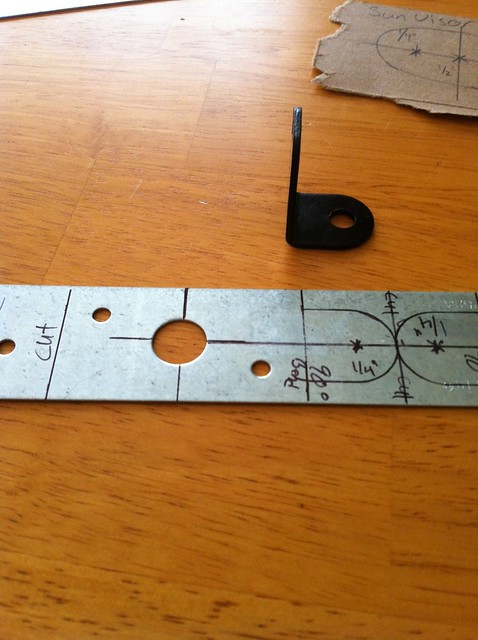
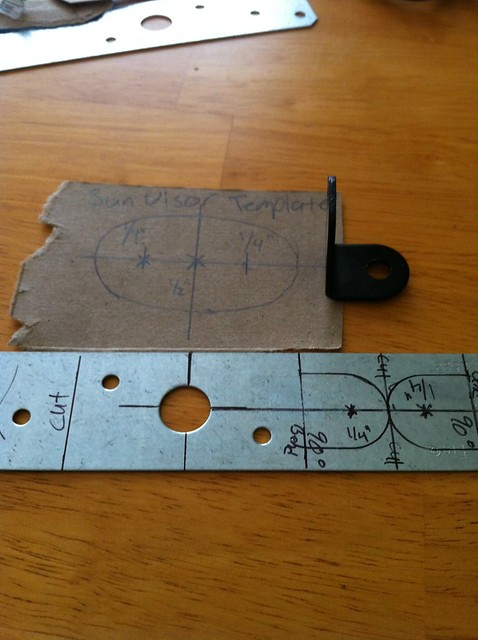
I took off my drivers side visor to make a template of the mounting base. I didn't take any measurements to aid in the template making, but it's fairly simple.

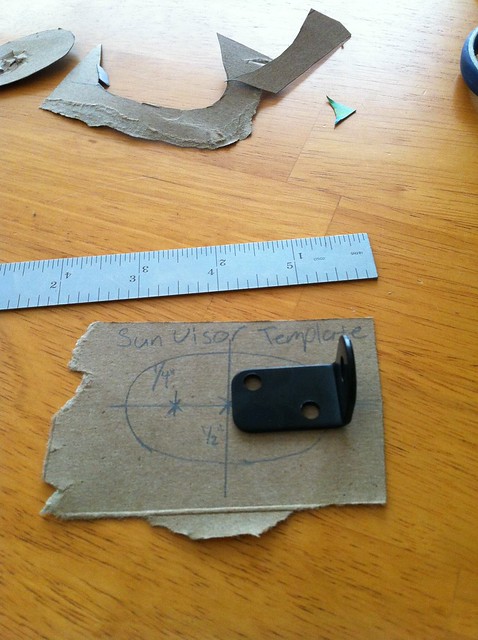
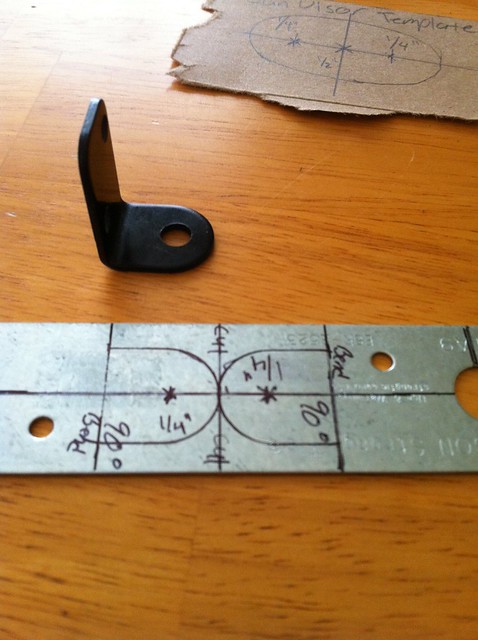
This is the 90 degree mounting bracket that comes with the kit, and how I would like my bracket to look like.

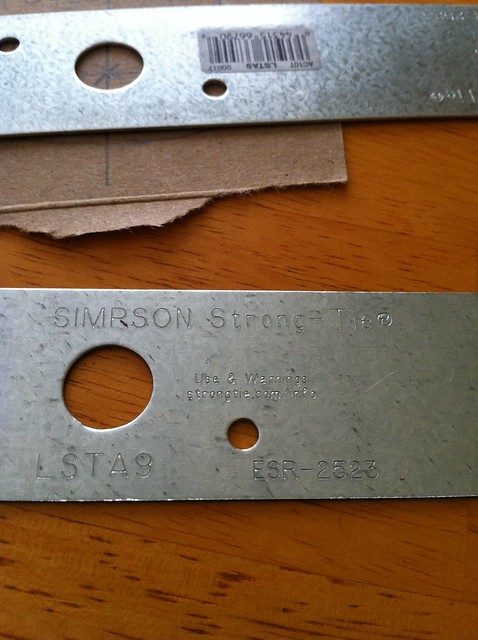
A trip to Lowe's and this is what I found to make the bracket. A wood bracket/tie. It was $0.88 so it doesn't break the bank.


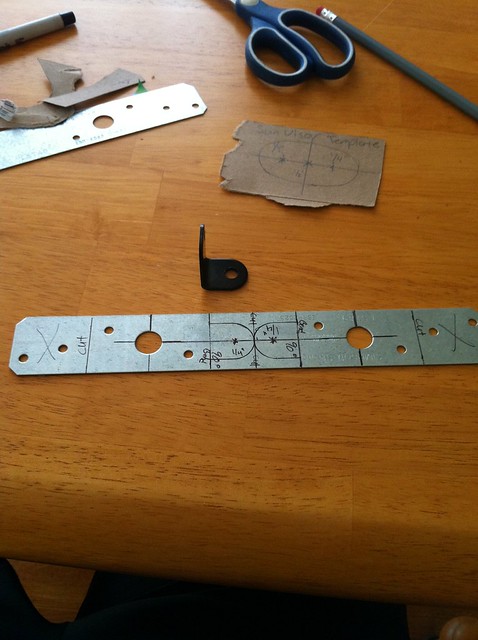
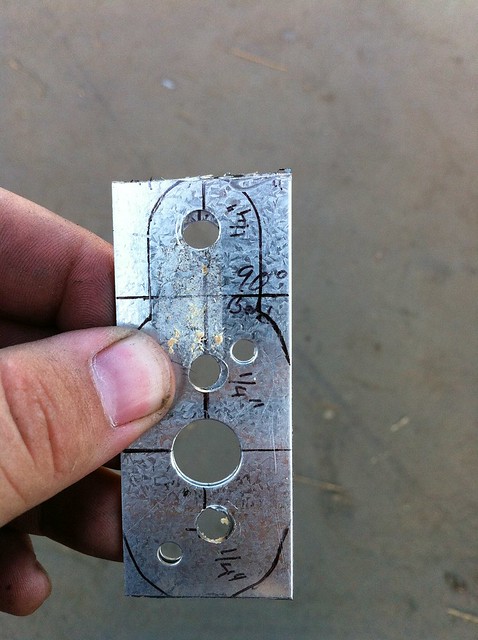
It's time to lay out my cut lines and drill marks.


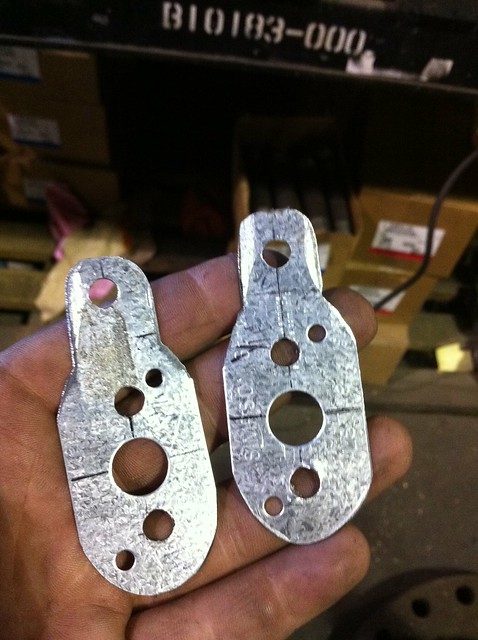
After some fancy Dremeling, drilling, and a few minutes on a belt sander, this is what comes out.


Here is a mock up of how it'll sit inside the visor mounting plate.

*NOTE: I ended up sanding down the bracket extensively after this shot because the bracket was too wide. I sanded it down to roughly the width of the original bracket.

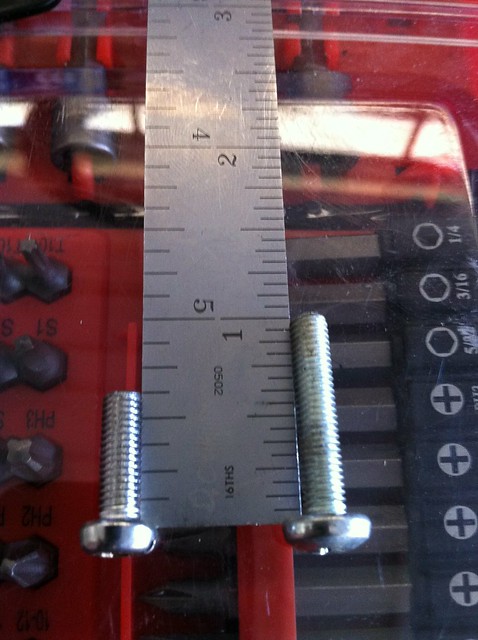
I'm not 100% sure you would need longer hardware, but I found some in the metric bolt drawer at work. WIN!
Here is a size comparison. I don't know the TPI on them, but if you took the stock bolt to a nut & bolt shop, they'll sort you out.

Here is what it looked like with the visor brackets and the hanger bracket that came with the kit.
Not so hot. The mirror sat crooked and too forward for my liking.


So, I had to make a elongated bracket to fix the problem.
Part 2: Hanger bracket
Now on to the hanger arm bracket.
I took a trip to Lowe"s and bought a 1 inch strip of aluminum bar stock 3 feet long
It was a slow night at work, so I made the bracket there and didn't get to take more detailed pics during fabrication


Essentially, I cut a 5" long piece and made "S" bends 1" in on both ends and then drilled a 1/4" hole on center of the ends to accept the mounting bolt. I then rounded the corners and ran the bracket over a wire wheel to scuff it up for paint. I don't have a exact degree of the bends but I set them first at 45 degrees but it was too steep, so I went to about 20-25 degrees.
I put it all together and here is the end result.


And here is proof that it does not affect visor use and is positioned in a good location.


Bonus: The mirror is is a great holder of sun shades, no need to pull the visors down.

The mirror doesn't even get in the way of my garage door opener clipped on my passenger visor.


the position is GREAT, tighten down the bolts and it doesn't move. I have yet to drive around with it since I've been busy with other stuff all day, but I will take a test drive to see if there is any excessive vibration or anything. If that is a go, I will take it apart again and paint the brackets with some self etching primer and satin black.
Vibration/flex issue fix:
First things first, get your needed supplies, some 1"x1" aluminum 90 degree angle stock and JB Weld (Lowe's)

I was in a rush and bought enough material for a 24" long mirror (even though its 34" ...DAMMIT!). So, instead of running the angle across the whole length of the mirror, I just centered them.
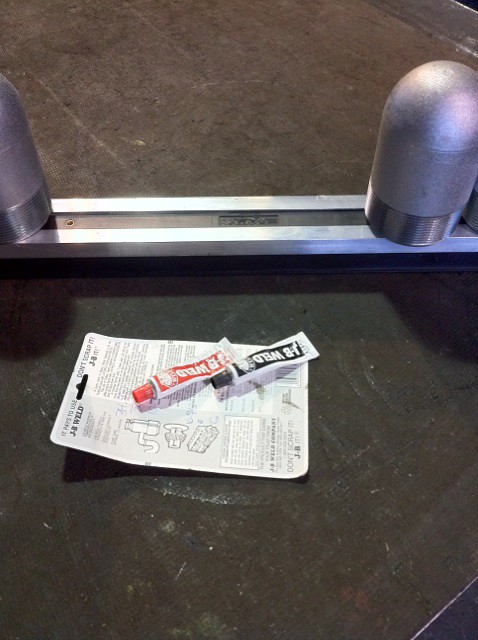
Mix some JB weld and join the aluminum stock and mirror.
I ran into a few 100+ degree days when I initially installed the mirror and within a week of 100+ degree heat it started to bow, so I had to use C-clamps and some additional weight to hold the angle stock on the wink and to true up the mirror.


While I was at it, I laid down some Rustoleum satin black to the brackets to make them look legitimate.

And to try and mask the ugliness of the aluminum bar stock protruding from the mirror, I sprayed down some Duplicolor High temp black Wrinkle on the outer edges of the mirror.


Here is where it gets sketchy cause I don't have pics of most of the process.
You now have a pretty rigid wink mirror but you can add stickers or some nice art work on the front fascia. What do? I had some vernier at work and cut it to the new dimensions (width of the angle). Scuffed/sanded the wood and threw on a few coats of clear on the wood to have a smooth finish.

I then used some Velcro to hold the vernier to the mirror.
Here is what the wood panel looks like after I added a few decals.

I got my decals from Hosue of Grafix and ihatestickers. I planned on picking up some from JDMdecals but the estore is not up right now.
First things first.
Get yourself a Rallye Wink Mirror. There are the 4 & 5 panel variants. I went with with 5 panel. I have read that the 4 panel is shorter.
I took off my drivers side visor to make a template of the mounting base. I didn't take any measurements to aid in the template making, but it's fairly simple.
This is the 90 degree mounting bracket that comes with the kit, and how I would like my bracket to look like.
A trip to Lowe's and this is what I found to make the bracket. A wood bracket/tie. It was $0.88 so it doesn't break the bank.
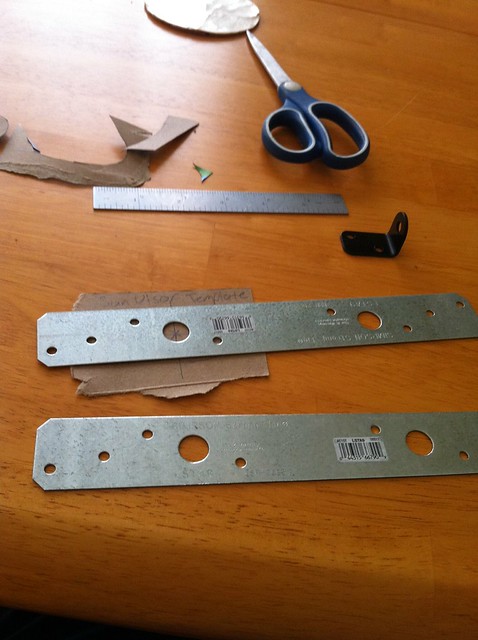
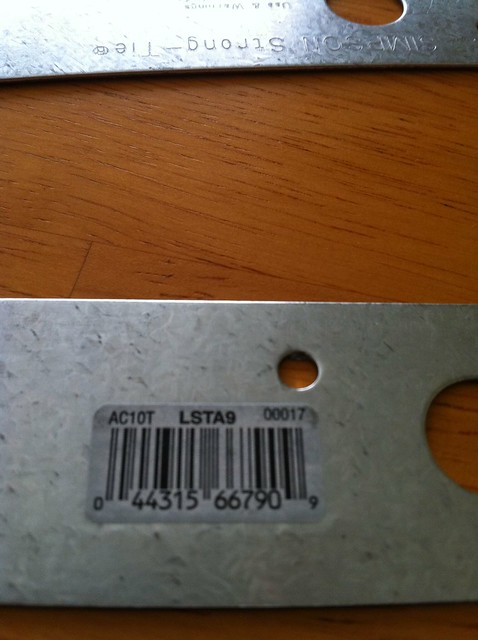
It's time to lay out my cut lines and drill marks.
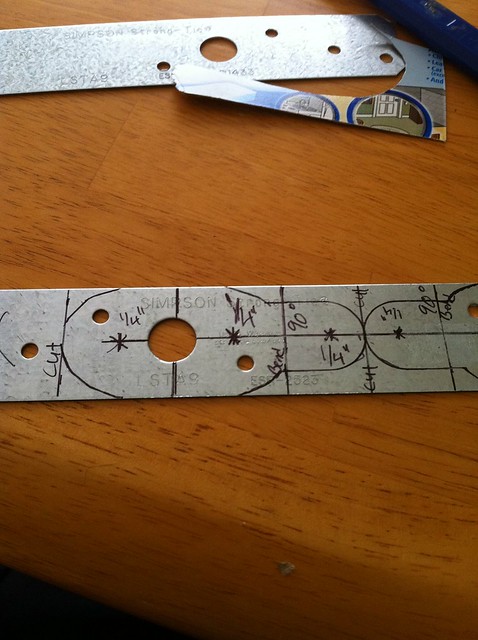
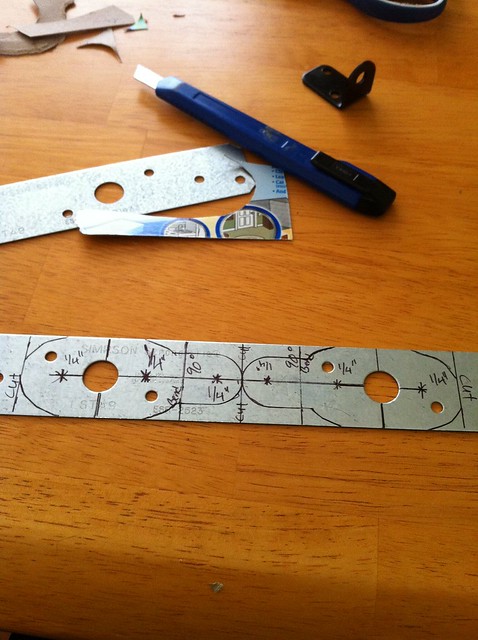
After some fancy Dremeling, drilling, and a few minutes on a belt sander, this is what comes out.
Here is a mock up of how it'll sit inside the visor mounting plate.
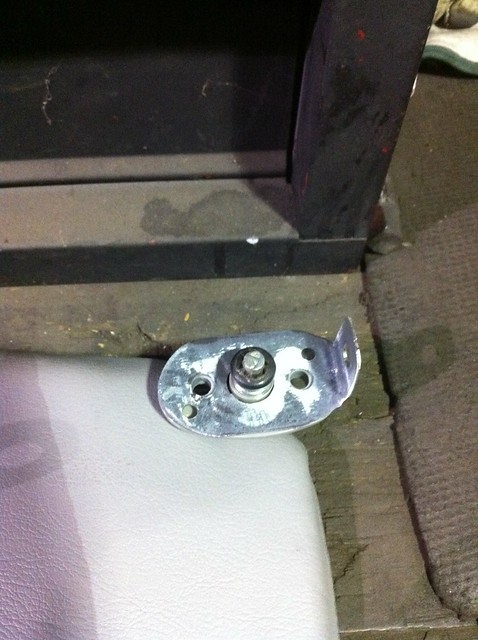
*NOTE: I ended up sanding down the bracket extensively after this shot because the bracket was too wide. I sanded it down to roughly the width of the original bracket.
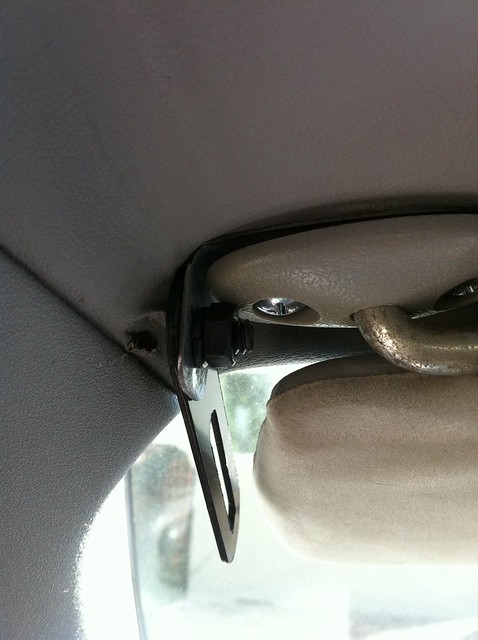
I'm not 100% sure you would need longer hardware, but I found some in the metric bolt drawer at work. WIN!
Here is a size comparison. I don't know the TPI on them, but if you took the stock bolt to a nut & bolt shop, they'll sort you out.
Here is what it looked like with the visor brackets and the hanger bracket that came with the kit.
Not so hot. The mirror sat crooked and too forward for my liking.
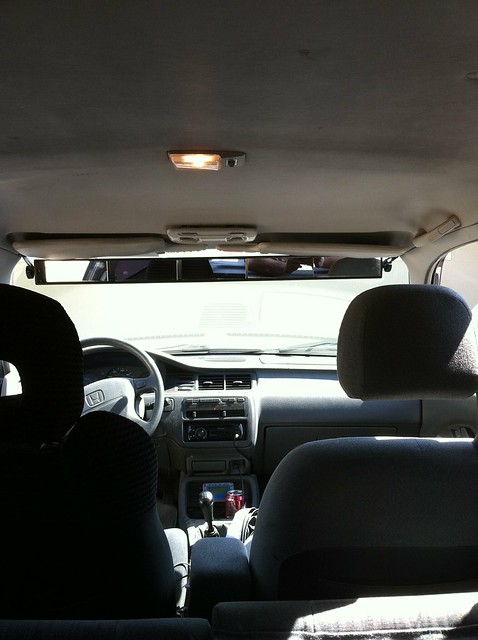
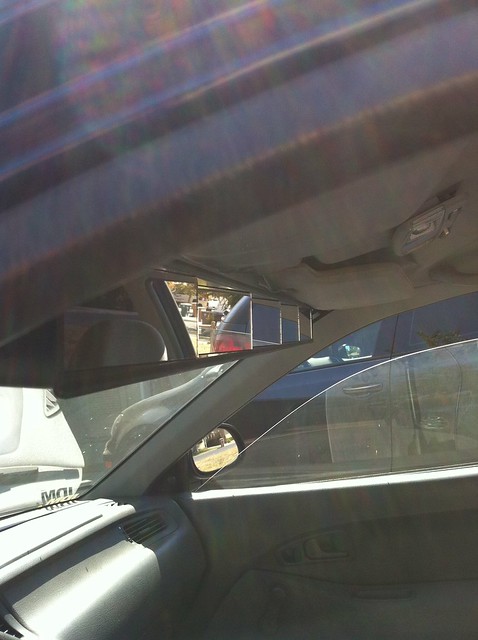
So, I had to make a elongated bracket to fix the problem.
Part 2: Hanger bracket
Now on to the hanger arm bracket.
I took a trip to Lowe"s and bought a 1 inch strip of aluminum bar stock 3 feet long
It was a slow night at work, so I made the bracket there and didn't get to take more detailed pics during fabrication
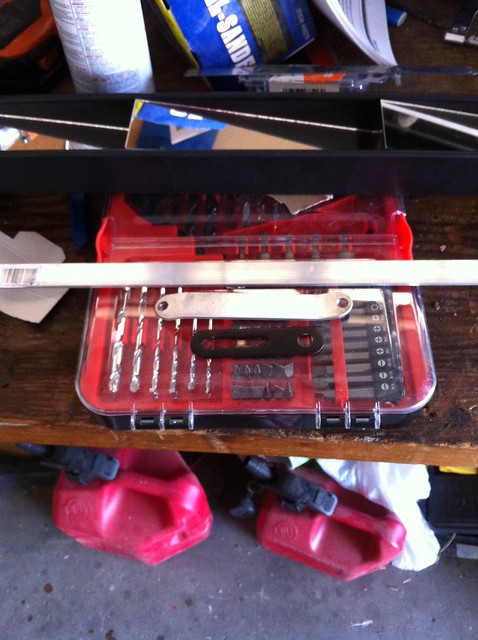

Essentially, I cut a 5" long piece and made "S" bends 1" in on both ends and then drilled a 1/4" hole on center of the ends to accept the mounting bolt. I then rounded the corners and ran the bracket over a wire wheel to scuff it up for paint. I don't have a exact degree of the bends but I set them first at 45 degrees but it was too steep, so I went to about 20-25 degrees.
I put it all together and here is the end result.
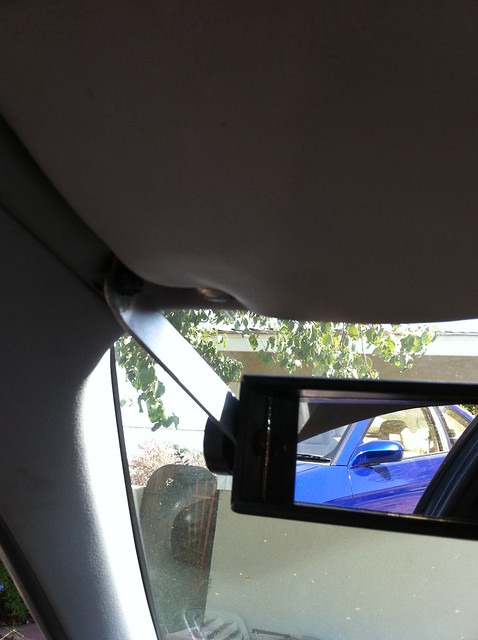
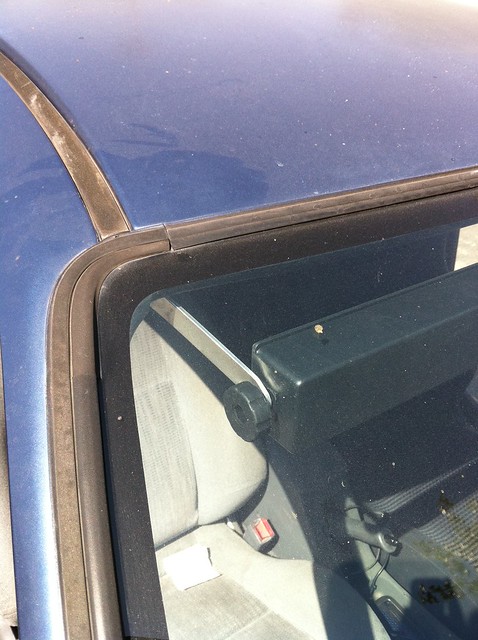
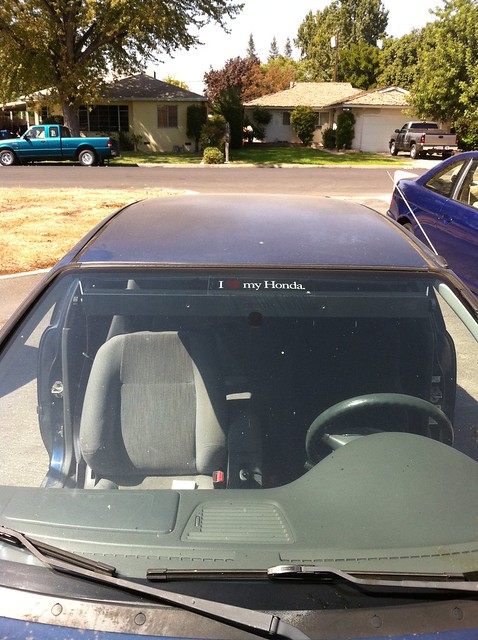
And here is proof that it does not affect visor use and is positioned in a good location.
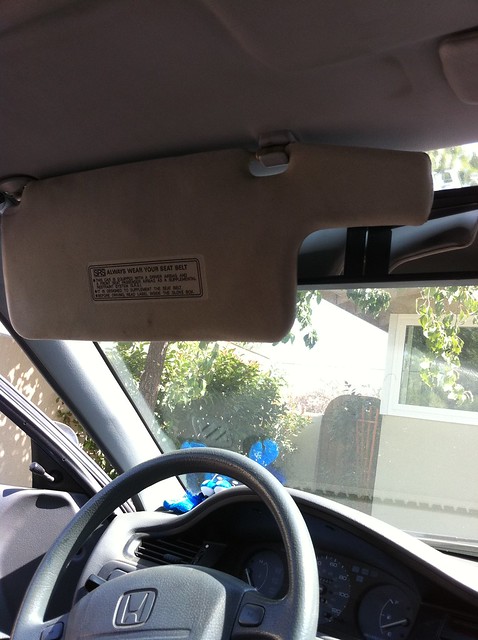
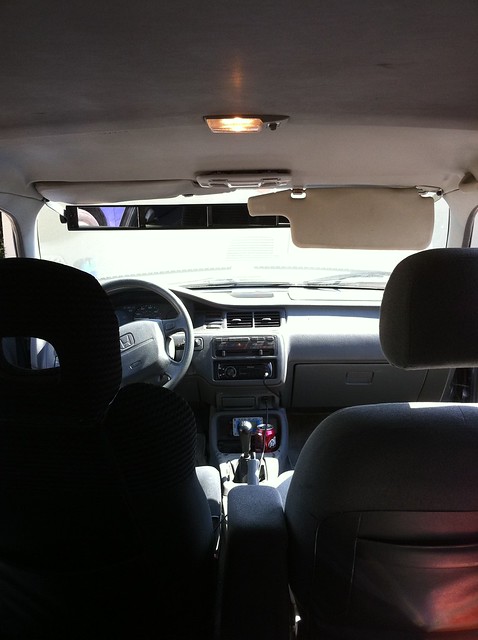
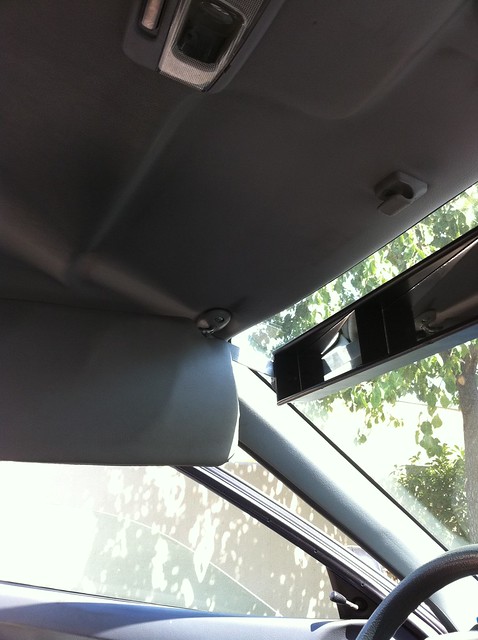
Bonus: The mirror is is a great holder of sun shades, no need to pull the visors down.
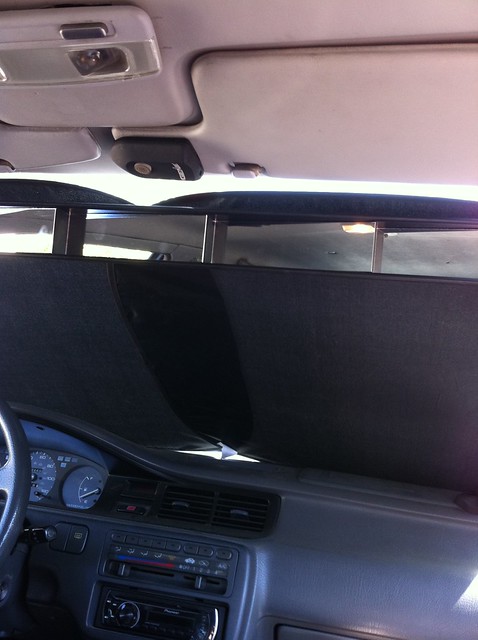
The mirror doesn't even get in the way of my garage door opener clipped on my passenger visor.
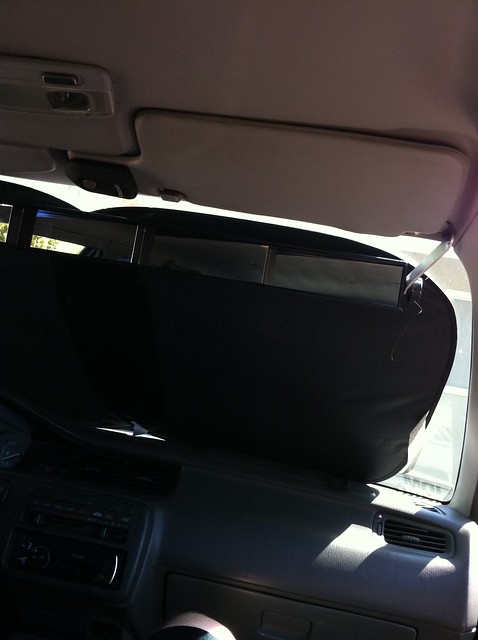
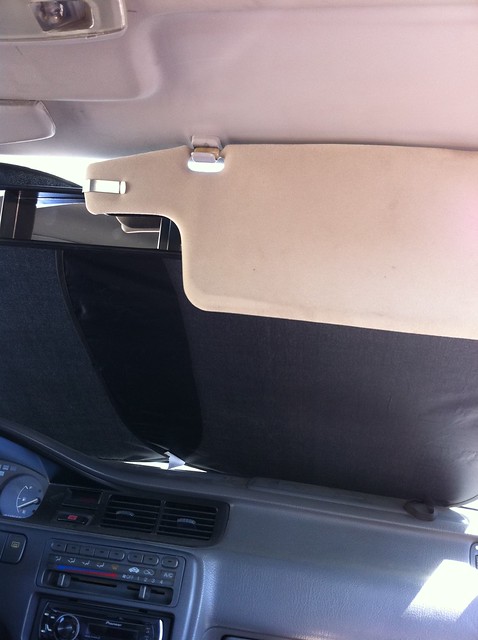
the position is GREAT, tighten down the bolts and it doesn't move. I have yet to drive around with it since I've been busy with other stuff all day, but I will take a test drive to see if there is any excessive vibration or anything. If that is a go, I will take it apart again and paint the brackets with some self etching primer and satin black.
Vibration/flex issue fix:
First things first, get your needed supplies, some 1"x1" aluminum 90 degree angle stock and JB Weld (Lowe's)
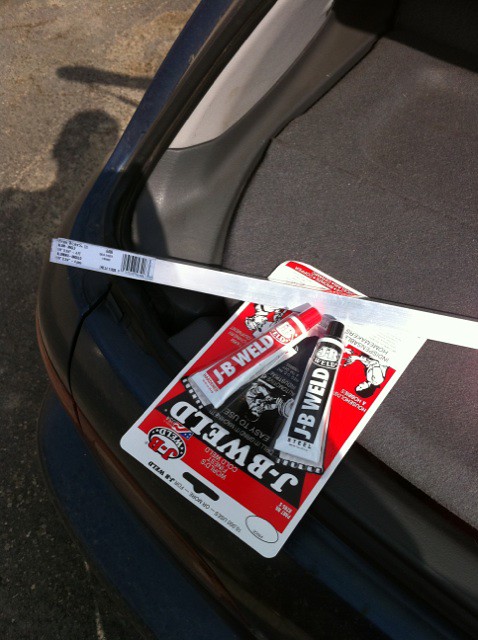
I was in a rush and bought enough material for a 24" long mirror (even though its 34" ...DAMMIT!). So, instead of running the angle across the whole length of the mirror, I just centered them.
Mix some JB weld and join the aluminum stock and mirror.
I ran into a few 100+ degree days when I initially installed the mirror and within a week of 100+ degree heat it started to bow, so I had to use C-clamps and some additional weight to hold the angle stock on the wink and to true up the mirror.
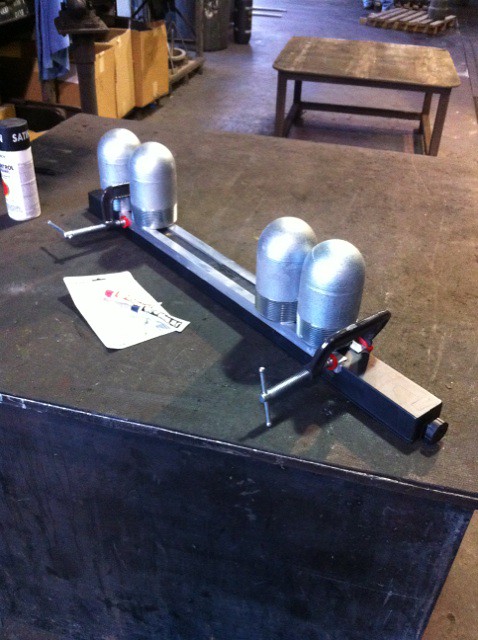
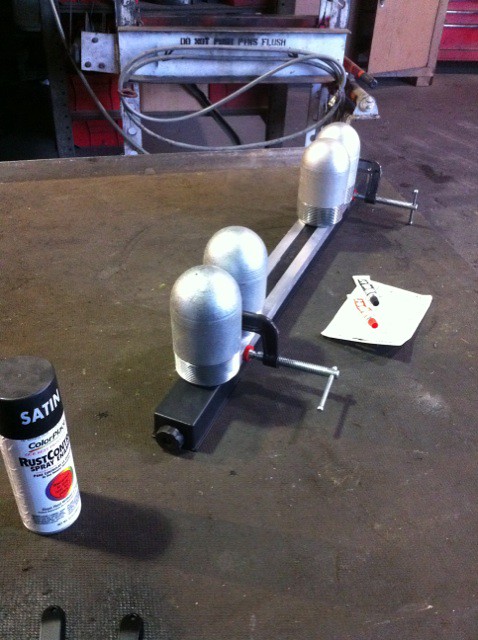
While I was at it, I laid down some Rustoleum satin black to the brackets to make them look legitimate.
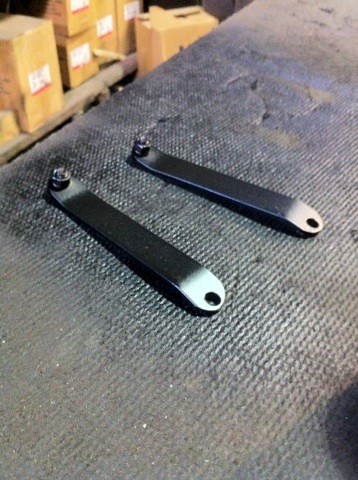
And to try and mask the ugliness of the aluminum bar stock protruding from the mirror, I sprayed down some Duplicolor High temp black Wrinkle on the outer edges of the mirror.
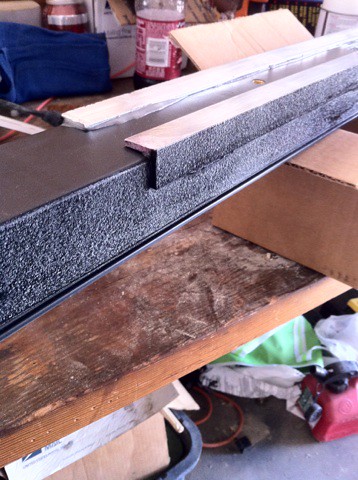
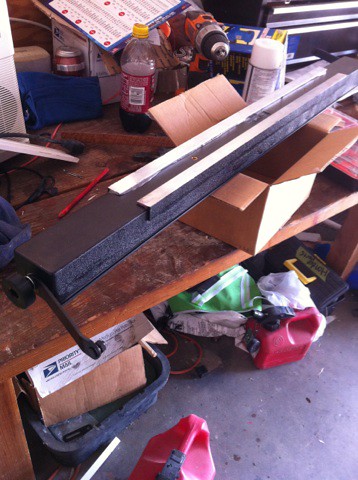
Here is where it gets sketchy cause I don't have pics of most of the process.
You now have a pretty rigid wink mirror but you can add stickers or some nice art work on the front fascia. What do? I had some vernier at work and cut it to the new dimensions (width of the angle). Scuffed/sanded the wood and threw on a few coats of clear on the wood to have a smooth finish.
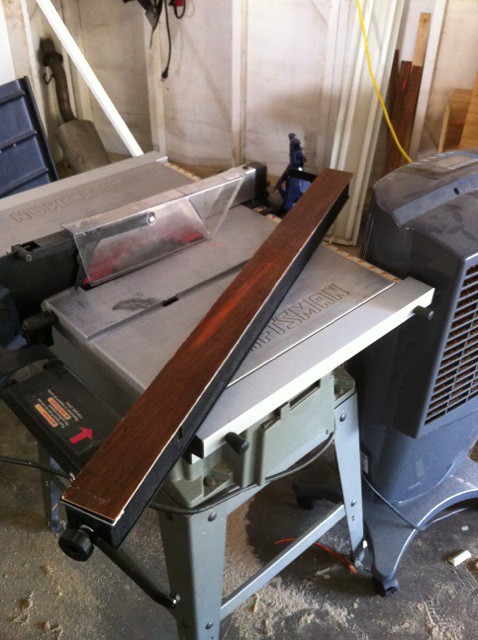
I then used some Velcro to hold the vernier to the mirror.
Here is what the wood panel looks like after I added a few decals.
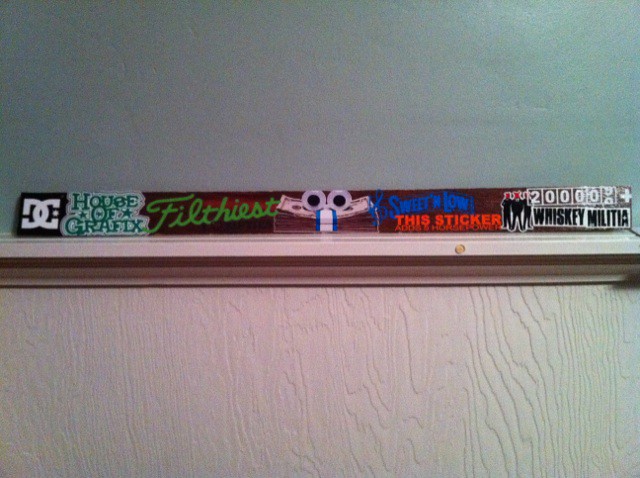
I got my decals from Hosue of Grafix and ihatestickers. I planned on picking up some from JDMdecals but the estore is not up right now.
Last edited:
