- Home
- Forums
- Honda Civic Gen Tech and Builds / Show Offs
- 6th Generation Honda Civic (1996-2000)
- 6th Gen Honda Civic Builds / Show Offs
1997 DX hatch
- Thread starter ReedMann
- Start date
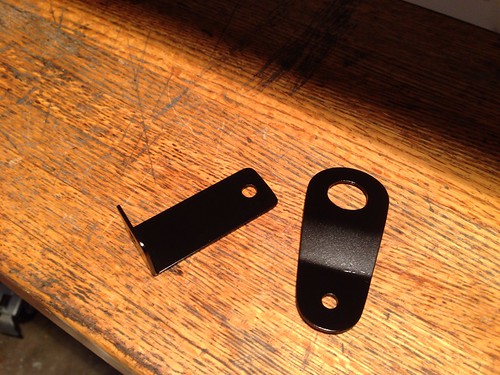
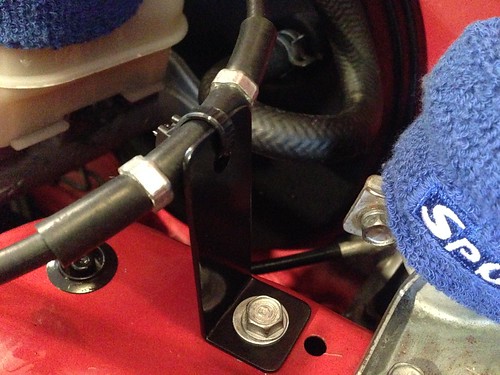
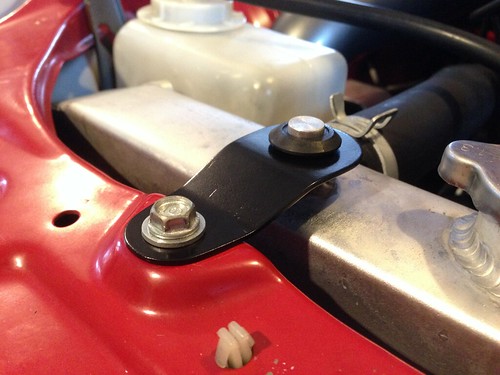
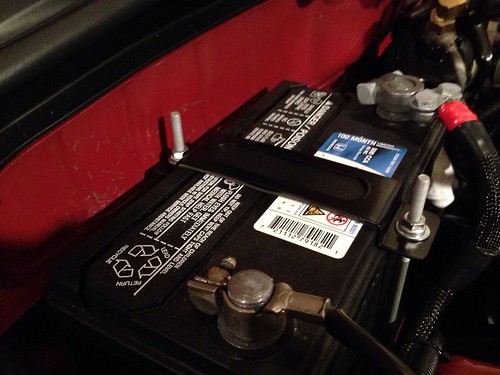
Alright here we go. First, I wasn't too happy with the rad stay and battery tie down I made really quickly at the end of summer so I decided to make some new ones. I also made a bracket to hold the throttle cable since my stock ones didn't work with the shorter cable.


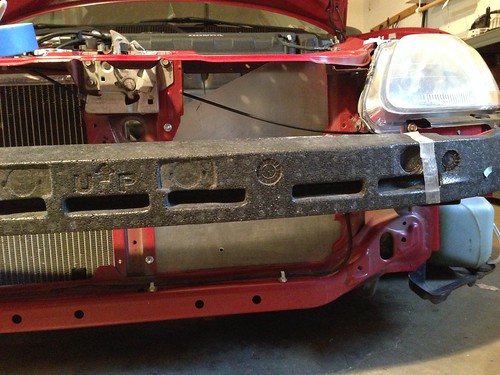
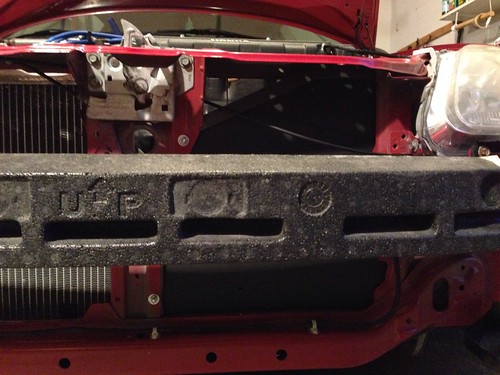
Next, I started on a project I have been planning for a long time, but somehow never got around to it. As you can see below, when the air conditioning is removed, a massive empty space is left in the front of the bay.

This doesn't necessarily hurt the cooling ability of the radiator, but it certainly doesn't help it. Air follows the path of least resistance so when it has the choice of flowing through a radiator or an empty space it will choose the empty space. For this reason, I decided to make a panel to close the gap. Start with a cardboard template.

The original plan was to make it out of aluminum, but aluminum (or any other metal) would be more expensive and unnecessarily heavy. I decided on plastic. I found a sheet of acrylic at Lowe's for $8 that I thought would work great. For any of you planning to do this, I do not recommend this material. It is really easy to crack it when working with power tools. If I were doing this again, I would look for a sheet of abs plastic.

Trace the template onto the plastic.

Not shown is the cutting process (dremel) and the fitting process (files), but here is a rough mockup when I almost had the final shape completed.

See the crack? That's what I was alluding to earlier. It cracked when I was drilling a hole (hence the angled upper side rather than the original square side the template had.

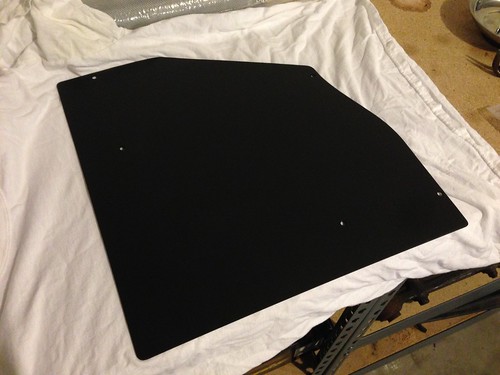
After I had the final shape, I gave it a coat of flat black paint.

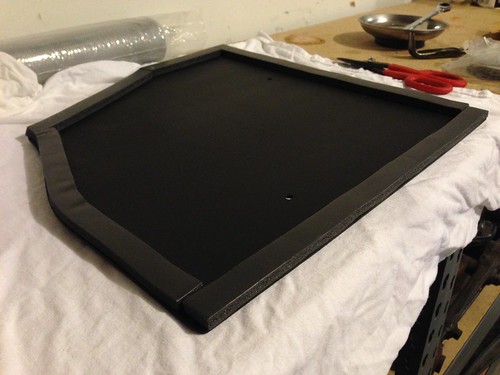
Then I applied some adhesive lined foam weather stripping to the outside edge to maintain a nice seal and prevent it from rattling against the core support.

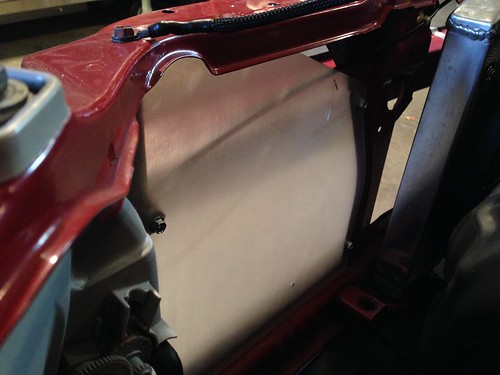
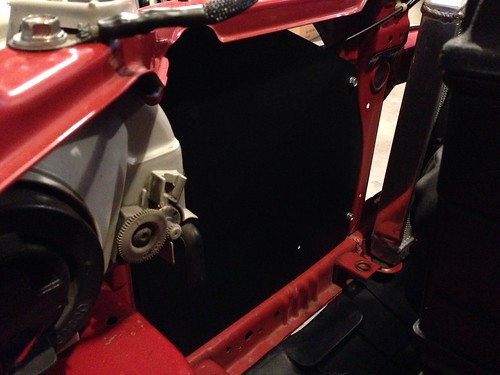
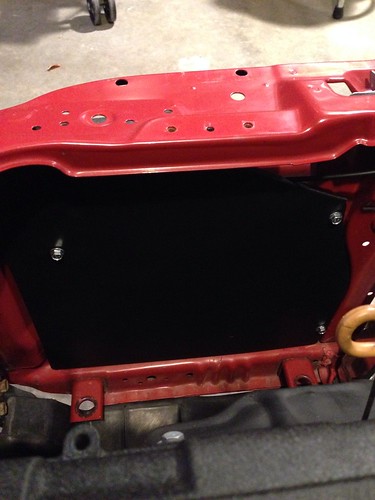
Final installed pics! I'm pretty happy with how it turned out. To install it, I used M6x1.0 bolts with washers and nylon lock nuts. I used the lock nuts because I did not want to have to tighten them the whole way when installing for two reasons. One, I was worried about cracking the plastic. Two, if I had tightened them the whole way, the plastic would warp and not sit flush due to the foam around the edge.


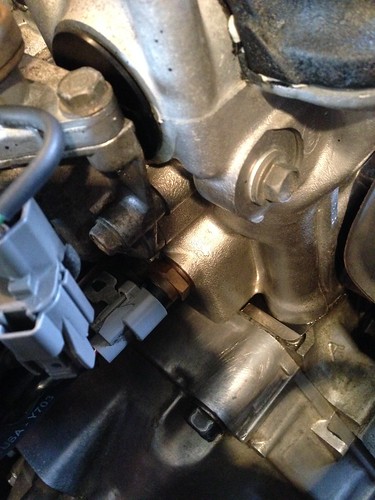
Last thing I did was some basic maintenance. I replaced a leaky cam seal. Check out how clean it is under that VC!


Then I replaced the distributor cap, rotor, and plug wires. New parts. OEM Honda, of course, and NGK wires.

I hate Honda's design for the set screw on the rotor. I ended up having to pull the distributor off and hack off the old rotor just to get to the screw with vise grips.

I replaced it with a bolt for easier removal in the future.

Everything installed.

Some more pics of the bay. Yes or no on the Type One sticker? I thought the bay could use some spicing up.


I took this picture right after crossing 170k. Notice the snow? This thing is daily driven year round.

I was able to fix the idle (for the most part). I cleaned the IACV really well. Hopefully this fix will last, but I am doubtful.
I also apologize for the out of focus pictures. I was having trouble getting my phone to focus and I didn't have the patience to mess with it since I was working in my freezing garage.
Next, I started on a project I have been planning for a long time, but somehow never got around to it. As you can see below, when the air conditioning is removed, a massive empty space is left in the front of the bay.
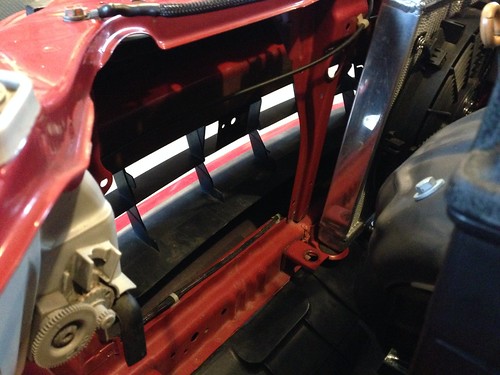
This doesn't necessarily hurt the cooling ability of the radiator, but it certainly doesn't help it. Air follows the path of least resistance so when it has the choice of flowing through a radiator or an empty space it will choose the empty space. For this reason, I decided to make a panel to close the gap. Start with a cardboard template.
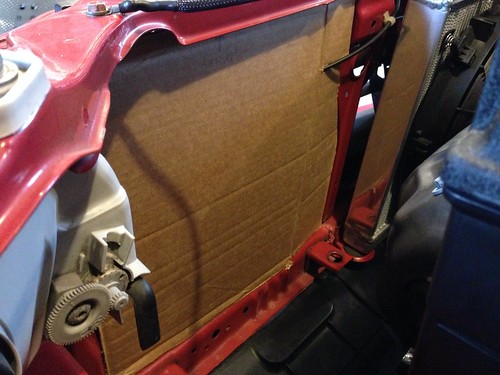
The original plan was to make it out of aluminum, but aluminum (or any other metal) would be more expensive and unnecessarily heavy. I decided on plastic. I found a sheet of acrylic at Lowe's for $8 that I thought would work great. For any of you planning to do this, I do not recommend this material. It is really easy to crack it when working with power tools. If I were doing this again, I would look for a sheet of abs plastic.
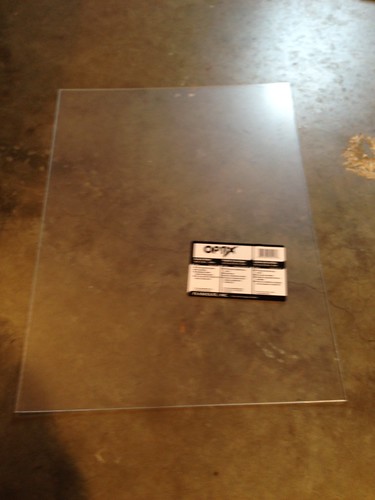
Trace the template onto the plastic.
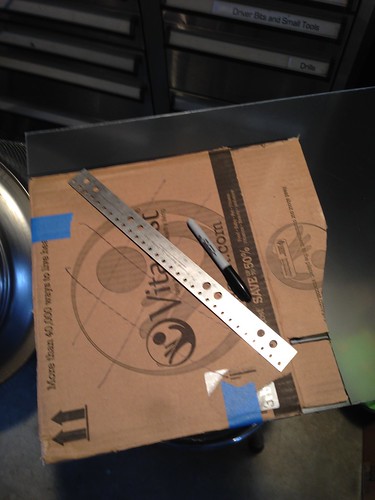
Not shown is the cutting process (dremel) and the fitting process (files), but here is a rough mockup when I almost had the final shape completed.
See the crack? That's what I was alluding to earlier. It cracked when I was drilling a hole (hence the angled upper side rather than the original square side the template had.
After I had the final shape, I gave it a coat of flat black paint.
Then I applied some adhesive lined foam weather stripping to the outside edge to maintain a nice seal and prevent it from rattling against the core support.
Final installed pics! I'm pretty happy with how it turned out. To install it, I used M6x1.0 bolts with washers and nylon lock nuts. I used the lock nuts because I did not want to have to tighten them the whole way when installing for two reasons. One, I was worried about cracking the plastic. Two, if I had tightened them the whole way, the plastic would warp and not sit flush due to the foam around the edge.
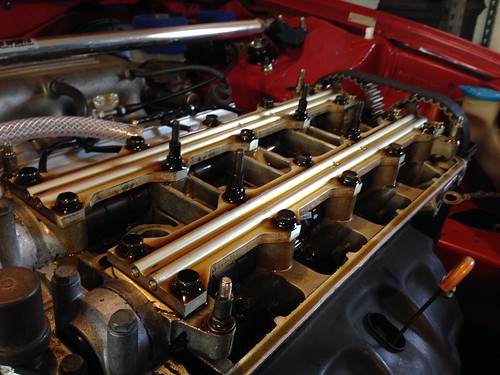
Last thing I did was some basic maintenance. I replaced a leaky cam seal. Check out how clean it is under that VC!

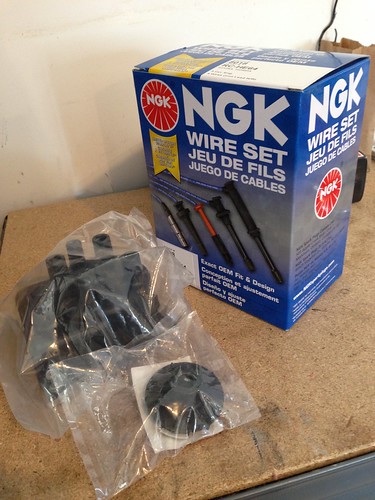
Then I replaced the distributor cap, rotor, and plug wires. New parts. OEM Honda, of course, and NGK wires.
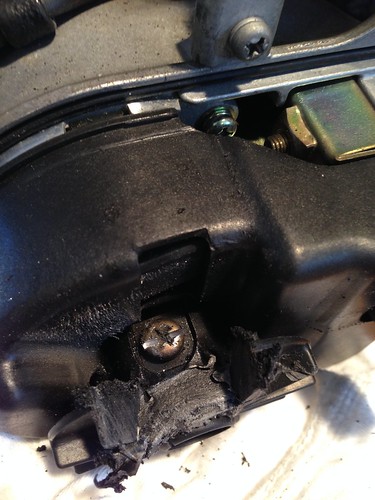
I hate Honda's design for the set screw on the rotor. I ended up having to pull the distributor off and hack off the old rotor just to get to the screw with vise grips.
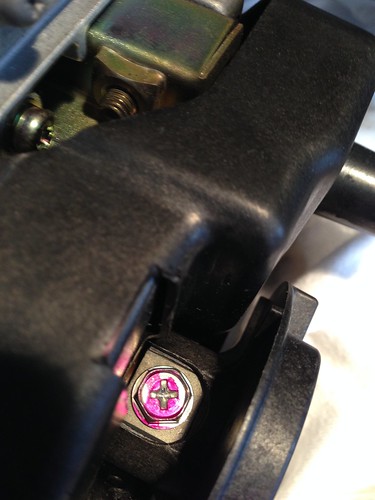
I replaced it with a bolt for easier removal in the future.
Everything installed.

Some more pics of the bay. Yes or no on the Type One sticker? I thought the bay could use some spicing up.

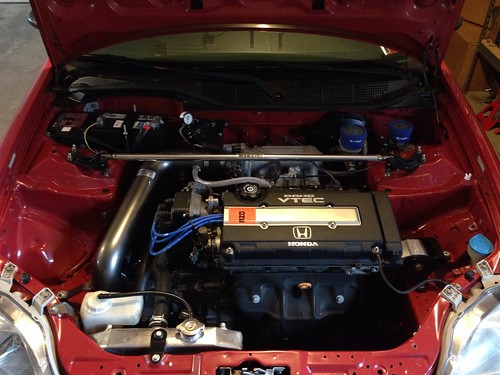
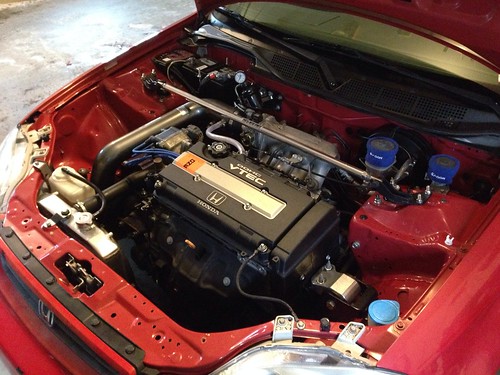
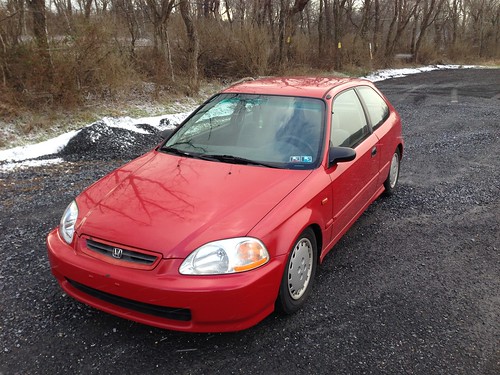
I took this picture right after crossing 170k. Notice the snow? This thing is daily driven year round.
I was able to fix the idle (for the most part). I cleaned the IACV really well. Hopefully this fix will last, but I am doubtful.
I also apologize for the out of focus pictures. I was having trouble getting my phone to focus and I didn't have the patience to mess with it since I was working in my freezing garage.
Not feeling the sticker but everything looks good.
Y not upgrade to a larger radiator?
Y not upgrade to a larger radiator?
Thanks CHILD!looking good. The type one sticker looks good. You mod the car like they would anyway
I'm still on the fence about the sticker myself. I put it on mainly out of boredom.Not feeling the sticker but everything looks good.
Y not upgrade to a larger radiator?
A larger rad would be nice, but it isn't really necessary since the half rad does the job just fine. Plus a larger rad means $$ which I don't have lol.
Looks great man. I think that the type one sticker really brought out the engine bay.
Looks good! Gonna do anything to the exterior?
Thanks guys. I don't have any major plans for the exterior anytime in the near future. The car will basically stay like this for the next 2 years until I'm done with school.Very very tidy my friend!
I like how you put zip ties on the spark plug wires at the distributor. I'm going to have to copy you on that. Yes, that bolt that holds the distributor rotor is a PITB to remove. The flange hex head bolt you put on there is perfect. Nice upgrades man!
I just like the way the bigger radiator looks in the bay personally.Thanks CHILD!
I'm still on the fence about the sticker myself. I put it on mainly out of boredom.
A larger rad would be nice, but it isn't really necessary since the half rad does the job just fine. Plus a larger rad means $$ which I don't have lol.
Thanks guys. I don't have any major plans for the exterior anytime in the near future. The car will basically stay like this for the next 2 years until I'm done with school.
I know how the no money thing goes. U will get there someday! Looks great for now!
Thanks Hecz!
I like how you put zip ties on the spark plug wires at the distributor. I'm going to have to copy you on that. Yes, that bolt that holds the distributor rotor is a PITB to remove. The flange hex head bolt you put on there is perfect. Nice upgrades man!
I put the zip ties there mainly for piece of mind. I'm not worried about them coming off. My intent was to close the boot and provide a water-tight seal.Are zip ties just some peace of mind cause I doubt they'd pop off lol.
Sent from my ADR6350 using Tapatalk
Gotcha. Yeah, I'd have to agree that a larger rad looks much better. I've got big plans for this car someday lol.I just like the way the bigger radiator looks in the bay personally.
I know how the no money thing goes. U will get there someday! Looks great for now!
Haha would be nice, but honestly, the B16 is enough for me. I'm pretty happy with the power it currently has.After school when you get a baller job, you can k swap yours haha
Thanks for sharing. I did not know this. Luckily I had a bolt with the right pitch laying around, but I'l keep this in mind for the future.You might know this already but I thought it was worth noting, some aftermarket replacement dizzy rotors come with the bolt instead of a screw. Because yes its a big pain.
i rarely post now but i had to requote this picture. this single picture has reinspired me to keep my eye on the prize, thank you.
Thanks man! I appreciate it. I'm glad this picture could give you some inspiration.i rarely post now but i had to requote this picture. this single picture has reinspired me to keep my eye on the prize, thank you.
Well this week is my spring break and I was really looking forward to working on my car, but as they often do, plans changed.
About 70 miles into my 300 mile drive home on Friday, I lost all electrical power. Luckily I was able to get to a gas station off the next exit. I had some tools with me and luckily I had the stuff for my electrical engineering class with me too which included my multimeter. I also have a PDF of the factory service manual saved on my computer so I was able to do some roadside trouble shooting. I hooked the multimeter up to the battery and turned the car on. The battery was at 11.5V which I expected because I was basically running on the battery when I was getting to the gas station. It stayed at 11.5 and didn't increase. Strike 1. Next I turned on the lights and could basically watch the battery voltage drop. When I turned the lights off a few seconds later, the voltage was down to 10.1V. Strike 2. I checked the alternator fuse under the dash and it was not blown. Strike 3. All signs pointed to alternator failure. I called some buddies who hadn't left school yet and they came to get me. Luckily one of them has AAA so I was able to get a free tow back to school and another friend's house that has a garage. We pulled the alternator in no time, but unfortunately no local parts store had or could get an alternator until at least today. I caught a ride home and left my car at school. So this week I'll get an alternator and take it back with me to get the car running again. I brought the old alternator home with me and took it to the local parts store to have it bench tested and it failed. That's what I wanted because now I know for sure that it is the culprit.
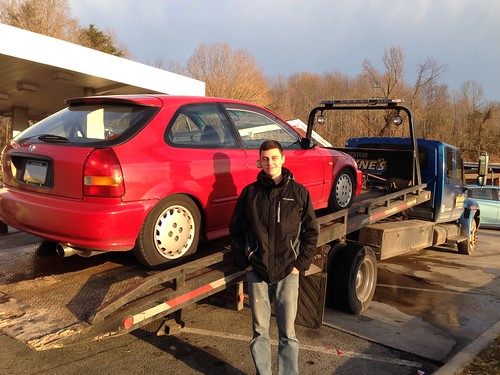
First time getting a tow!

 looking sharp there.