It's the principle. Kill kill haha. I've thought of ways to booby trap my car to cause pain in attempts like that. Sucks to think that way I just can't stand lazy people who steal for a quick buckCan't say the thought hasn't crossed my mind lol but a few grand worth of parts lost isn't worth all that haha
Sent from my iPhone using Tapatalk
- Home
- Forums
- Honda Civic Gen Tech and Builds / Show Offs
- 6th Generation Honda Civic (1996-2000)
- 6th Gen Honda Civic Builds / Show Offs
Blandsarcasm's 98 ej6 daily
- Thread starter blandsarcasm
- Start date
Thanks man I appreciate it. It was depressing for sure but I'm trying to stay positive and keep pushing forward. I'm still having fun tinkering with the car. I just finished ripping out the trailing arms in favor of a pair of Integra ones I picked up a little bit ago. Ran into a few snags and had to do a good bit of cutting to get the compensator arms free but they're all bolted up and ready to be bled. I'll get around to posting pics of the carnage soonCrazy thread, man. It hurt to see the theft right after you did so much workI'm glad you bounced back though. Definitely looking forward to where this goes from here.
Sent from my iPhone using Tapatalk
after a little struggling and cutting i finally got the integra trailing arms bolted up with new adjustable toe arms. the factory arms were of course seized inside the bushing and i was forced to hack off the bolt that goes through the arm and the chassis. the bolt would turn but the rubber just disintegrated and the inner bushing sleeve just rotated with it. because of this, the sliding nut thats hidden inside the chassis ended up popping out of track forcing me to cut a window to access and feed a new bolt through.
 IMG_4695 by evan mclaren, on Flickr
 IMG_4718 by evan mclaren, on Flickr
 IMG_4720 by evan mclaren, on Flickr
looks like a complete hack job mess but it works. i plan on just spraying the entire area with some undercoating and not even bother with welding the hole shut for easier access in the future. the other complication i ran into was getting enough slack with the integra parking brake cables to reach the handle as theyre about an inch or so too short. obviously em1 cables are a better option but i managed to get these to work and since i rarely use the parking brake anyway i said forget spending the extra money. the solution to this was to leave the bolt that mounts each cable underneath the car closest to the handle unbolted. the one on the driver side wont line up as it is so i just left the passenger one out as well and this gave me just enough slack to pull the cables forward to the handle. i also had trouble reassembling the weird nut and spring adjuster for the handle so i ghetto rigged that as well. seriously the name of the game with this whole project is just that.. ghetto rig. oh well it gives me stuff to go back and correct in the future.
 IMG_4721 (1) by evan mclaren, on Flickr
regardless, everything is back together and in working order. i was able to get it up onto the alignment rack and i have to say the adjustable toe and camber arms make setting the rear a breeze. i was able to loosen the jam nuts and just turn the adjusters by hand and get everything right were i wanted. that combined with the new tie rods up front make me a happy camper when aligning this car.
oh yeah also forgot to mention that one of the bushings in the trailing arms was brand new.. the other destroyed haha. i managed to get it replaced with only a mini sledge and a little shaving of the outside of the bushing sleeve.
 IMG_4708 by evan mclaren, on Flickr
 trailingbushing by evan mclaren, on Flickr
rotors and pads are pretty crusty and need to be replaced but ill get to that in a week or two. for now they server their purpose even though the look like poop.
 IMG_6859 by evan mclaren, on Flickr
 IMG_6861 by evan mclaren, on Flickr
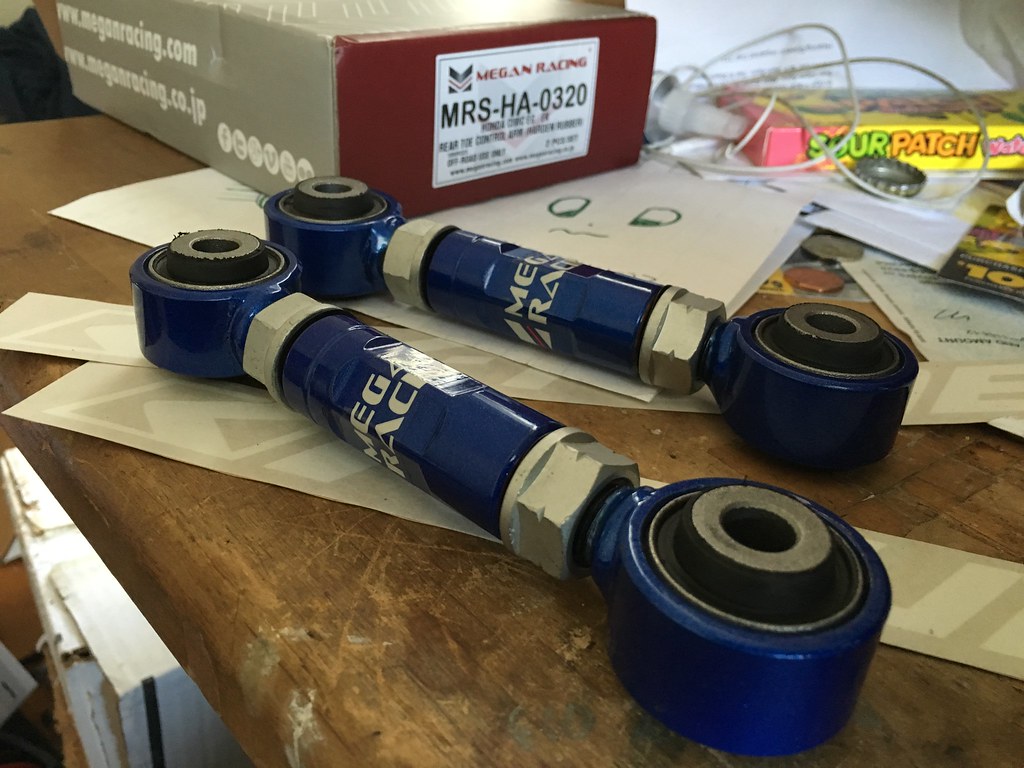 IMG_4695 by evan mclaren, on Flickr
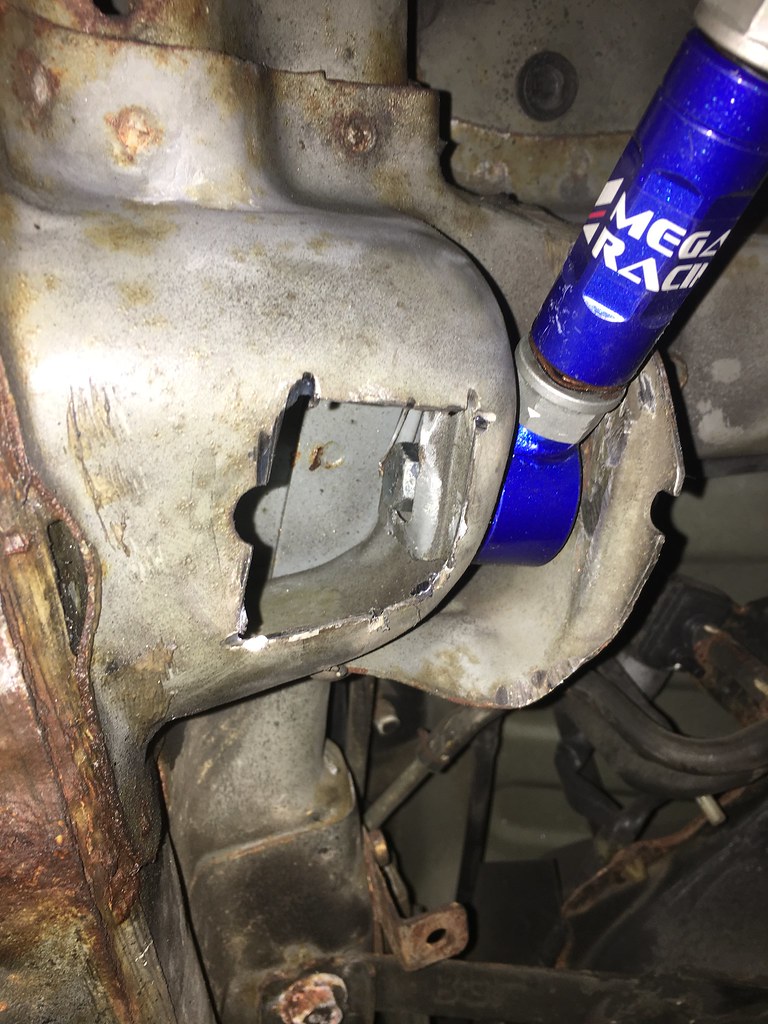 IMG_4718 by evan mclaren, on Flickr
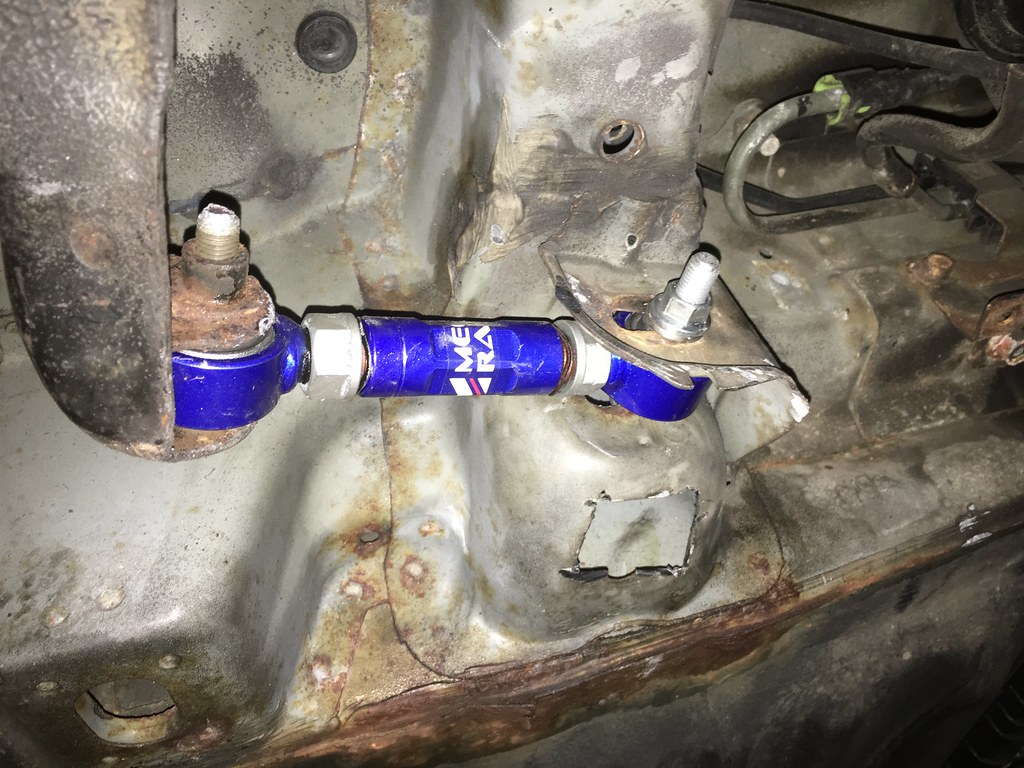 IMG_4720 by evan mclaren, on Flickr
looks like a complete hack job mess but it works. i plan on just spraying the entire area with some undercoating and not even bother with welding the hole shut for easier access in the future. the other complication i ran into was getting enough slack with the integra parking brake cables to reach the handle as theyre about an inch or so too short. obviously em1 cables are a better option but i managed to get these to work and since i rarely use the parking brake anyway i said forget spending the extra money. the solution to this was to leave the bolt that mounts each cable underneath the car closest to the handle unbolted. the one on the driver side wont line up as it is so i just left the passenger one out as well and this gave me just enough slack to pull the cables forward to the handle. i also had trouble reassembling the weird nut and spring adjuster for the handle so i ghetto rigged that as well. seriously the name of the game with this whole project is just that.. ghetto rig. oh well it gives me stuff to go back and correct in the future.
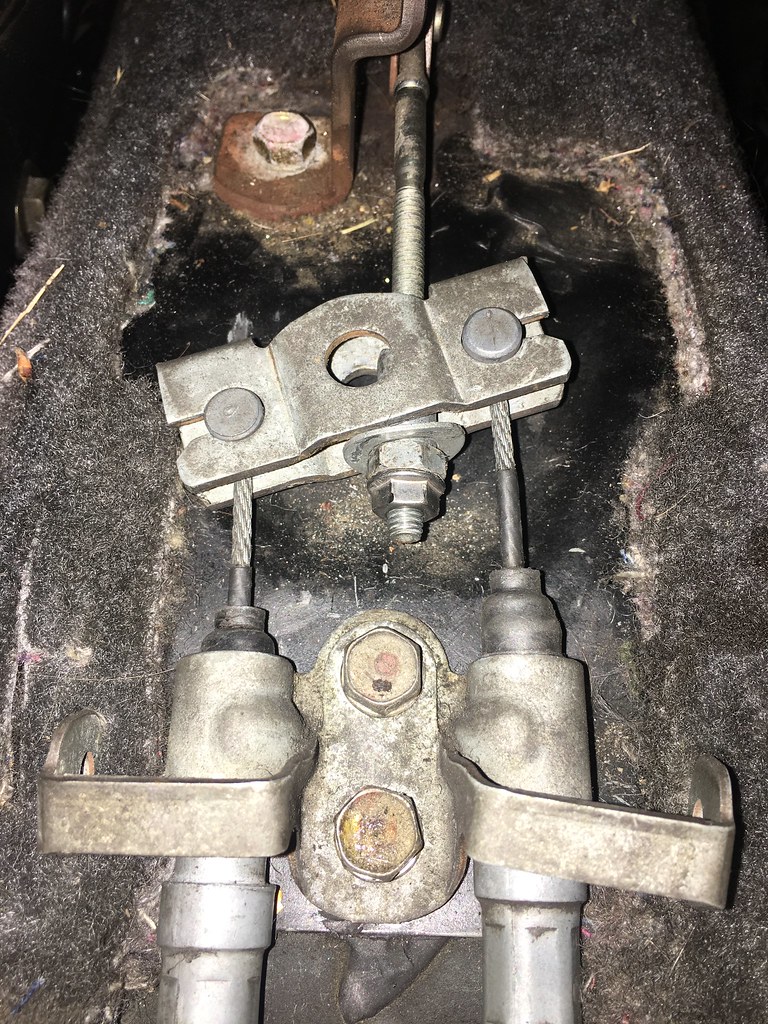 IMG_4721 (1) by evan mclaren, on Flickr
regardless, everything is back together and in working order. i was able to get it up onto the alignment rack and i have to say the adjustable toe and camber arms make setting the rear a breeze. i was able to loosen the jam nuts and just turn the adjusters by hand and get everything right were i wanted. that combined with the new tie rods up front make me a happy camper when aligning this car.
oh yeah also forgot to mention that one of the bushings in the trailing arms was brand new.. the other destroyed haha. i managed to get it replaced with only a mini sledge and a little shaving of the outside of the bushing sleeve.
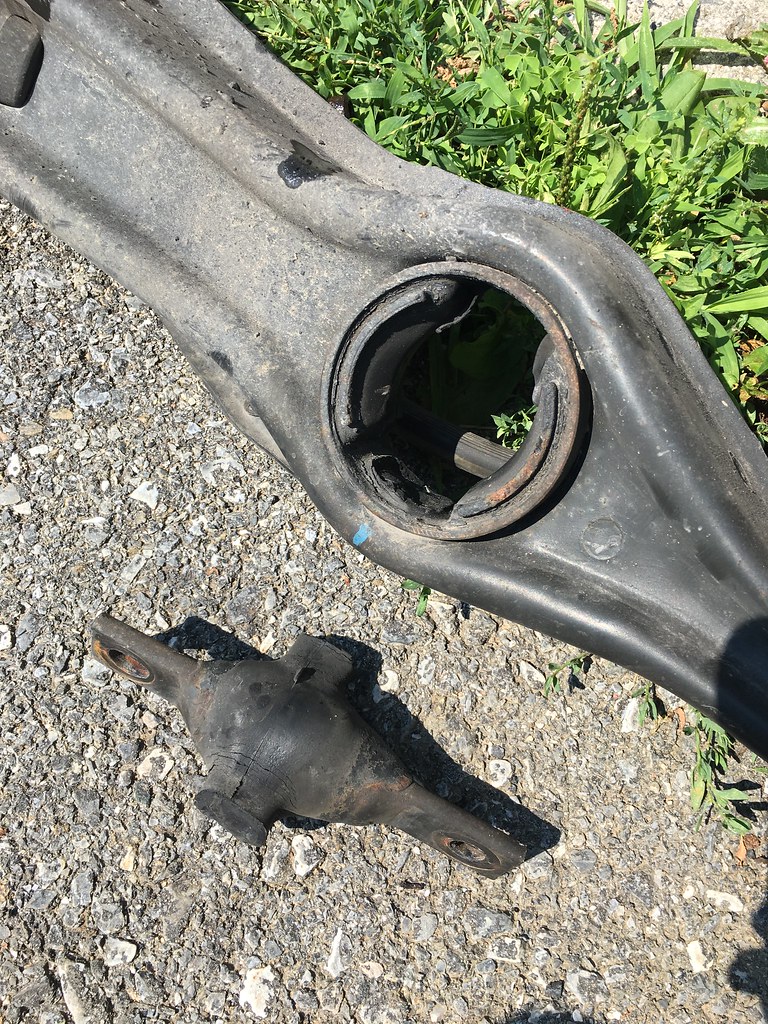 IMG_4708 by evan mclaren, on Flickr
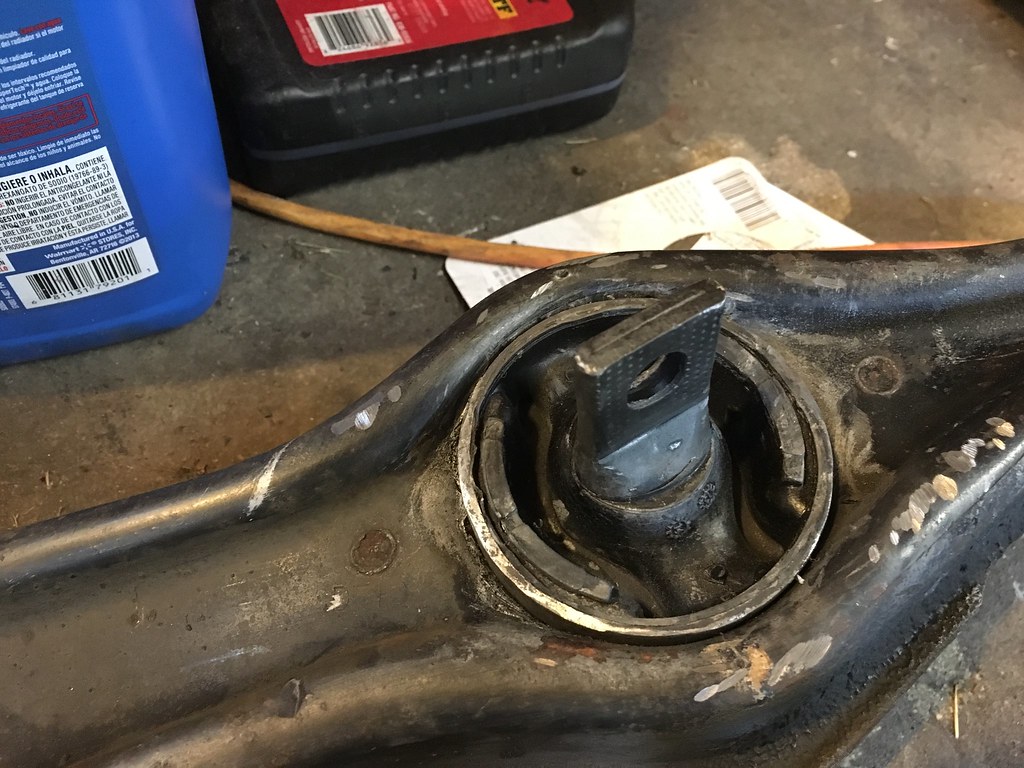 trailingbushing by evan mclaren, on Flickr
rotors and pads are pretty crusty and need to be replaced but ill get to that in a week or two. for now they server their purpose even though the look like poop.
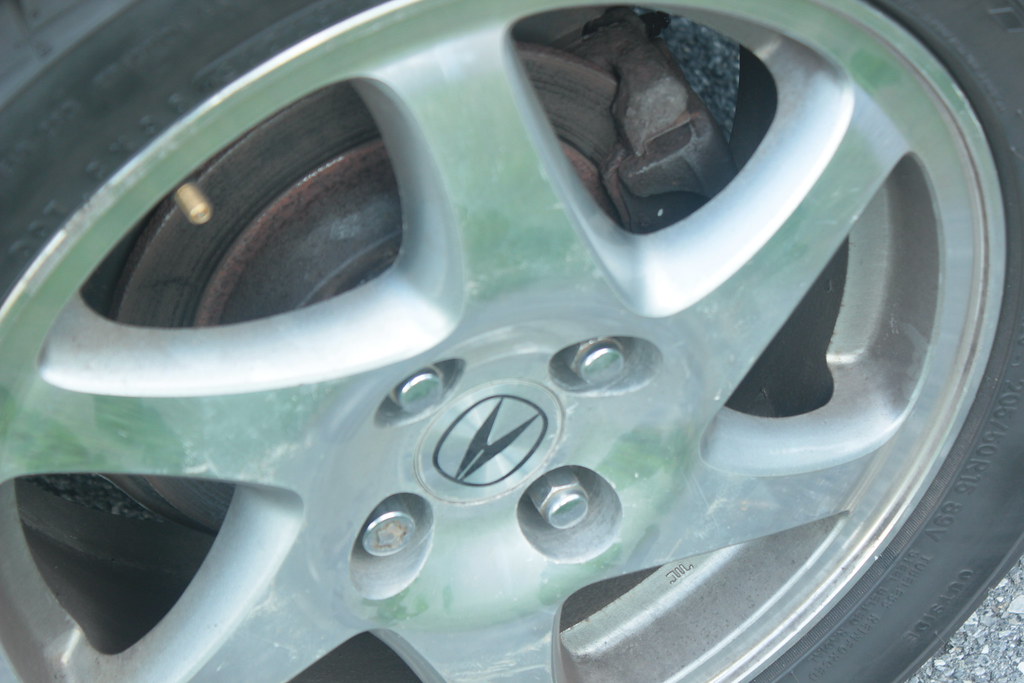 IMG_6859 by evan mclaren, on Flickr
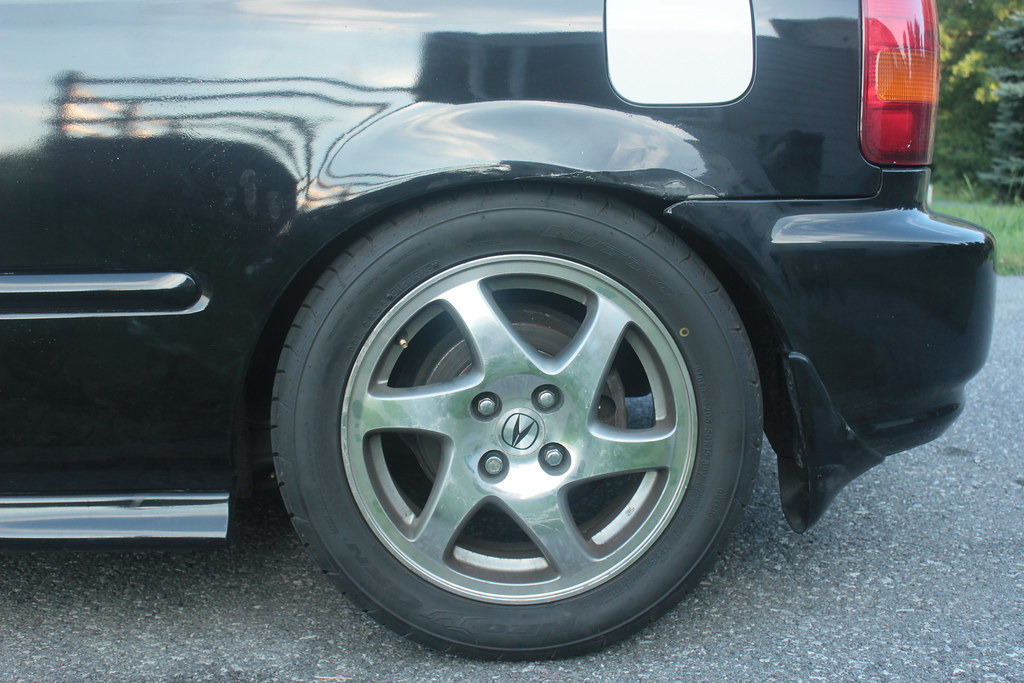 IMG_6861 by evan mclaren, on Flickr
Truckin right along. Ive had to cut open spots like that on my old 99 hatch, luckily it was just for the front tow hook bolts.
Think I missed it, but what was the reason for putting the Integra trailing arms in? Was it a rear disc conversion?
Think I missed it, but what was the reason for putting the Integra trailing arms in? Was it a rear disc conversion?
Yeah I picked up the full rear disk setup for cheap and since my toe arms were seized and unable to be adjusted and both trailing arm bushings blown out I figured it would be a good opportunity to knock it all out. It's just Added weight and brake dust of course but I do prefer the appearance haha. At least I will once I get the calipers painted and fresh rotors. The whole process was a pain in the ass thoughTruckin right along. Ive had to cut open spots like that on my old 99 hatch, luckily it was just for the front tow hook bolts.
Think I missed it, but what was the reason for putting the Integra trailing arms in? Was it a rear disc conversion?
Sent from my iPhone using Tapatalk
Word. I did the full trailing arm conversion on my old 99 Hatch. Everything was transferred from my wrecked EM1. Wasnt a huge difference in break feel, but like you said, the cosmetic aspect was well worth it.
Ive tossed around the idea of doing rear disc on the CRX, but honestly once i refresh the system with some standard upgrades they wont be needed unless I ever got on an actual track more than once in a blue moon.
Ive tossed around the idea of doing rear disc on the CRX, but honestly once i refresh the system with some standard upgrades they wont be needed unless I ever got on an actual track more than once in a blue moon.
yeah this car will never see a track lol its just my daily beater so there really was no reason to switch to disks besides just doing it for the hell of it. the real objective was to get some toe adjustment back there as the bushings were seized up and wouldnt budge. after using these toe arms and seeing how easy they are to adjust im definitely getting a pair along with camber arms for my integra. that install should be a breeze since theres almost no rust underneath that car and the toe adjustment bolts already move pretty freelyWord. I did the full trailing arm conversion on my old 99 Hatch. Everything was transferred from my wrecked EM1. Wasnt a huge difference in break feel, but like you said, the cosmetic aspect was well worth it.
Ive tossed around the idea of doing rear disc on the CRX, but honestly once i refresh the system with some standard upgrades they wont be needed unless I ever got on an actual track more than once in a blue moon.
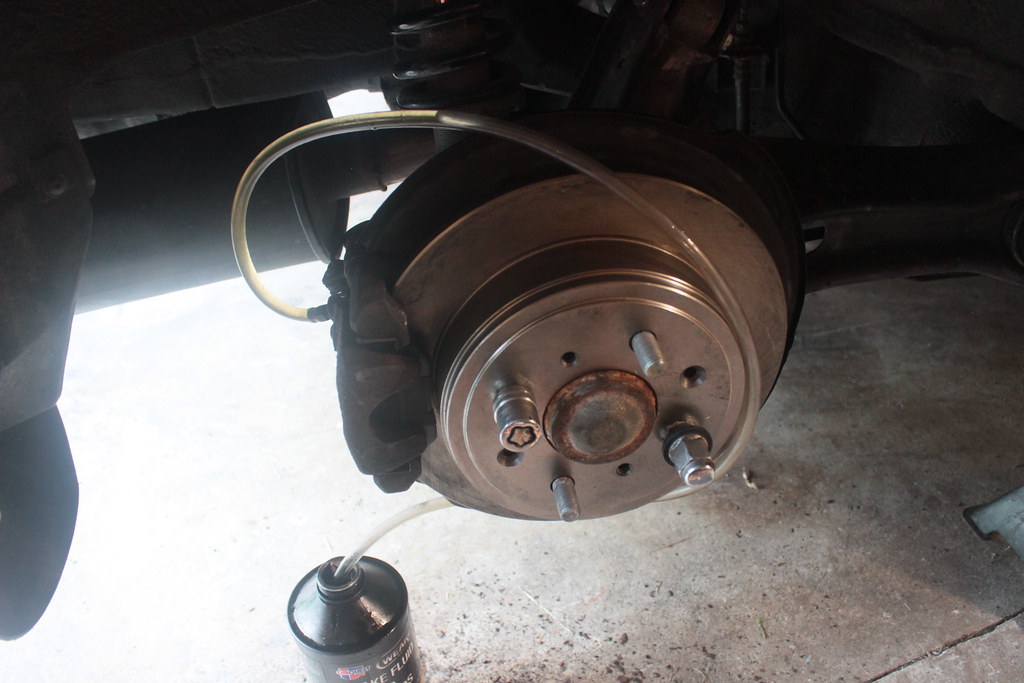 IMG_6872 by evan mclaren, on Flickr
hit up rock auto for some fresh rotors, pads and hardware in the rear. wound up having to cut one of the slide pin bolts on the driver side caliper to get it free. luckily i was smart enough to order new ones before hand lol.
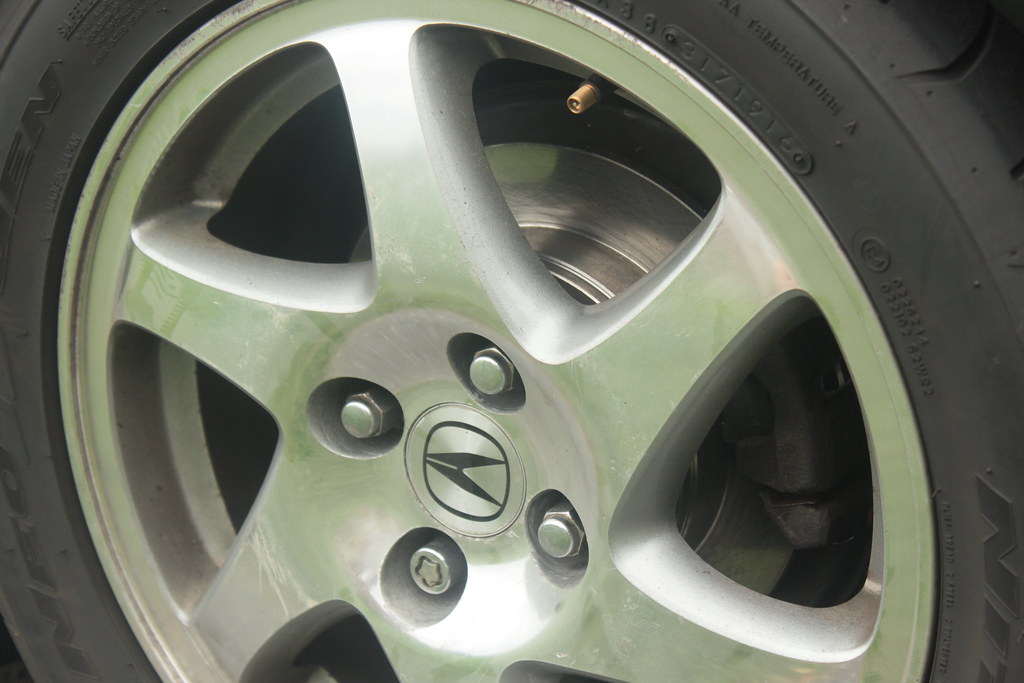 IMG_6907 by evan mclaren, on Flickr
since i gave my integra a brake upgrade i donated the gsr brakes to the civic.
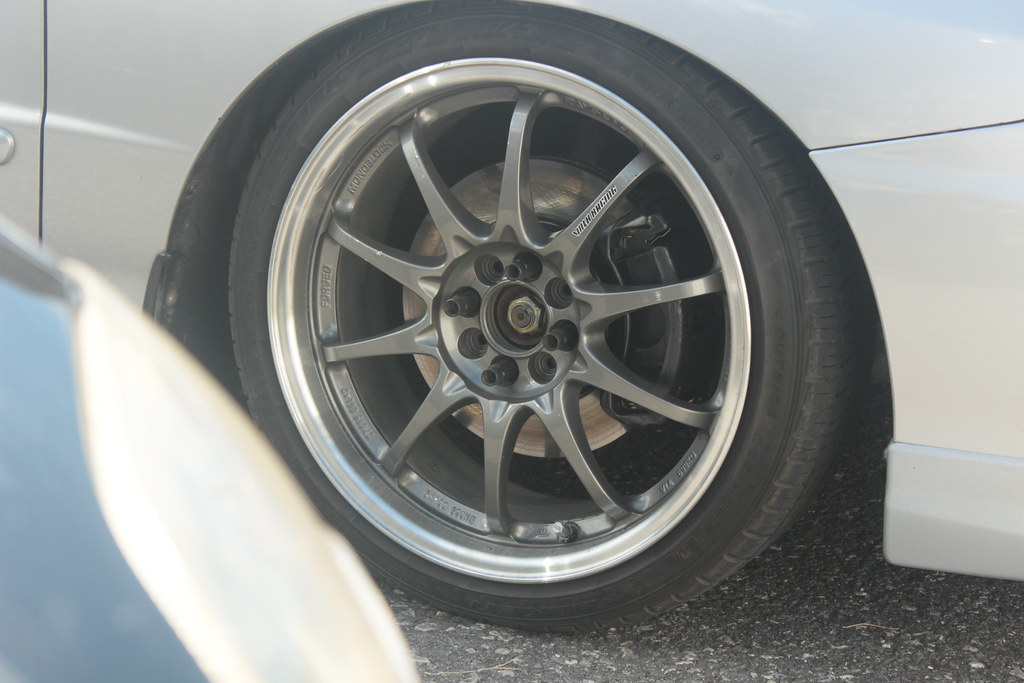 IMG_6882 by evan mclaren, on Flickr
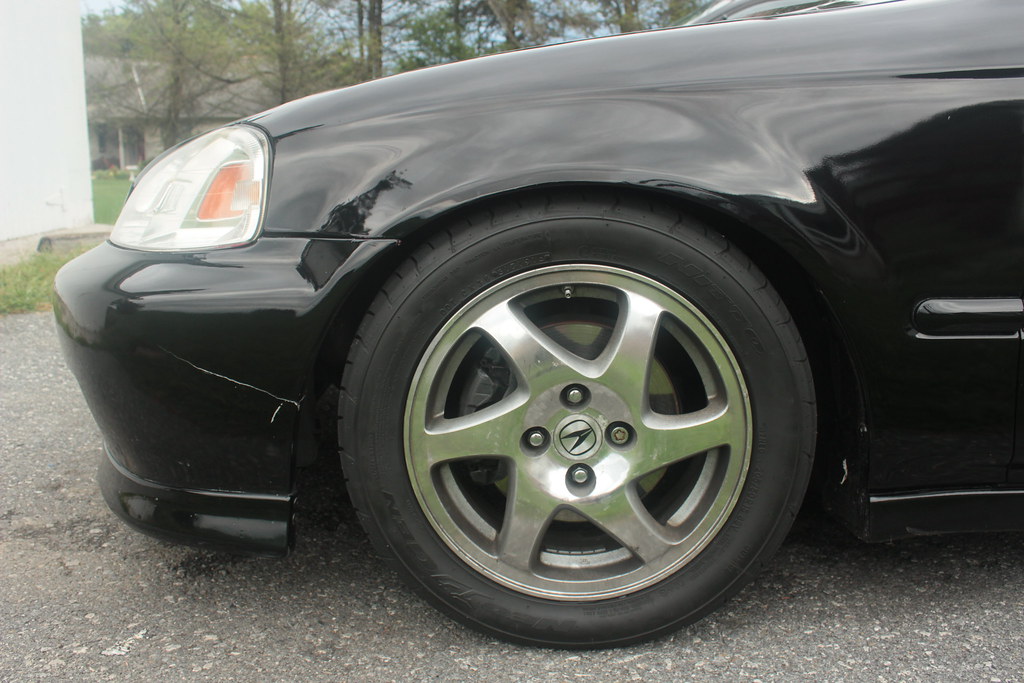 IMG_6913 by evan mclaren, on Flickr
the hatch already had integra brakes up front but they were definitely more weathered.
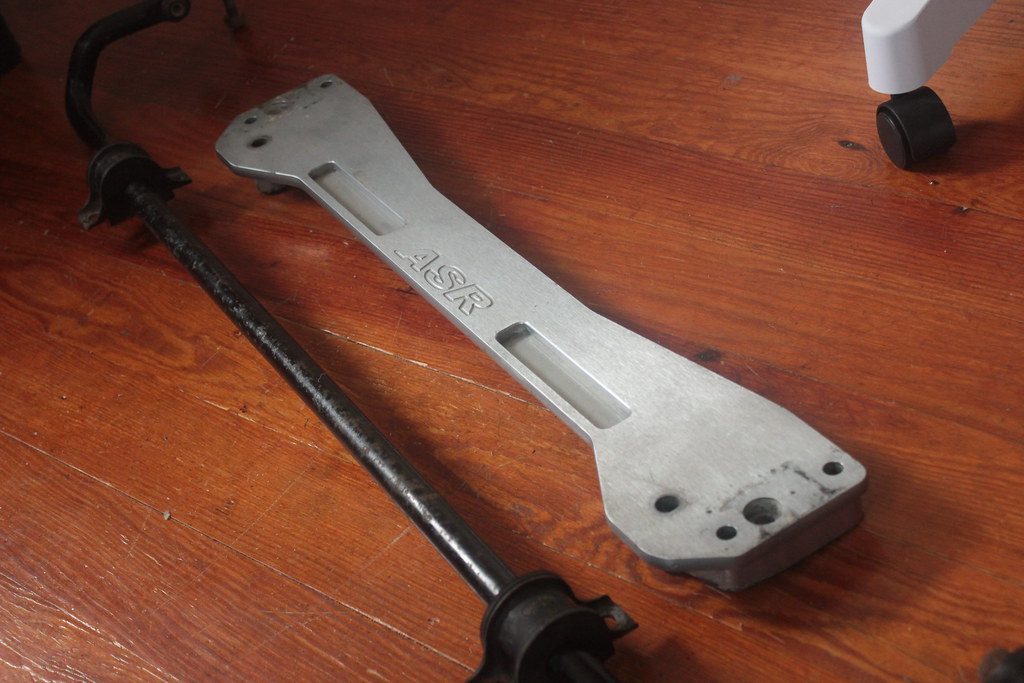
also by a stroke of luck i was able to pick up an asr brace with an oem 22mm sway bar.
 IMG_6890 (2) by evan mclaren, on Flickr
im pretty hyped on this it should be a nice addition to the integra front sway bar. just waiting on a couple missing brackets and some fresh harware from asr so i can slap it on and go throw myself into a turn lol.
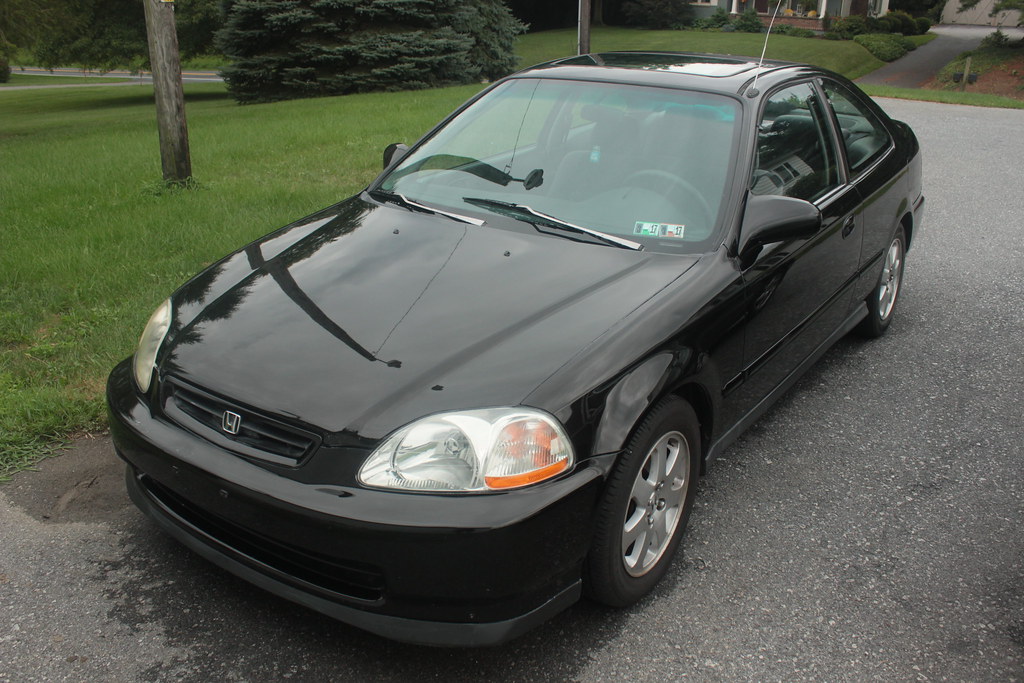
i got pretty bored and sick of looking at my girlfriends filthy and horribly oxidized hood so i did something about it...
 IMG_6903 by evan mclaren, on Flickr
my cheap buffer and some meguiars did a decent job. wish i had taken a before shot the difference was pretty drastic. her hood was pretty jacked.
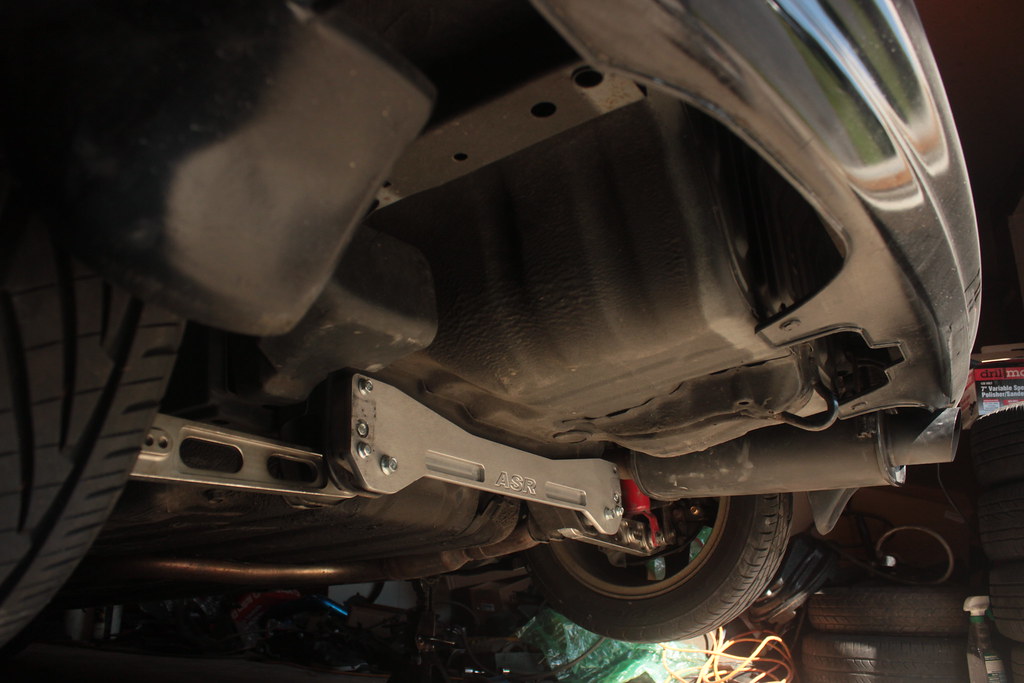
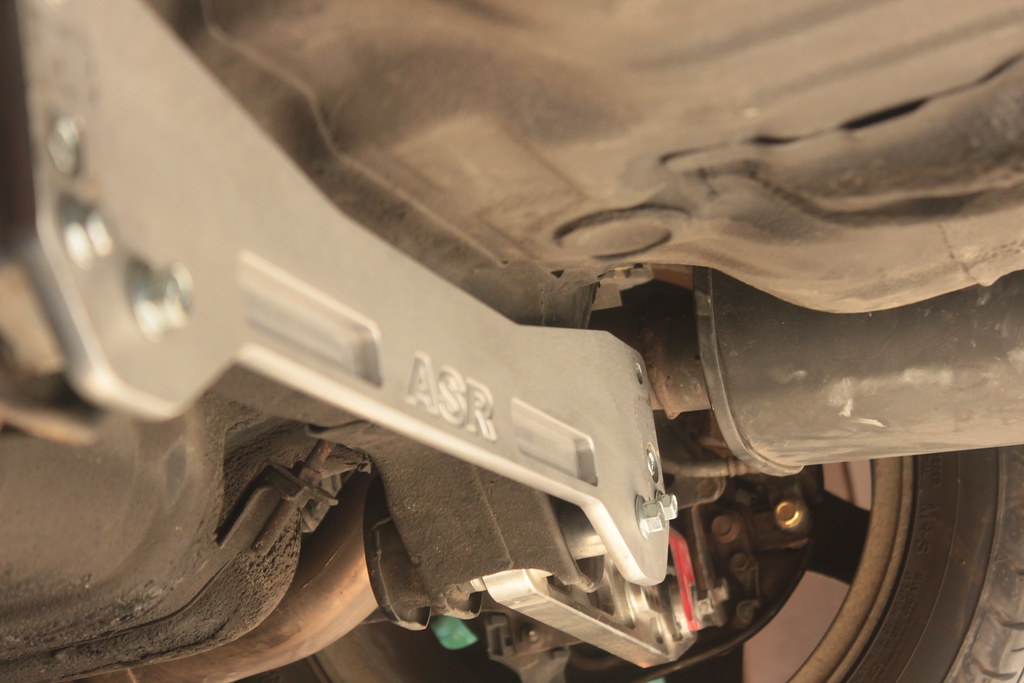
so of course nothing with this car can go without complication... i got the new hardware i had ordered from asr to mount the subframe brace and swaybar and went straight into the garage to install this thing. come to find that the vibrant muffler sits too close to the subframe not providing enough clearance for the sway bar d brackets. since i was 75% of the way into the job i just left the brace on without the bar. this car is officially rice status haha.
 IMG_6936 by evan mclaren, on Flickr
 IMG_6934 by evan mclaren, on Flickr
not too much room for activities. either i take it back to the exhaust shop and have them rework the axle back portion to move the muffler about 1.5" towards the rear or buy a catback that fits. i wouldnt mind buying a tanabe touring medalion or apexi ws2 catback for this car but im not sure the cost is justified. i really like how the muffler sits up in the bumber as is and im afraid it would look retarded sticking out any further
 IMG_6933 by evan mclaren, on Flickr
 IMG_6936 by evan mclaren, on Flickr
 IMG_6934 by evan mclaren, on Flickr
not too much room for activities. either i take it back to the exhaust shop and have them rework the axle back portion to move the muffler about 1.5" towards the rear or buy a catback that fits. i wouldnt mind buying a tanabe touring medalion or apexi ws2 catback for this car but im not sure the cost is justified. i really like how the muffler sits up in the bumber as is and im afraid it would look retarded sticking out any further
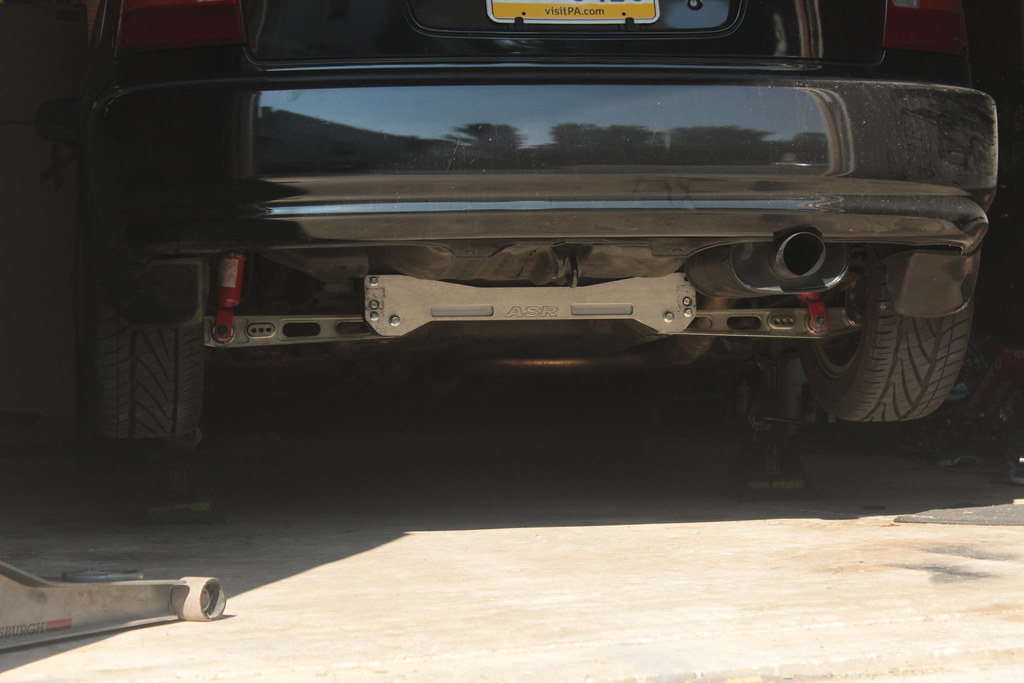 IMG_6933 by evan mclaren, on Flickr
 IMG_6986 by evan mclaren, on Flickr
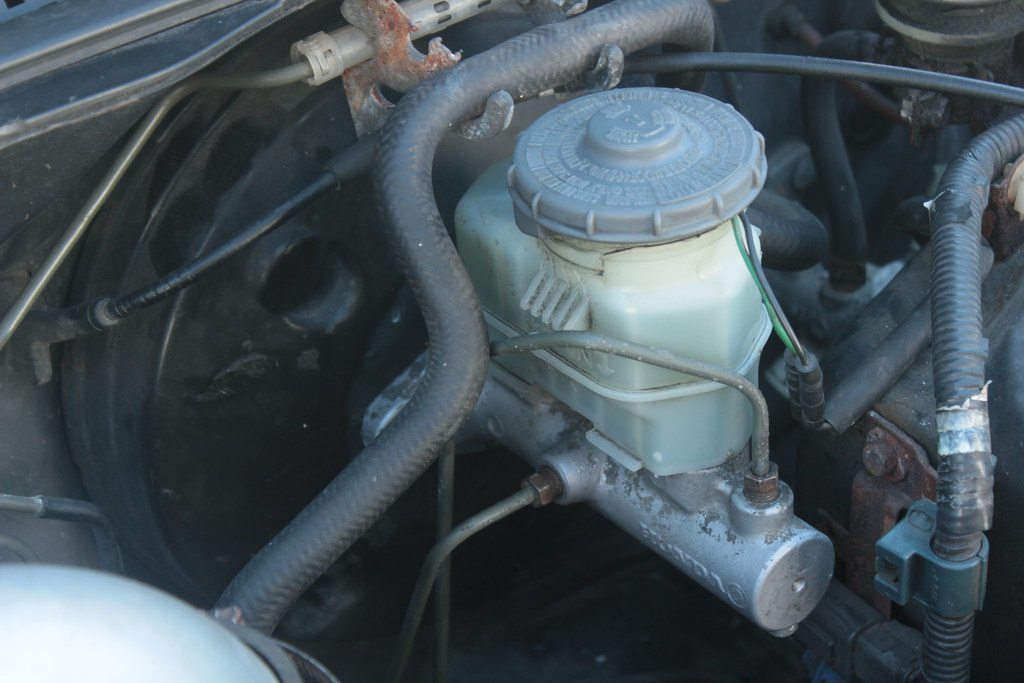
finally decided to stop being lazy and install the integra master cylinder i had picked up a while ago with the front subframe. as the final piece in the brake conversion, i wasnt convinced it was even necessary but now that ive felt the difference back to back im glad i did. with the integra calipers and stock master the pads still grabbed firm, but the travel was long and pressure came on gradually. now with this master it feels exactly like it should with about half the pedal travel. the master is from an ls so its a little smaller than a gsr/r i guess but its def a big difference from the baby dx one. im really starting to like how the light hatch drives, but i still need to get the swaybar mounted so i can see how much of an effect thats going to have. also i need to purchase a new set of rear lca's because the bushings in these cheap pieces of junk that came on here are ripped. and of course this single cam needs to come out haha
Lots of work! Now it seems you didn't apply any anti-seize on the hardware you just installed...and had trouble getting off to do the work. Go back through and coat those bolts so you have better luck next time 
Well I guess looks can be deceiving haha. Believe it or not every bolt I've removed or replaced under this car so far has been reinstalled coated in anti seize. One thing I hate the most is struggling to remove rusted and seized bolts so I'm pretty anal about preventing that in the future. This car has been the worse for rust that I've owned so far most likely because it originally came from New York. Anything that was touched or replaced by the previous owner like the rear upper and lower control arms weren't a problem but the compensator arms were horrible. Even the front caliper bleeders were seized upLots of work! Now it seems you didn't apply any anti-seize on the hardware you just installed...and had trouble getting off to do the work. Go back through and coat those bolts so you have better luck next time
Sent from my iPhone using Tapatalk
Excellent! 
ok well its been a little while since ive updated in here... for the past couple weeks ive been putting in work to get the hatch ready for the next stage in its life haha. that means pics and lots of them! unfortunately my dslr met its demise so its all iphone for now...
 IMG_5283 by evan mclaren, on Flickr
grabbed some hasport 62a mounts with the 3 bolt drivers side to fit the b18c1
 IMG_5273 by evan mclaren, on Flickr
 IMG_5377 by evan mclaren, on Flickr
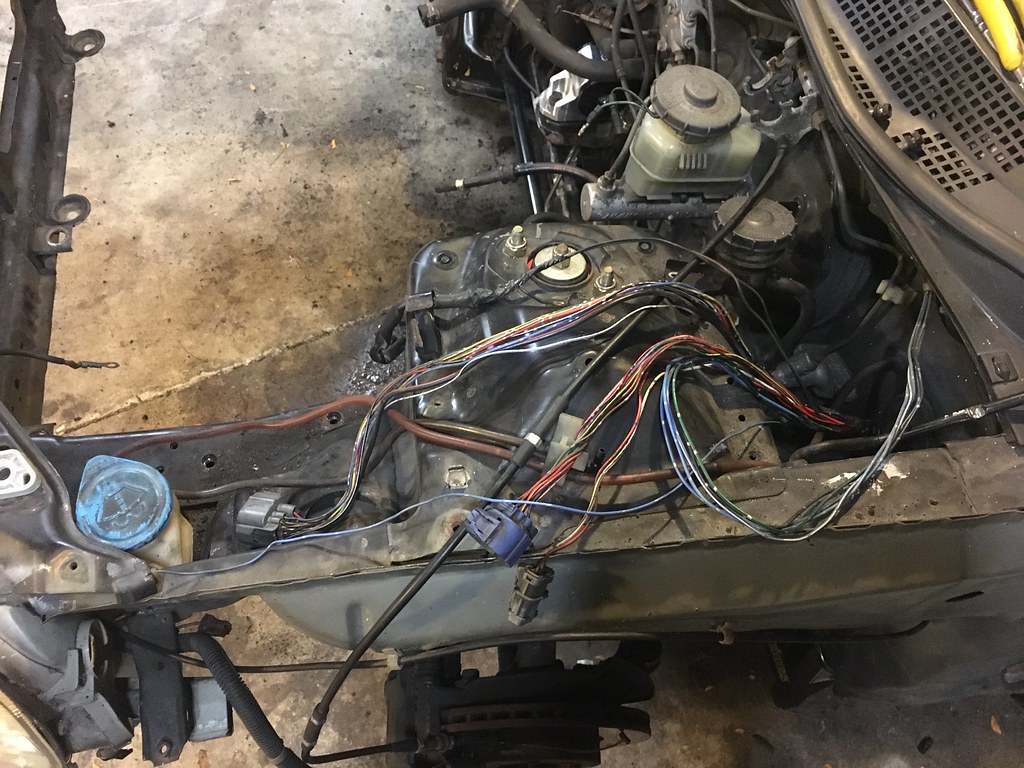
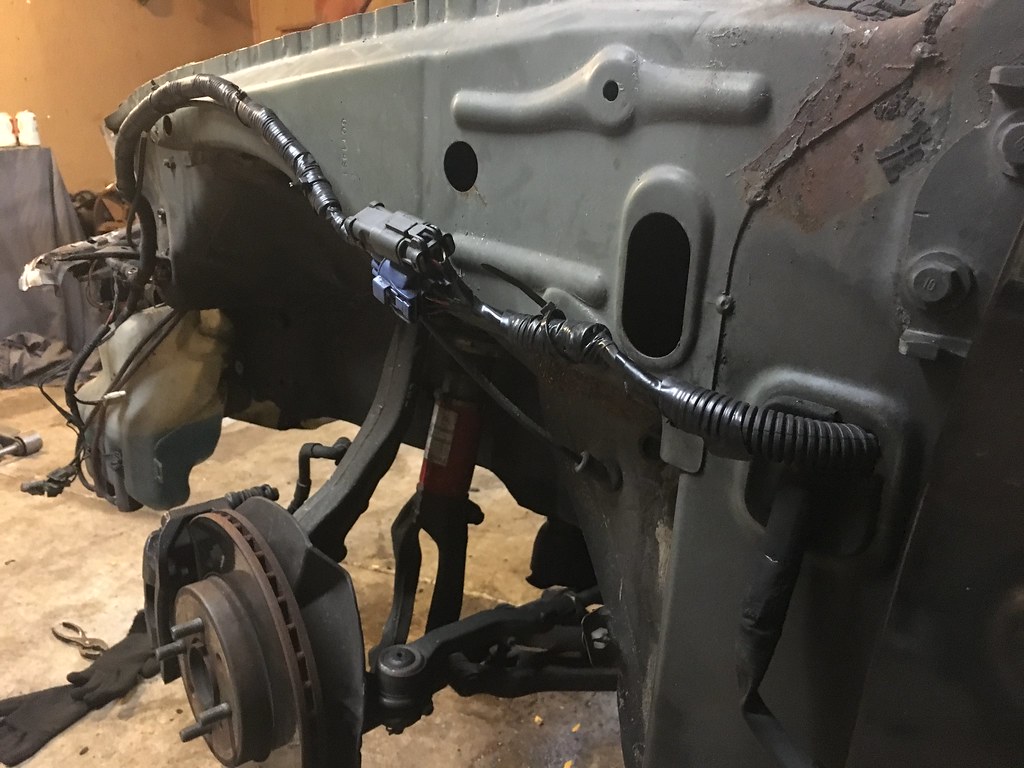
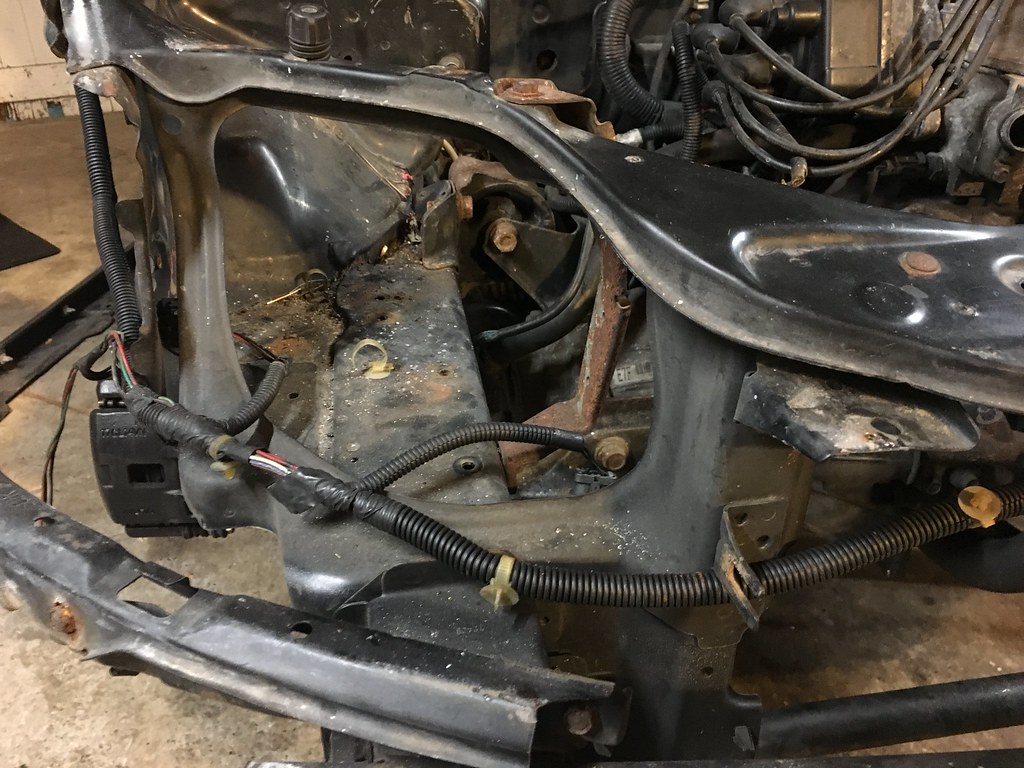
No more perfect of a time to tuck the headlight harness. Gotta love ek's for all the slack honda gave them compared to an integra. these cars a breeze in comparison. no cutting or soldering or even depinning necessary. just deloom a little and reroute then reconnect.
 FullSizeRender (2) by evan mclaren, on Flickr
 IMG_5367 by evan mclaren, on Flickr
 IMG_5379 by evan mclaren, on Flickr
 IMG_5332 by evan mclaren, on Flickr
ran the sprayer lines through this little grommet as well. the line for the fronts is just barely too short to reach so i still need to buy some hose to extend it.
 FullSizeRender by evan mclaren, on Flickr
 IMG_5372 by evan mclaren, on Flickr
as you can see this bay has been covered in filth for a long time. thats about to change thank god..
 IMG_5333 by evan mclaren, on Flickr
im choosing to use the full size mishimoto rad thats currently in the integra so i went ahead and chopped the lower mounts off. i didnt worry about getting them off intact cause i wont be reusing them. more on that later...
 IMG_5409 by evan mclaren, on Flickr
 IMG_5410 by evan mclaren, on Flickr
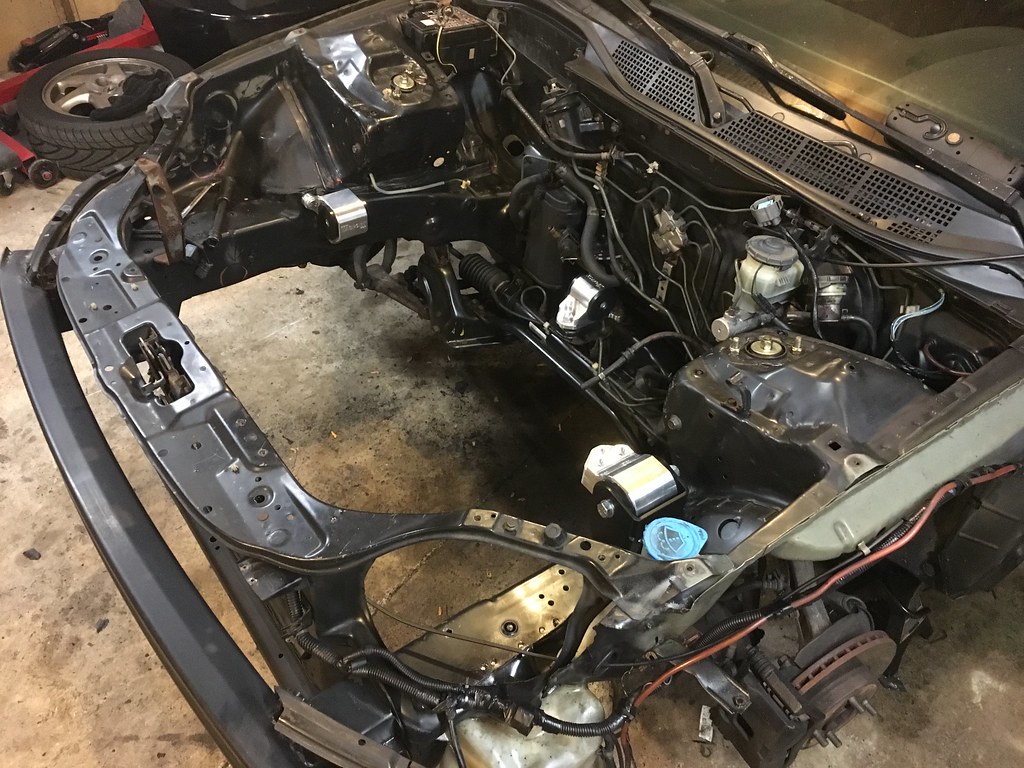
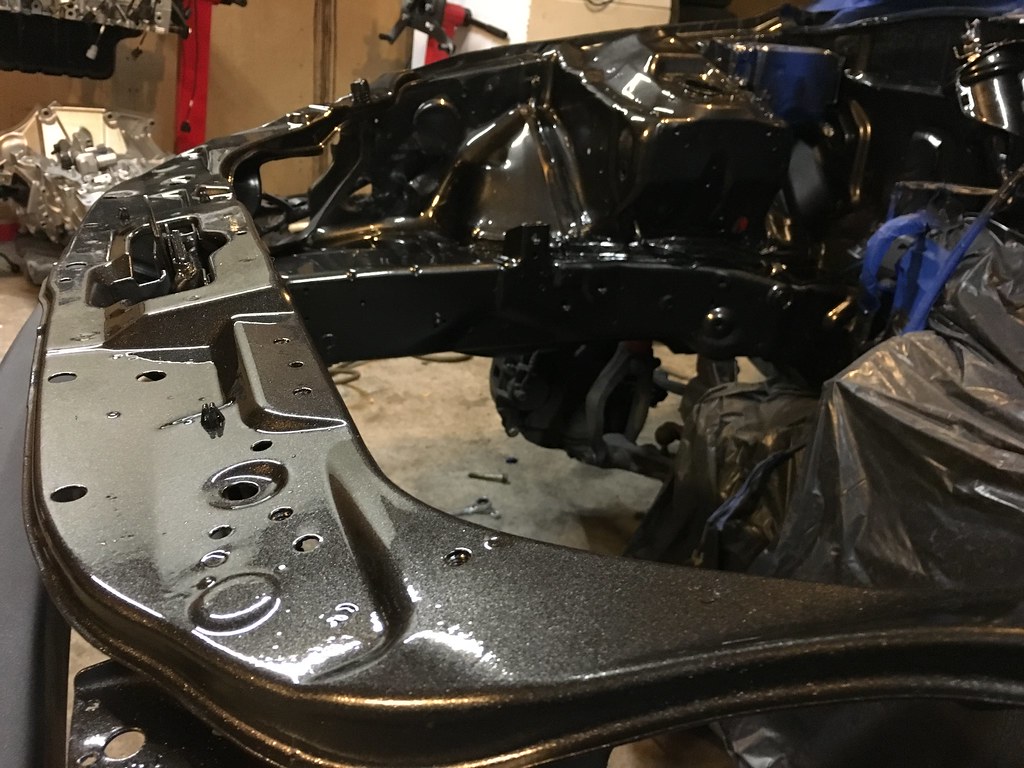
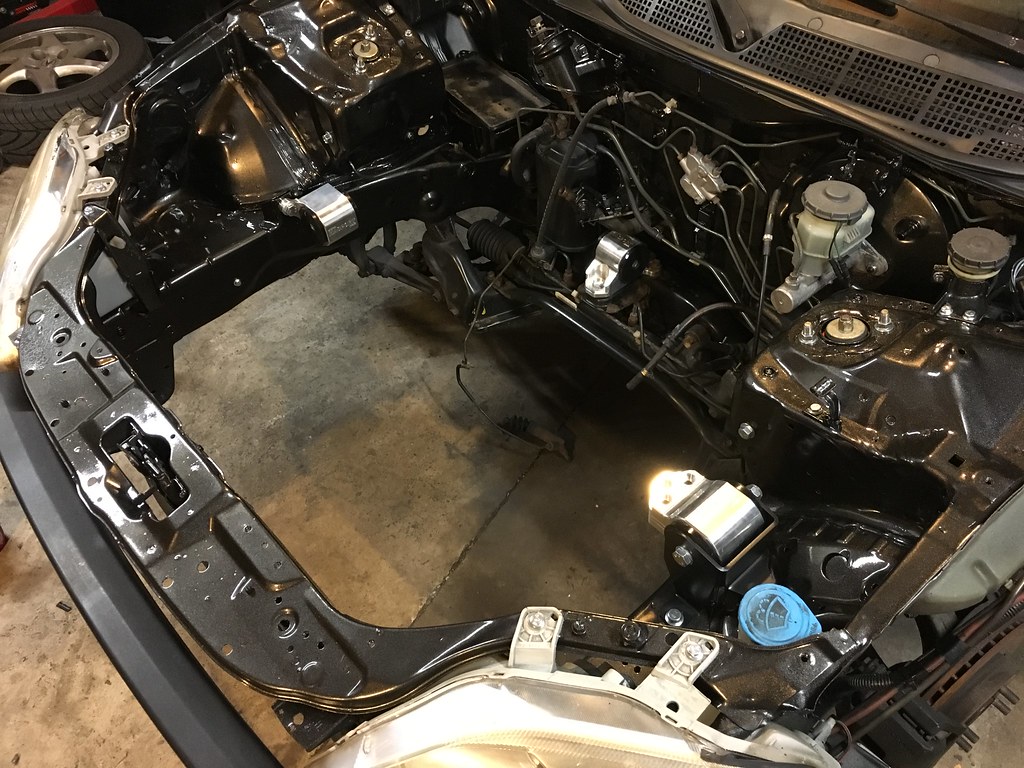
At this point i took the time to thoroughly clean every inch and tiny little corner of the bay that i could fit my fingers in. the grime was thick in some places and took several passes of scrubbing to finally clear up. that process alone took an entire evening haha. once it was as clean as i could possibly get it, it still wasnt attractive enough. this is the point where i was really debating on whether or not to just go ahead and spray it with some cheap rattle cans or just leave it. naturally the appearance just bothered me too much so i grabbed a ton of rustoleum and went to town...
 IMG_5423 by evan mclaren, on Flickr
i was just going to do primer then some gloss black but when i was looking at walmarts selection i saw a metallic black that seemed like it might look cool so i grabbed that as well as some clear instead. i admit that i cheated and instead of stripping everything off the firewall, i just masked it all with tape and foil and sprayed around. once it was all done there was a few runs and overspray spots but mostly unnoticeable haha. its a daily beater so i can live with it lol. i definitely like the look of the color, but well see how long it actually lasts...
 IMG_5430 by evan mclaren, on Flickr
 IMG_5426 by evan mclaren, on Flickr
 IMG_5429 by evan mclaren, on Flickr
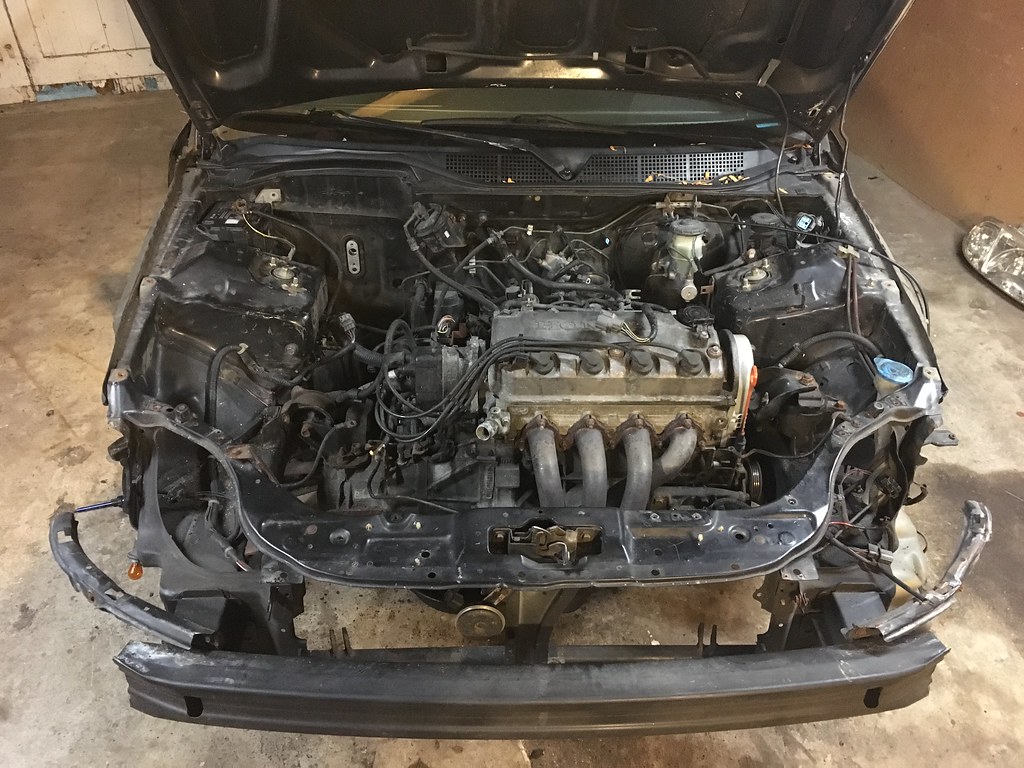 IMG_5283 by evan mclaren, on Flickr
grabbed some hasport 62a mounts with the 3 bolt drivers side to fit the b18c1
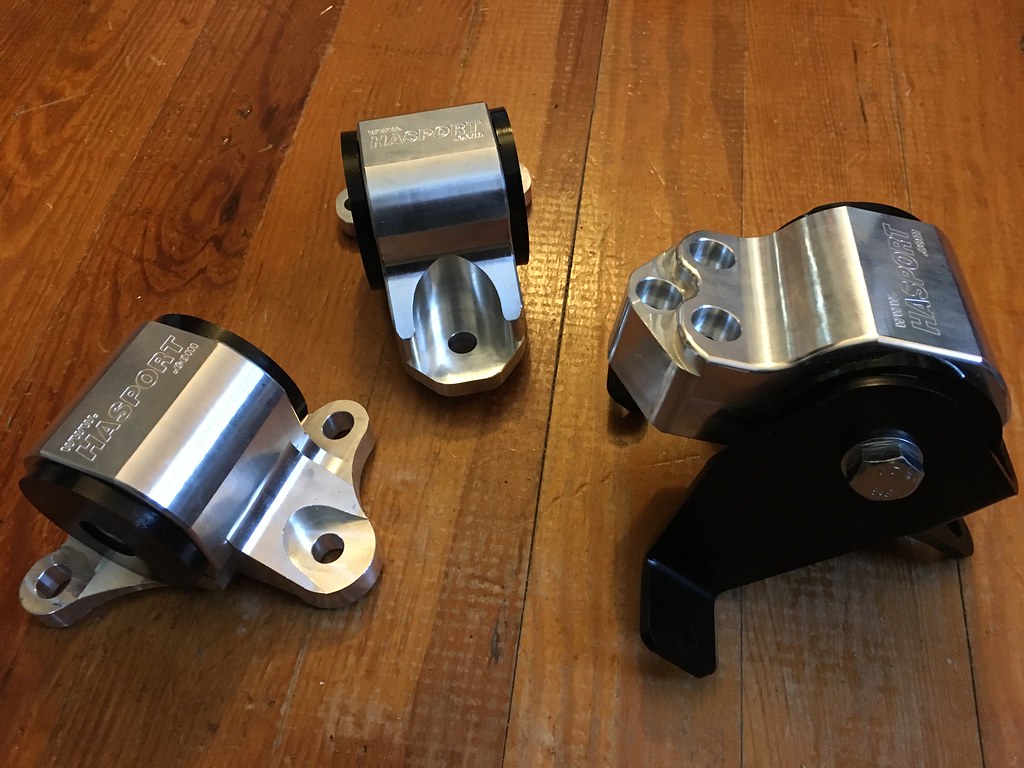 IMG_5273 by evan mclaren, on Flickr
 IMG_5377 by evan mclaren, on Flickr
No more perfect of a time to tuck the headlight harness. Gotta love ek's for all the slack honda gave them compared to an integra. these cars a breeze in comparison. no cutting or soldering or even depinning necessary. just deloom a little and reroute then reconnect.
 FullSizeRender (2) by evan mclaren, on Flickr
 IMG_5367 by evan mclaren, on Flickr
 IMG_5379 by evan mclaren, on Flickr
 IMG_5332 by evan mclaren, on Flickr
ran the sprayer lines through this little grommet as well. the line for the fronts is just barely too short to reach so i still need to buy some hose to extend it.
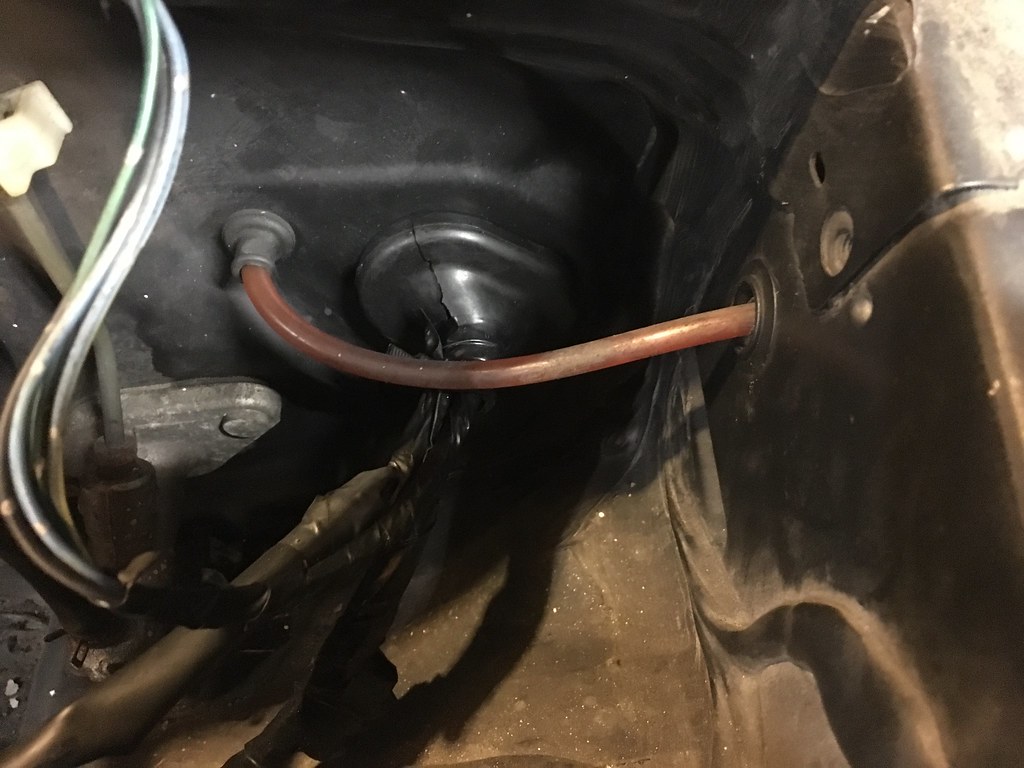 FullSizeRender by evan mclaren, on Flickr
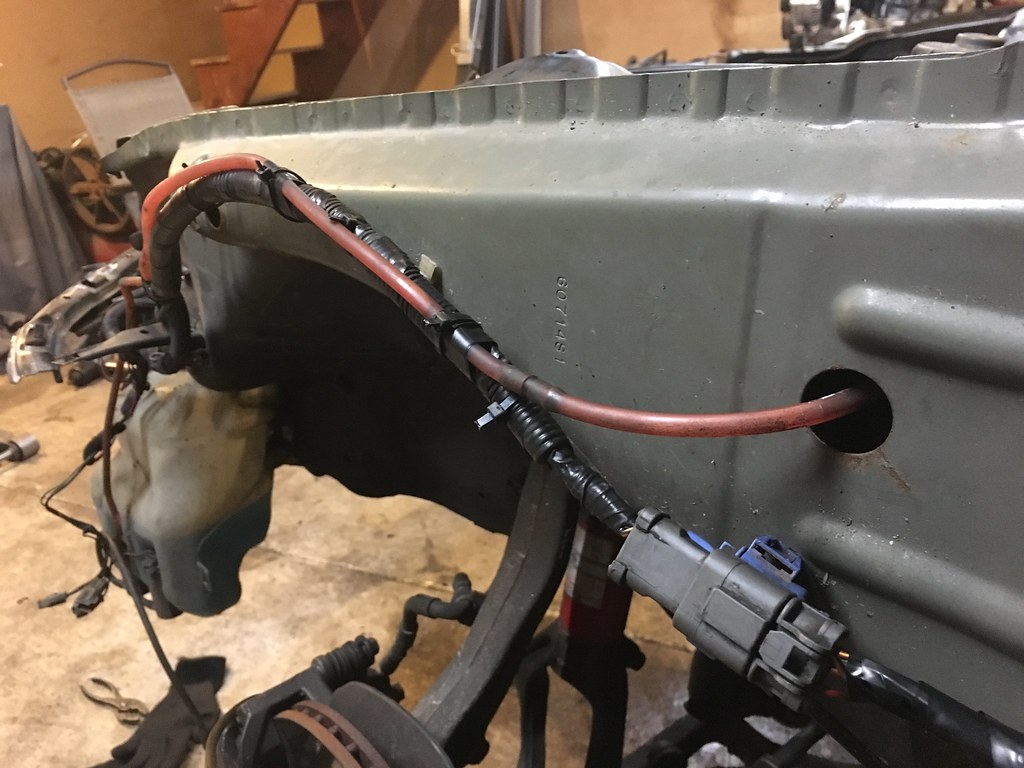 IMG_5372 by evan mclaren, on Flickr
as you can see this bay has been covered in filth for a long time. thats about to change thank god..
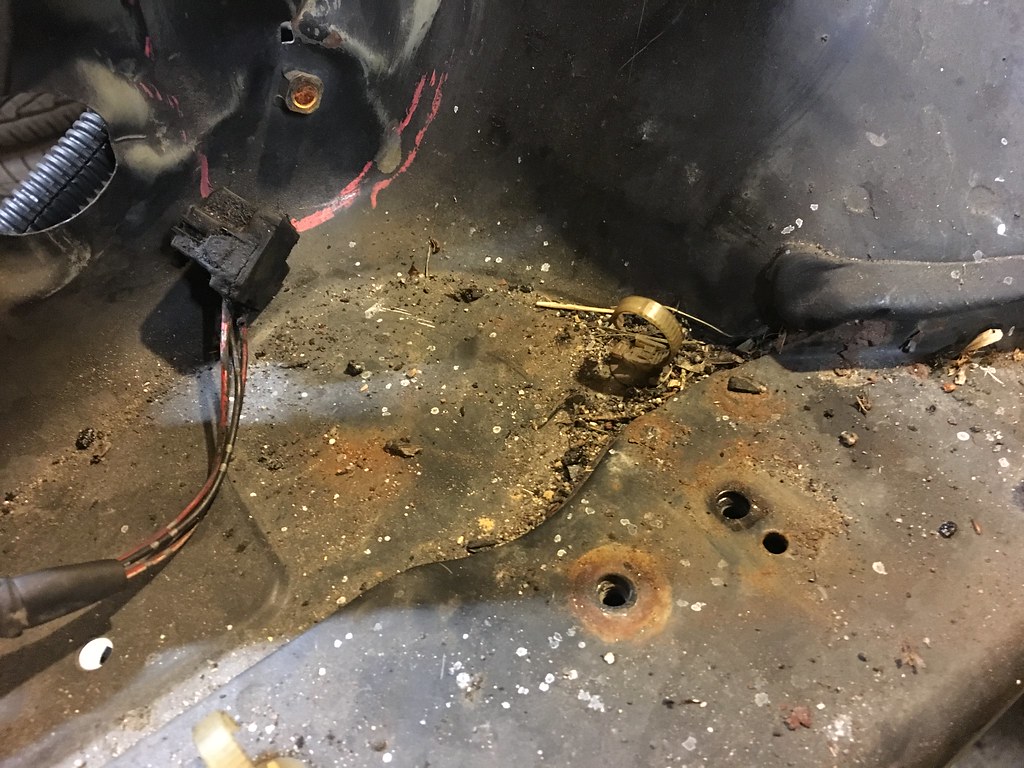 IMG_5333 by evan mclaren, on Flickr
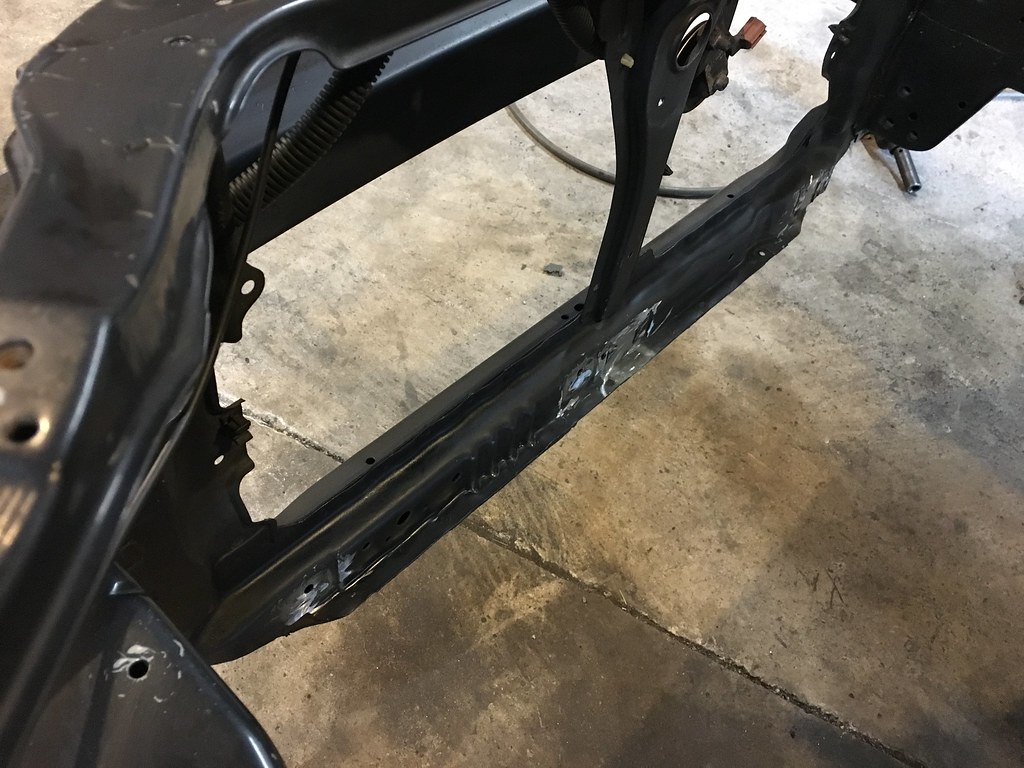
im choosing to use the full size mishimoto rad thats currently in the integra so i went ahead and chopped the lower mounts off. i didnt worry about getting them off intact cause i wont be reusing them. more on that later...
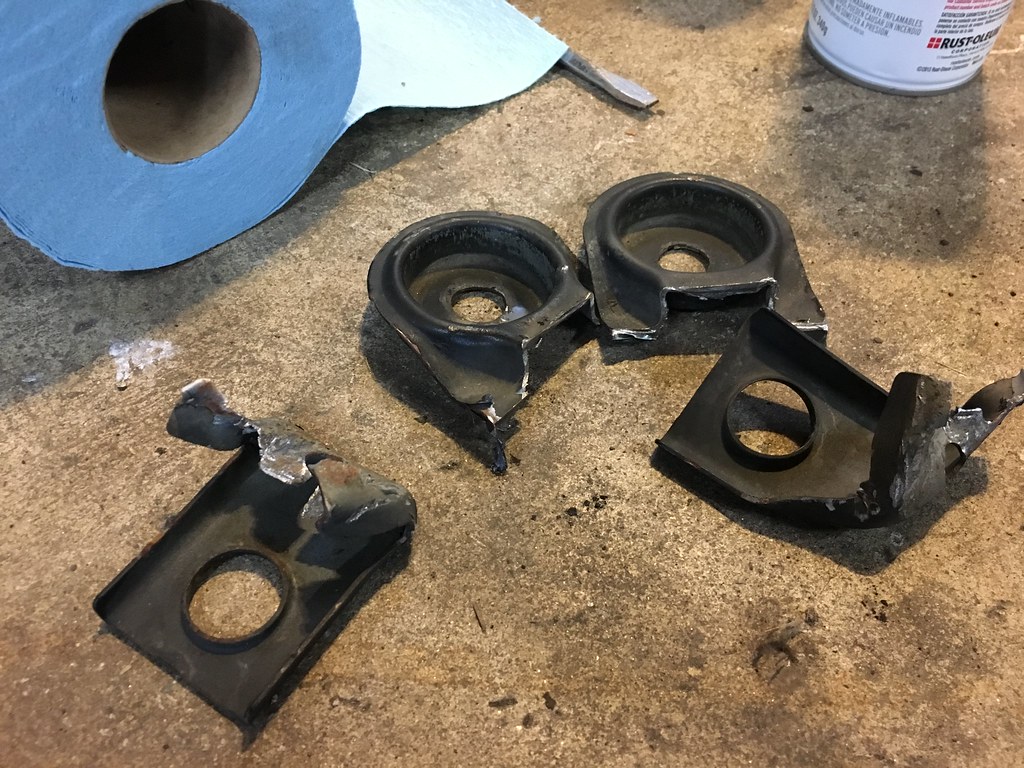 IMG_5409 by evan mclaren, on Flickr
 IMG_5410 by evan mclaren, on Flickr
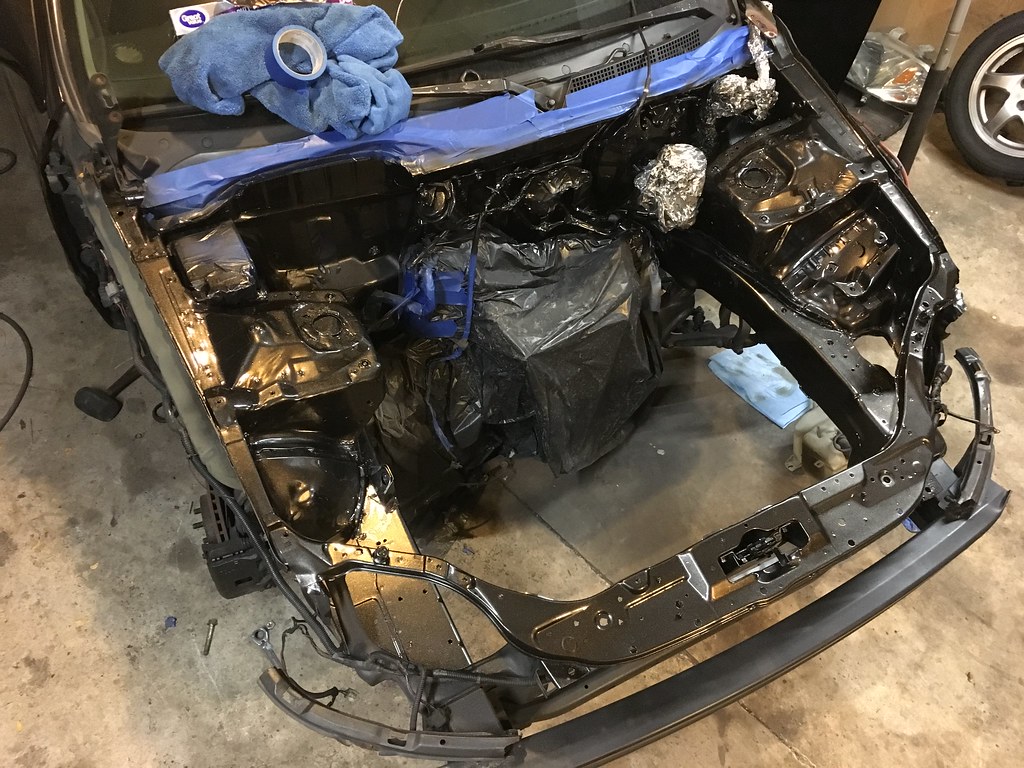
At this point i took the time to thoroughly clean every inch and tiny little corner of the bay that i could fit my fingers in. the grime was thick in some places and took several passes of scrubbing to finally clear up. that process alone took an entire evening haha. once it was as clean as i could possibly get it, it still wasnt attractive enough. this is the point where i was really debating on whether or not to just go ahead and spray it with some cheap rattle cans or just leave it. naturally the appearance just bothered me too much so i grabbed a ton of rustoleum and went to town...
 IMG_5423 by evan mclaren, on Flickr
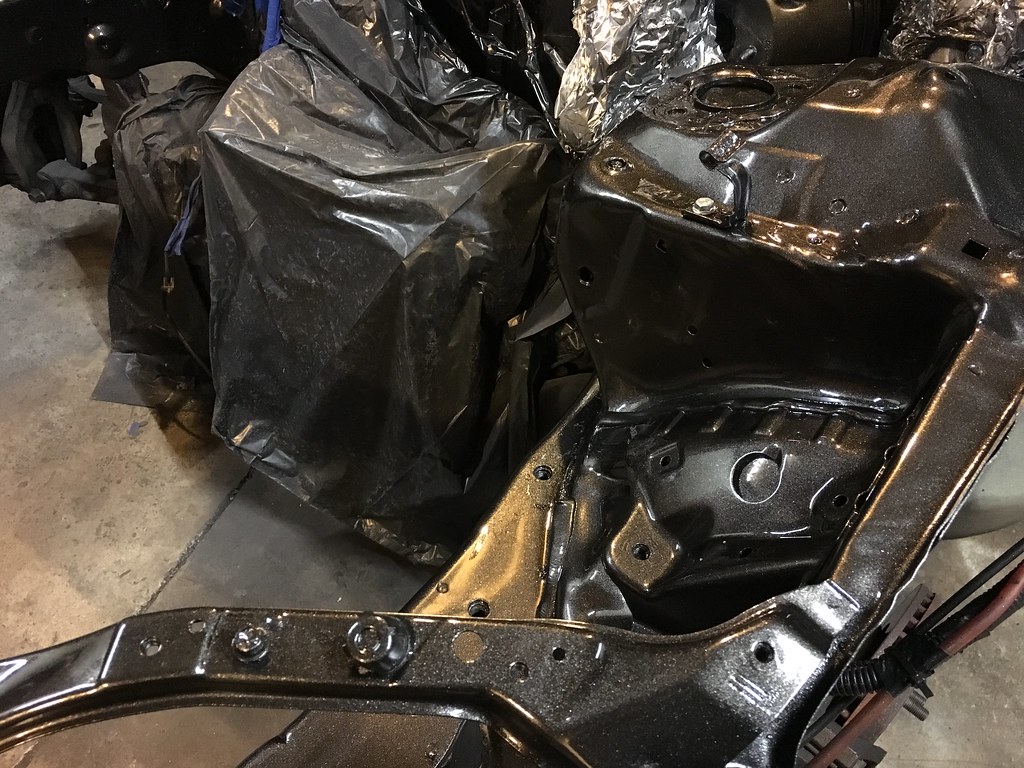
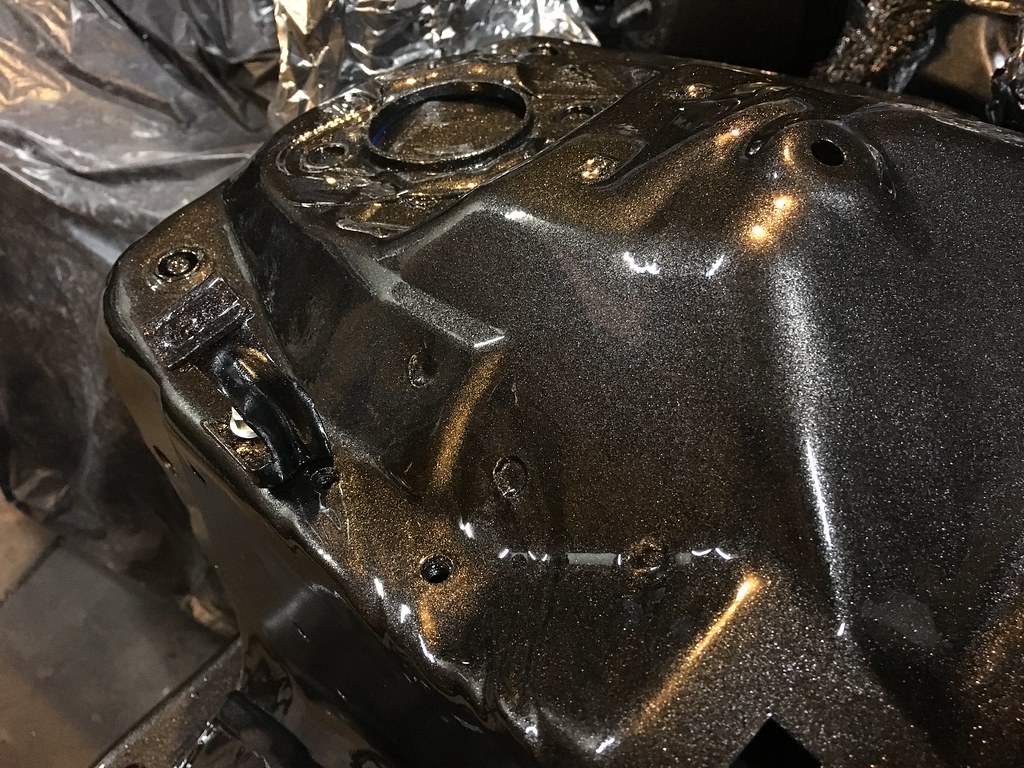
i was just going to do primer then some gloss black but when i was looking at walmarts selection i saw a metallic black that seemed like it might look cool so i grabbed that as well as some clear instead. i admit that i cheated and instead of stripping everything off the firewall, i just masked it all with tape and foil and sprayed around. once it was all done there was a few runs and overspray spots but mostly unnoticeable haha. its a daily beater so i can live with it lol. i definitely like the look of the color, but well see how long it actually lasts...
 IMG_5430 by evan mclaren, on Flickr
 IMG_5426 by evan mclaren, on Flickr
 IMG_5429 by evan mclaren, on Flickr
Last edited:
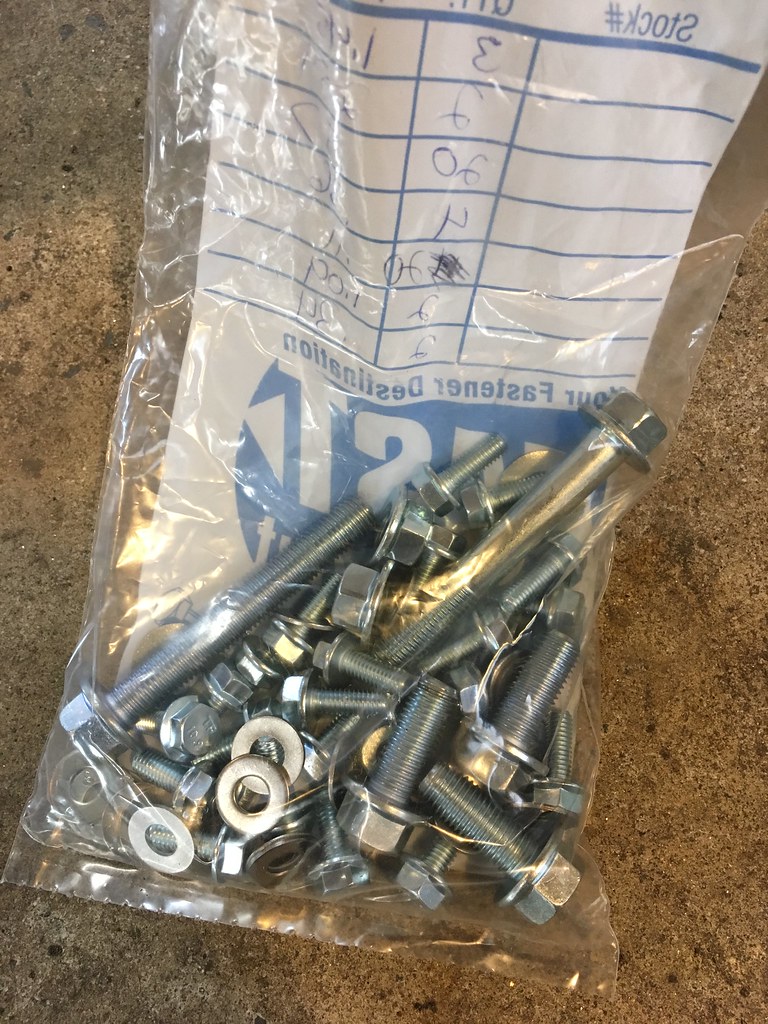
Once that was dry and i started to put the mounts and suspension back on i couldnt bring myself to reuse all the ugly ass rusted bolts that id removed so i went and raided the local hardware store of all the 10.2 grade bolts they had haha...
 IMG_5403 by evan mclaren, on Flickr
 IMG_5451 by evan mclaren, on Flickr
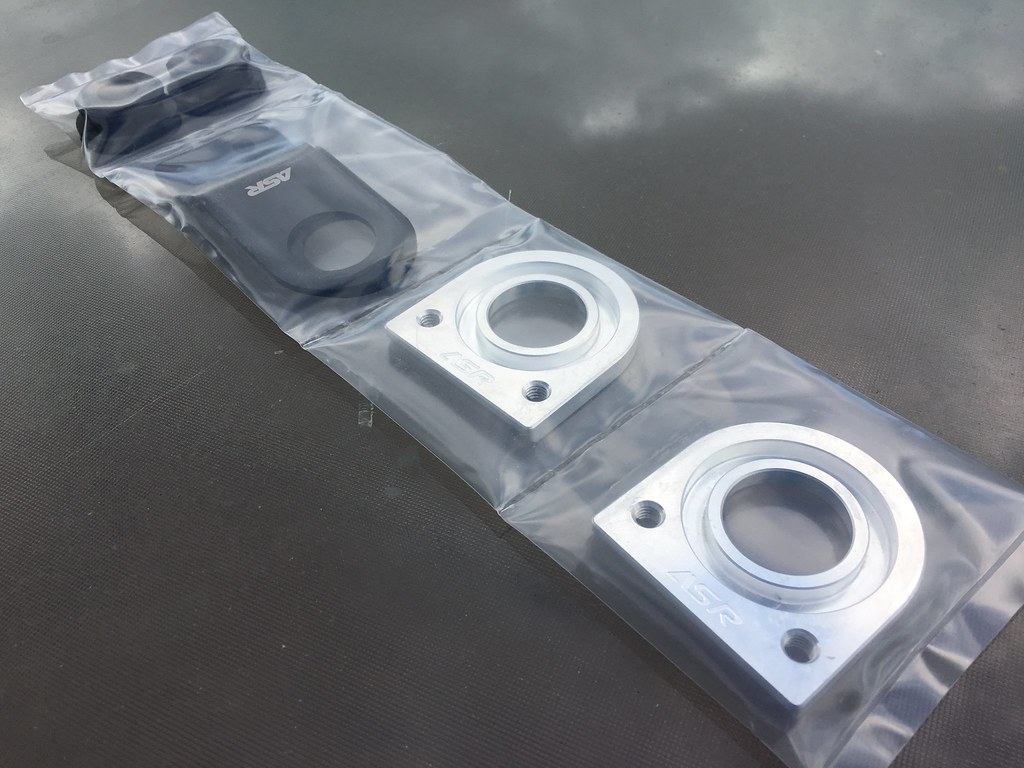
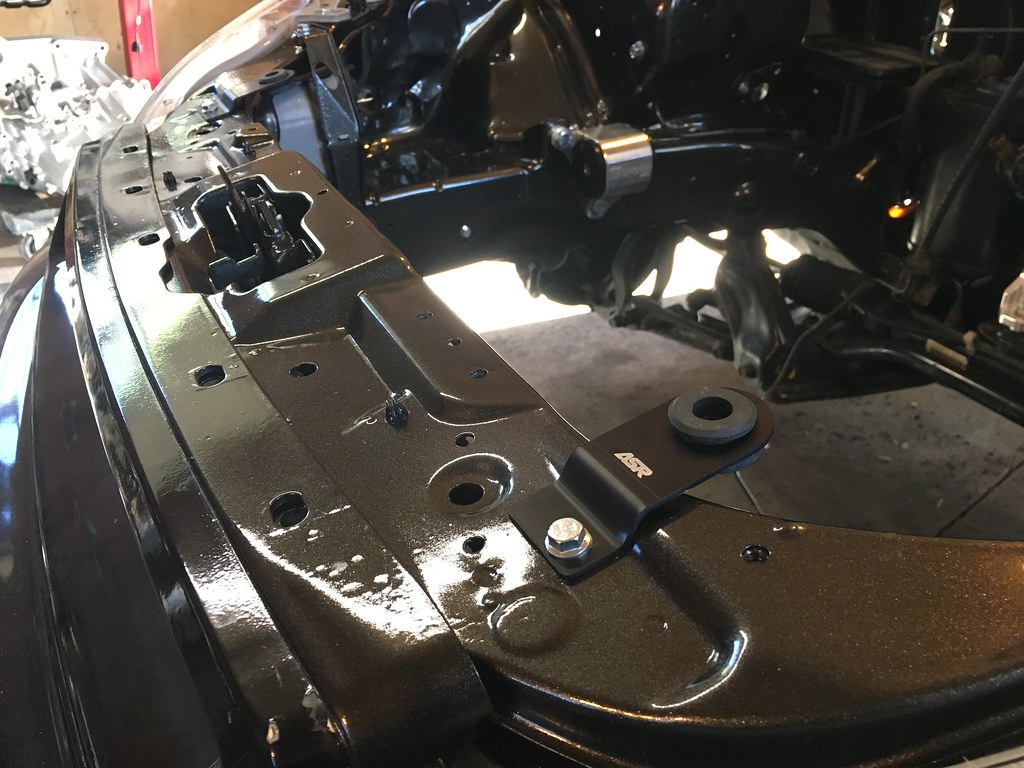
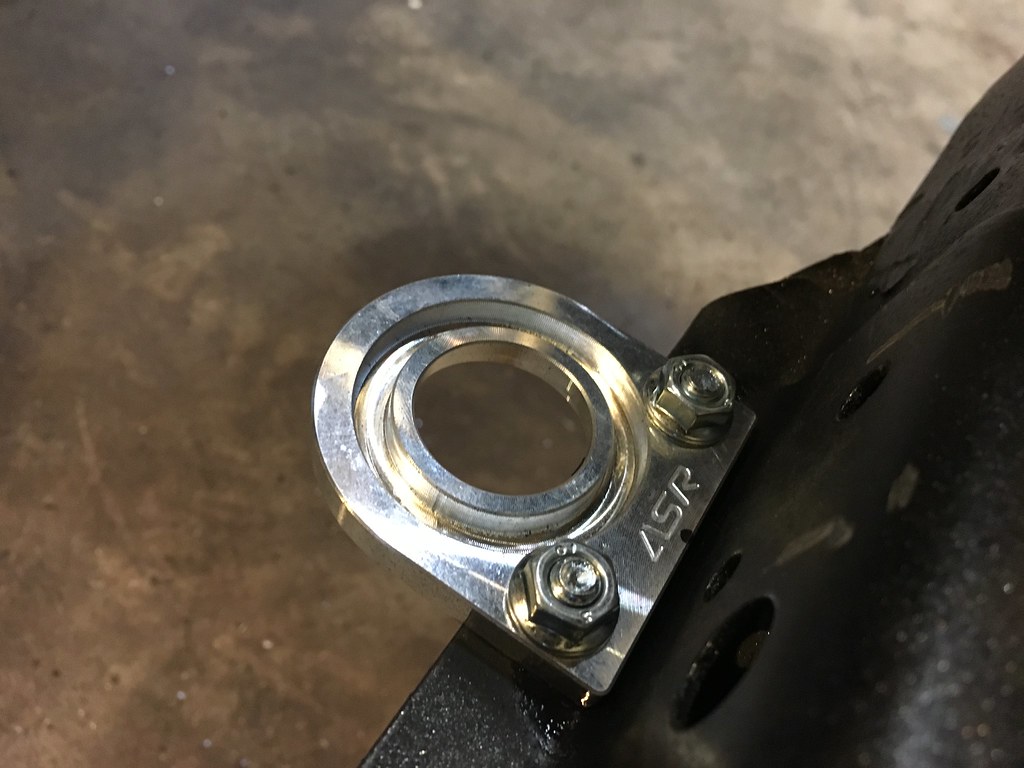
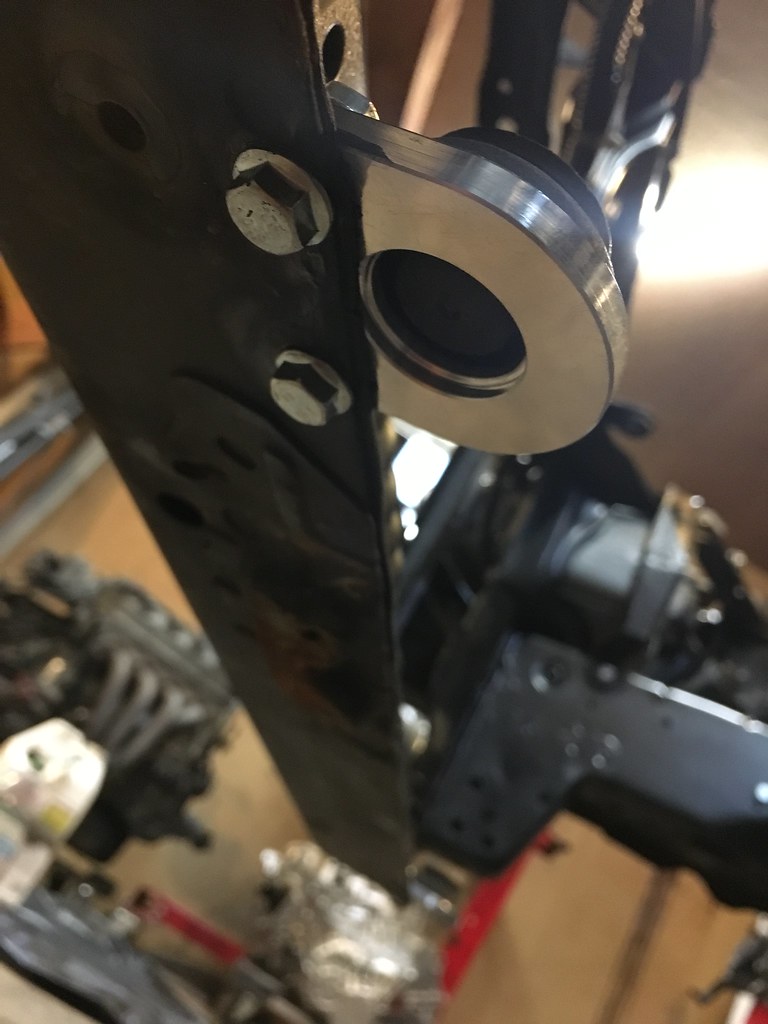
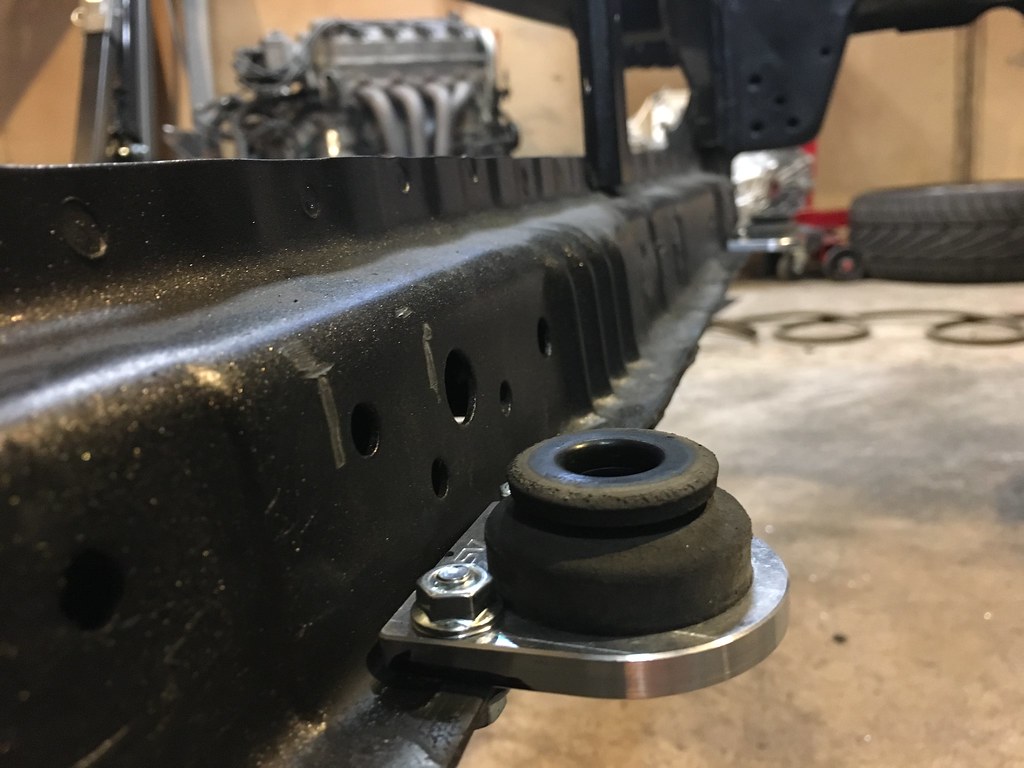
as i said i wasnt going to mess with relocating the oem radiator mounts so i grabbed these instead..
 IMG_5460 by evan mclaren, on Flickr
 IMG_5469 by evan mclaren, on Flickr
 IMG_5481 by evan mclaren, on Flickr
 IMG_5484 by evan mclaren, on Flickr
 IMG_5485 by evan mclaren, on Flickr
these things made the job a hundred times easier! the top rad stays use and existing hole in the upper support and look super clean. all you have to do for the bottom ones is drill four small holes and youre done. since i couldnt use the radiator for mockup i used the integra for measurements. hopefully i was spot on haha. the lowers are machined perfectly to hold the oem style bushings. the only drawback was that there was no hardware included when theyre webside states there would be. no big deal since i had a bag full of new m6 bolts and nuts. the mount itself is threaded but the bolts i used ended up being long enough to throw a nut on top for added security although im sure they arent even necessary. they felt really solid without them. the uppers i used the same bolt with a nylock nut uderneath. theyre bent to fit the shape of the rad support perfectly. i cant wait to see the radiator held in place by these i really like the way it all looks too bad the lower ones will be hidden.
 IMG_5482 by evan mclaren, on Flickr
 IMG_5403 by evan mclaren, on Flickr
 IMG_5451 by evan mclaren, on Flickr
as i said i wasnt going to mess with relocating the oem radiator mounts so i grabbed these instead..
 IMG_5460 by evan mclaren, on Flickr
 IMG_5469 by evan mclaren, on Flickr
 IMG_5481 by evan mclaren, on Flickr
 IMG_5484 by evan mclaren, on Flickr
 IMG_5485 by evan mclaren, on Flickr
these things made the job a hundred times easier! the top rad stays use and existing hole in the upper support and look super clean. all you have to do for the bottom ones is drill four small holes and youre done. since i couldnt use the radiator for mockup i used the integra for measurements. hopefully i was spot on haha. the lowers are machined perfectly to hold the oem style bushings. the only drawback was that there was no hardware included when theyre webside states there would be. no big deal since i had a bag full of new m6 bolts and nuts. the mount itself is threaded but the bolts i used ended up being long enough to throw a nut on top for added security although im sure they arent even necessary. they felt really solid without them. the uppers i used the same bolt with a nylock nut uderneath. theyre bent to fit the shape of the rad support perfectly. i cant wait to see the radiator held in place by these i really like the way it all looks too bad the lower ones will be hidden.
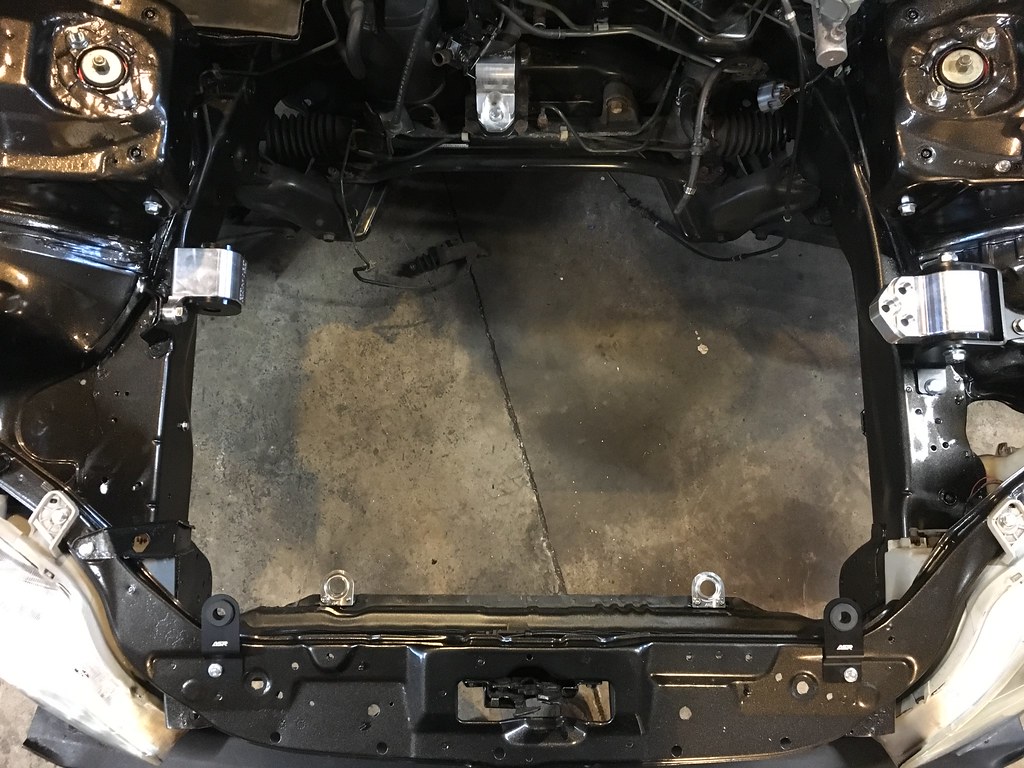 IMG_5482 by evan mclaren, on Flickr
Last edited:
once that was all taken care of, i turned my attention to the rear of the car...
 IMG_5346 by evan mclaren, on Flickr
 IMG_5340 by evan mclaren, on Flickr
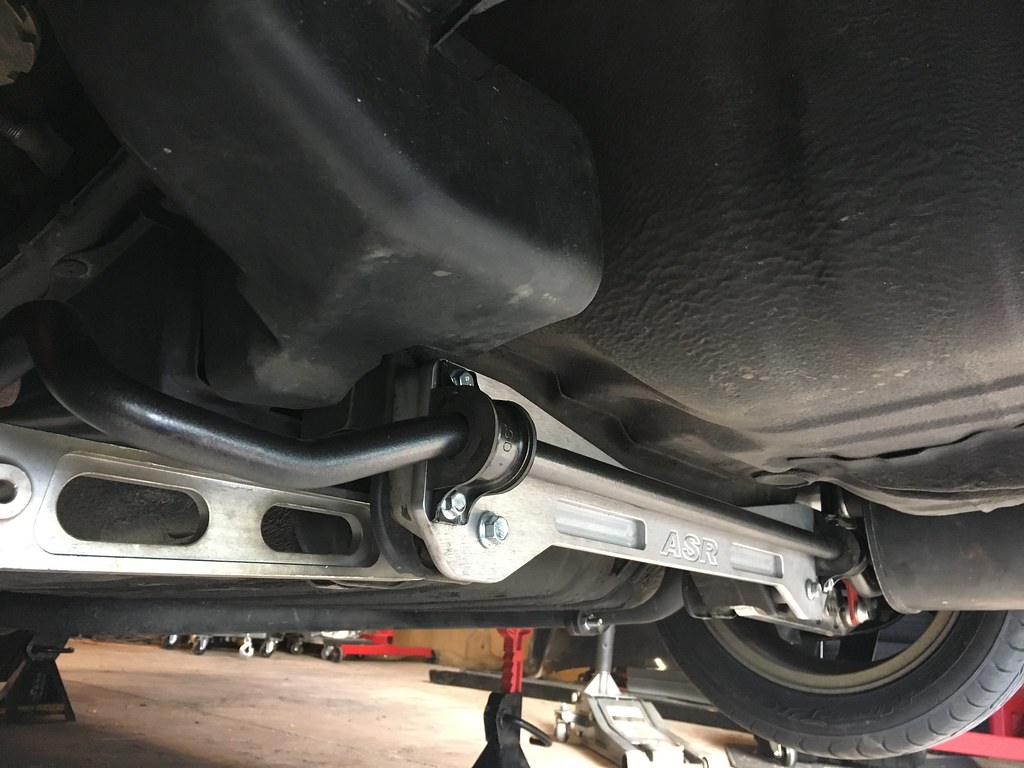
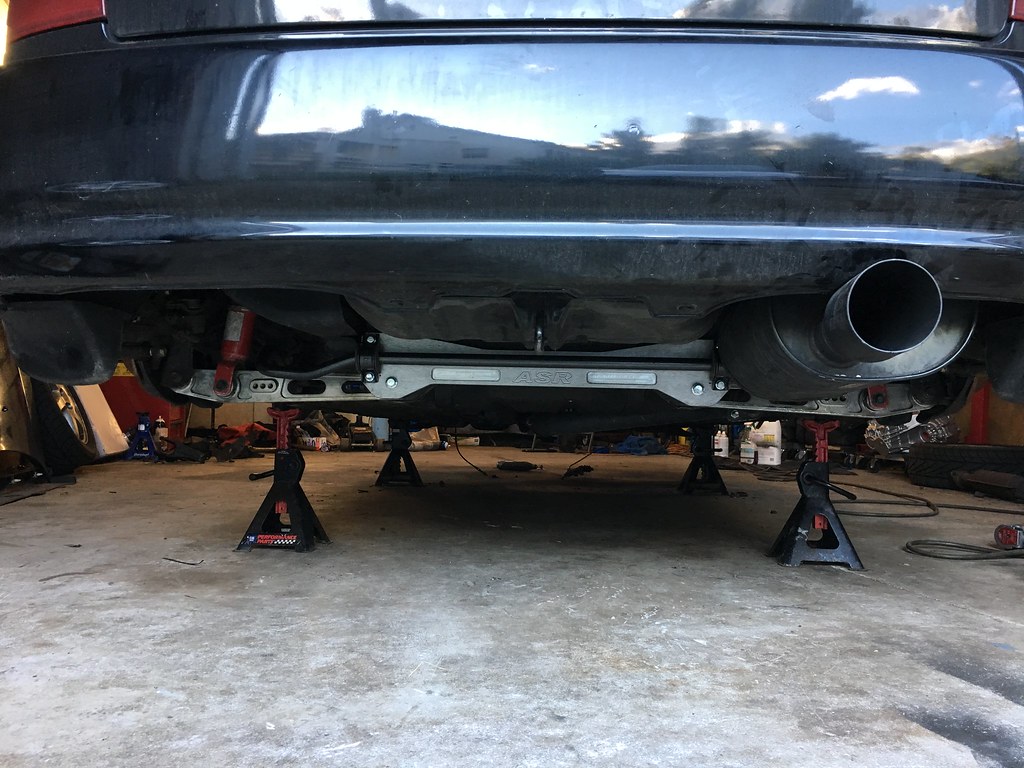
i was really wanting to grab a new tanabe touring medalion for this but my curiosity got the best of me. once the b series is out of my integra, the ws2 wouldnt be of any use to me so i couldve either tried to sell it or make it fit the hatch. i wasnt sure how much of a difference there was dimensionally between the two chassis so i dropped the ws2 off the teg and mocked it up on the hatch. laying on my back using my cell phone as a flashlight i measured between the hangers and found that it only needed 14cm taken from the axle back portion right before the muffler and everyting would line up. so thats what i did, took a slip over butt connector and clamped it up in the meantime untill i can drive it to the exhaust shop. the tip needs to be shortened and the muffler hangers extended slightly but other than that it fits damn near perfect. the location of the front flange that bolts to the cat even sits in the same spot as the itr midpipe that was on the hatch until now. not thinking before i cut it about whether or not it was gonna clear the sway bar brackets, i was like crap i hope i didnt just cut that for no reason haha. luckily with everything pulled to the rear of the car as much as possible it just barely clears by about a half an inch. thank god thats good enough for me! with that sorted i went ahead and painted the brackets and bar with the same rustoleum crap and slapped it all together.
 IMG_5413 by evan mclaren, on Flickr
 IMG_5478 by evan mclaren, on Flickr
 IMG_5502 by evan mclaren, on Flickr
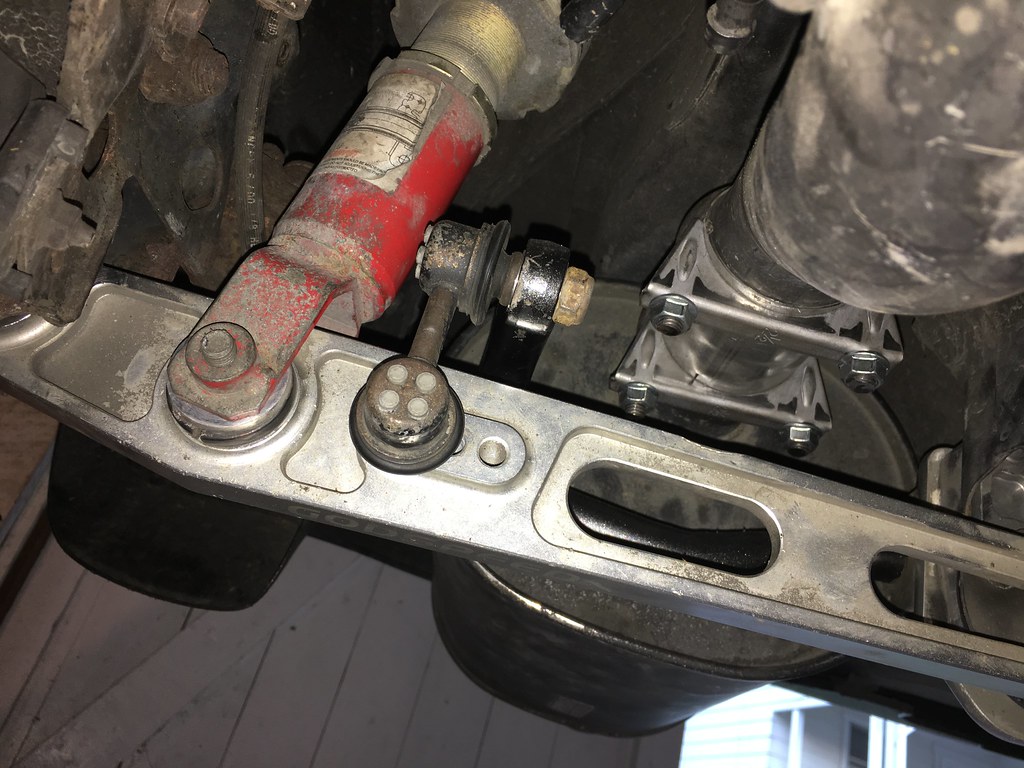
the oem endlinks were a little tricky to thread into the control arms but an allen key with a pair of vise grips clamped to the short end made it simple. i disconnnected them from the bar first and threaded them in by had as far as they would go and then slid the allen key in from the opposite side of the arm and turned them in that way. worked like a charm.
 IMG_5471 by evan mclaren, on Flickr
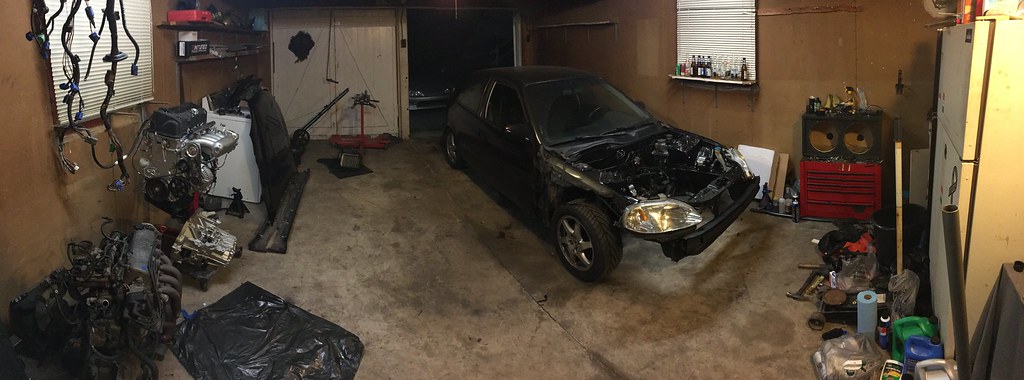
as of now shes back on her feet chilling waiting for the heart transplant. paid vacation is being taken in a couple weeks so ill be pulling the teg in next to the civic and tearing it down. the teg will stay on stands for the winter hopefully to be resurrected by next summer with an upgraded heart and ill have the revived hatch to rip around with in the meantime
 IMG_5488 by evan mclaren, on Flickr
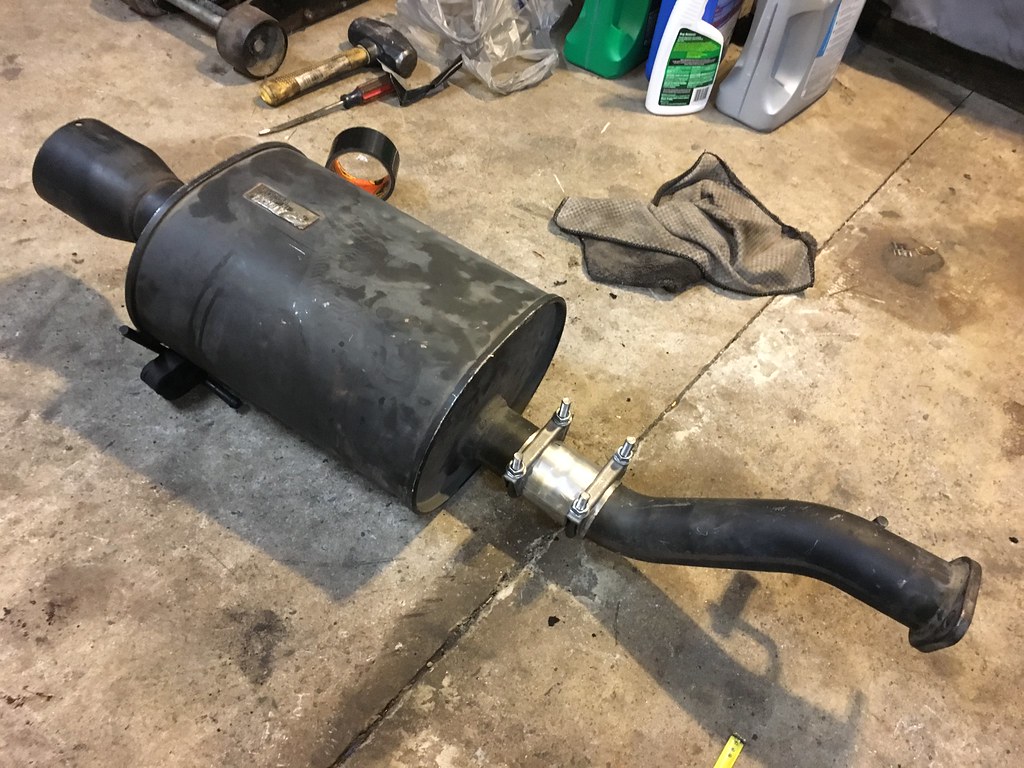 IMG_5346 by evan mclaren, on Flickr
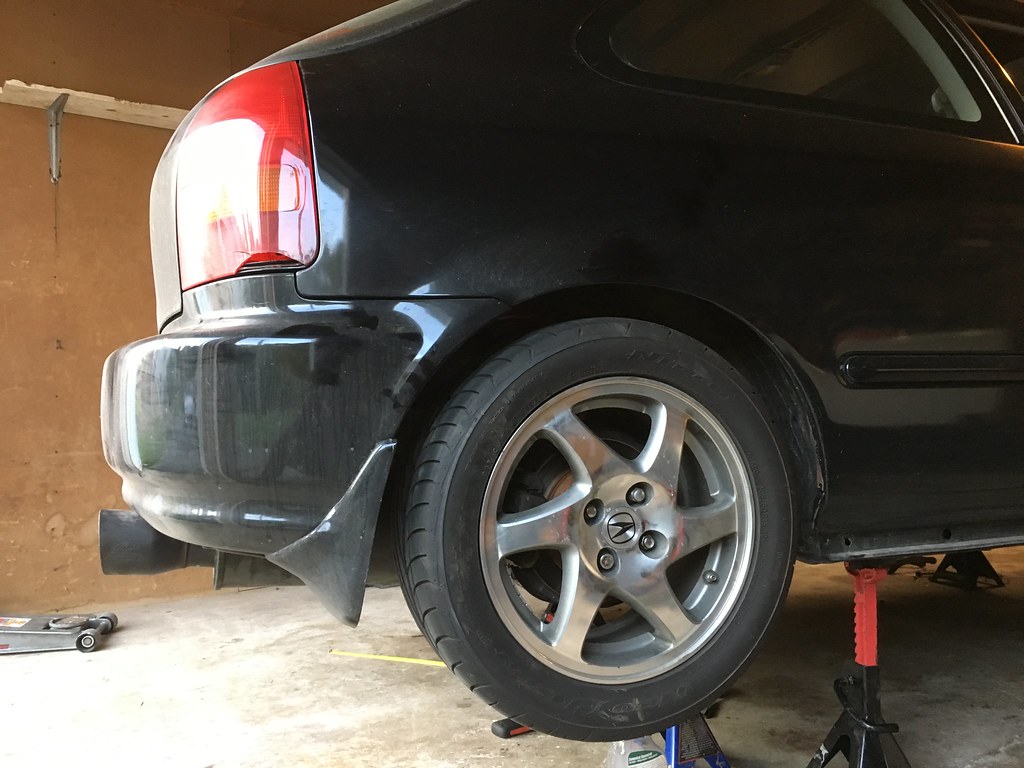 IMG_5340 by evan mclaren, on Flickr
i was really wanting to grab a new tanabe touring medalion for this but my curiosity got the best of me. once the b series is out of my integra, the ws2 wouldnt be of any use to me so i couldve either tried to sell it or make it fit the hatch. i wasnt sure how much of a difference there was dimensionally between the two chassis so i dropped the ws2 off the teg and mocked it up on the hatch. laying on my back using my cell phone as a flashlight i measured between the hangers and found that it only needed 14cm taken from the axle back portion right before the muffler and everyting would line up. so thats what i did, took a slip over butt connector and clamped it up in the meantime untill i can drive it to the exhaust shop. the tip needs to be shortened and the muffler hangers extended slightly but other than that it fits damn near perfect. the location of the front flange that bolts to the cat even sits in the same spot as the itr midpipe that was on the hatch until now. not thinking before i cut it about whether or not it was gonna clear the sway bar brackets, i was like crap i hope i didnt just cut that for no reason haha. luckily with everything pulled to the rear of the car as much as possible it just barely clears by about a half an inch. thank god thats good enough for me! with that sorted i went ahead and painted the brackets and bar with the same rustoleum crap and slapped it all together.
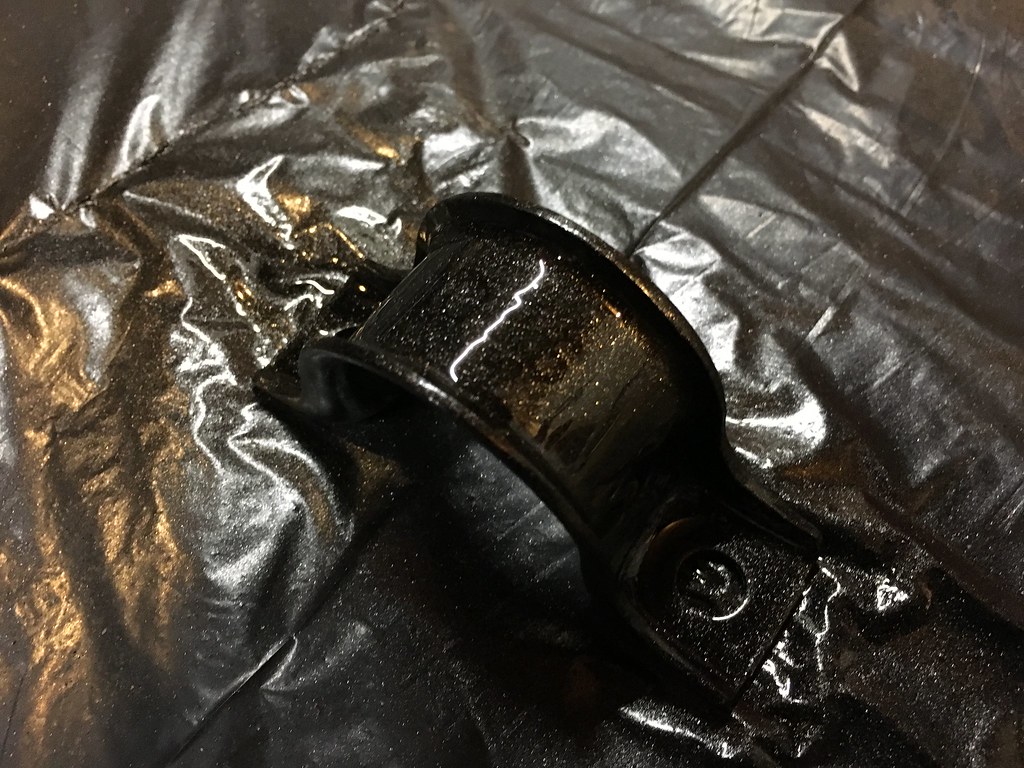 IMG_5413 by evan mclaren, on Flickr
 IMG_5478 by evan mclaren, on Flickr
 IMG_5502 by evan mclaren, on Flickr
the oem endlinks were a little tricky to thread into the control arms but an allen key with a pair of vise grips clamped to the short end made it simple. i disconnnected them from the bar first and threaded them in by had as far as they would go and then slid the allen key in from the opposite side of the arm and turned them in that way. worked like a charm.
 IMG_5471 by evan mclaren, on Flickr
as of now shes back on her feet chilling waiting for the heart transplant. paid vacation is being taken in a couple weeks so ill be pulling the teg in next to the civic and tearing it down. the teg will stay on stands for the winter hopefully to be resurrected by next summer with an upgraded heart and ill have the revived hatch to rip around with in the meantime
 IMG_5488 by evan mclaren, on Flickr
thank you kind sir! i was really afraid the paint was going to turn out like poop but its not too bad. i dont expect it to last forever cause the clear is really soft and scratches easily. ill have to be super careful putting this engine in hahaLol, "daily beater" ya right.
That looks great
Thank you for taking the time and that's a huge compliment coming from you. Your integra has gone through one hell of a journey and has been an inspiration for me for a long time. I'm over on TI as well but haven't had much progress to update in a whileso...
much...
work....
I just spent the past 45-60 mins going through the entire thread, wow, that's a lot of hard work there across many cars... glad to see things are the same over here as they are over on TI when it comes to dedication to cars
Sent from my iPhone using Tapatalk
